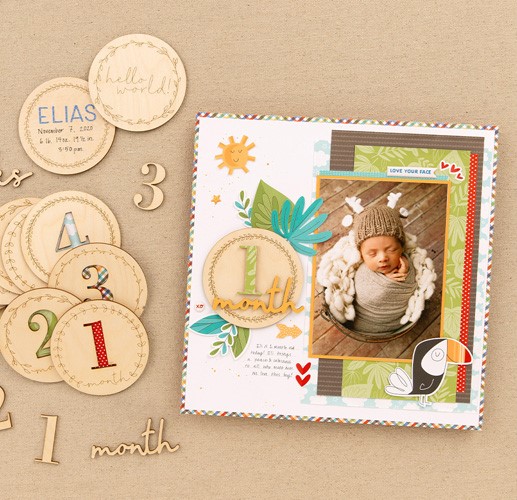
PRODUCT ANNOUNCEMENT! Celebrate the early milestones in a child’s life with the Hello World special, which features the Milestone Wood Circles!

PRODUCT ANNOUNCEMENT! Celebrate the early milestones in a child’s life with the Hello World special, which features the Milestone Wood Circles!
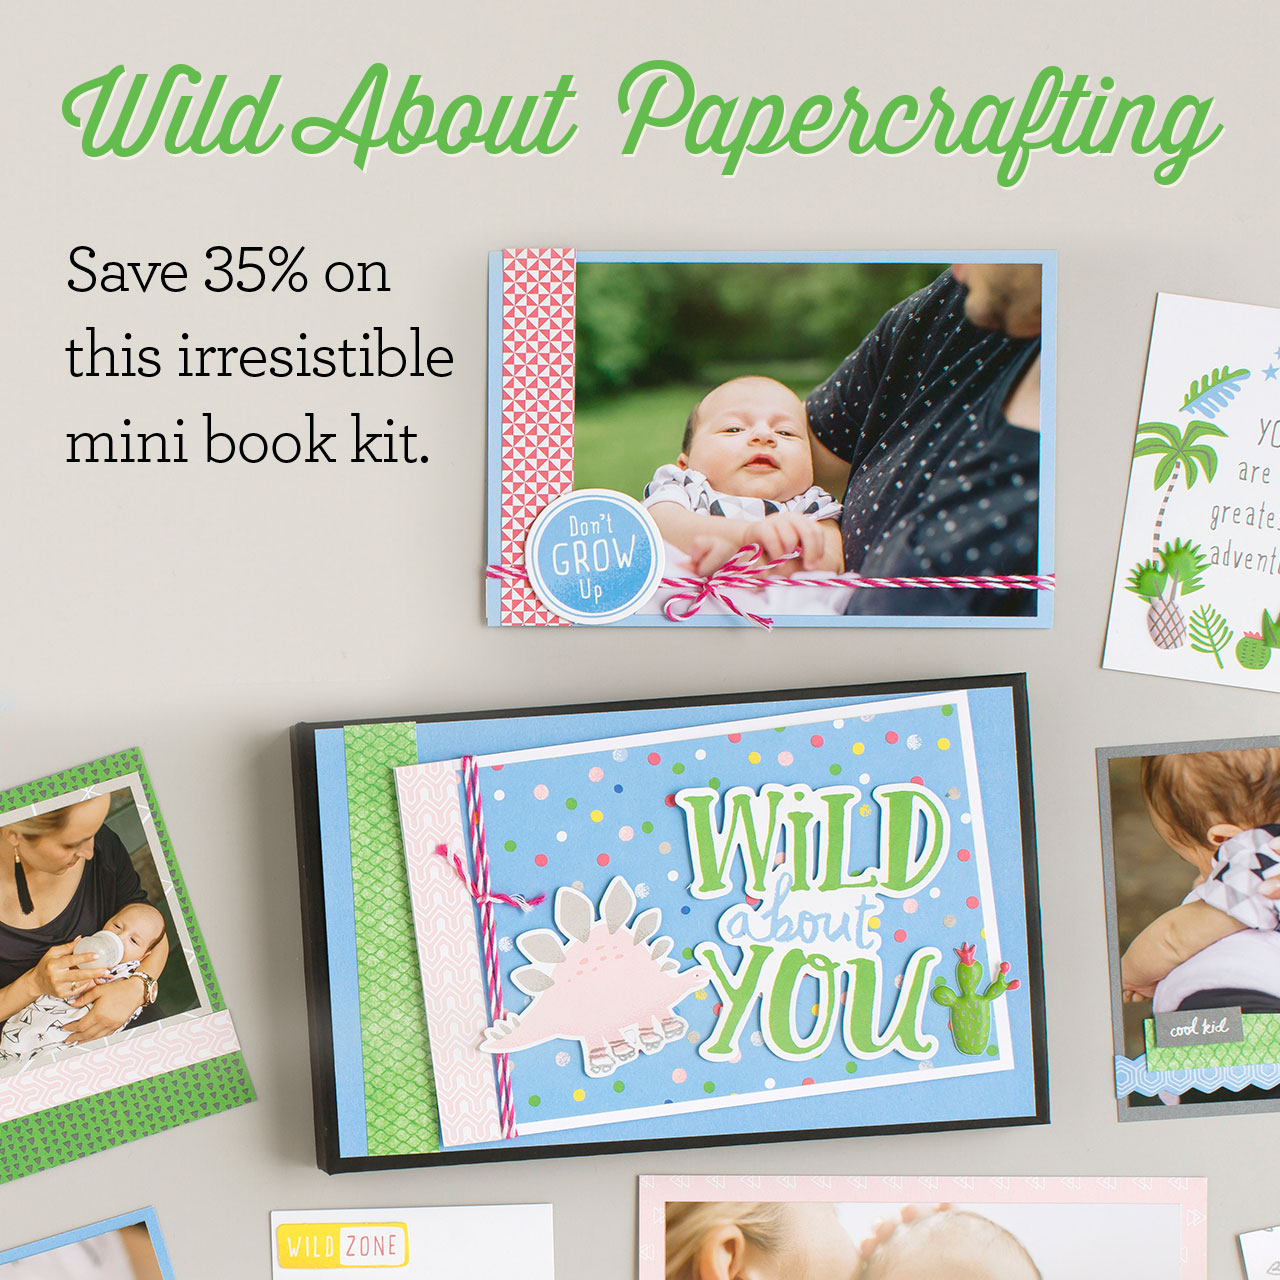

Celebrate 35 years of creativity with us this month with the irresistible Wild About You Mini Book Workshop Kit. This 20 page brag book has a fun dinosaur theme and is the perfect size to take to take with you to show off your favorite little people.
This guide includes step-by-step directions starting with cutting your paper and detailed assembly instructions for each page.
 |
| Front Cover |
 |
| Inside front cover |


When you buy the kit, you save save 35% on the papers and accessories you need to make this fun and easy project. Here’s what you get:

The kit includes the black mini book (with spiral bound memory protectors), 3 sheets cardstock (Carolina, Pewter and White Daisy), Something Fierce Picture My Life cards, Something Fierce Complements (stickers and chipboard pieces), Something Fierce Puffy Stickers and Raspberry Baker’s Twine.
Now you just need to choose the which special person, place or event to memorize in this fun book. What are you wild about?
Time to get creative!
Rebecca
Did you ever have great intentions to do something and even do 90% of the work, but then not get back to it? That’s what happened with the scrapbook I’m sharing with you today.

A few months ago, I created a 12 page scrapbook using a half pack of the Whimsy Fundamentalpapers and the Baby Girl Complements. I loved how these products go together! It was so much fun creating this album that I wanted to make another book using the other half of the paper pack and the Baby Boy Complements. I shelved my blog post about the pages I already made because I wanted to present the two books together.
However, in just a few days these products will all retire! Since I believe this is a great project (wouldn’t it make a great new mom gift?), I want to get this posted so now so you’ll have a chance to order the supplies before they are gone.
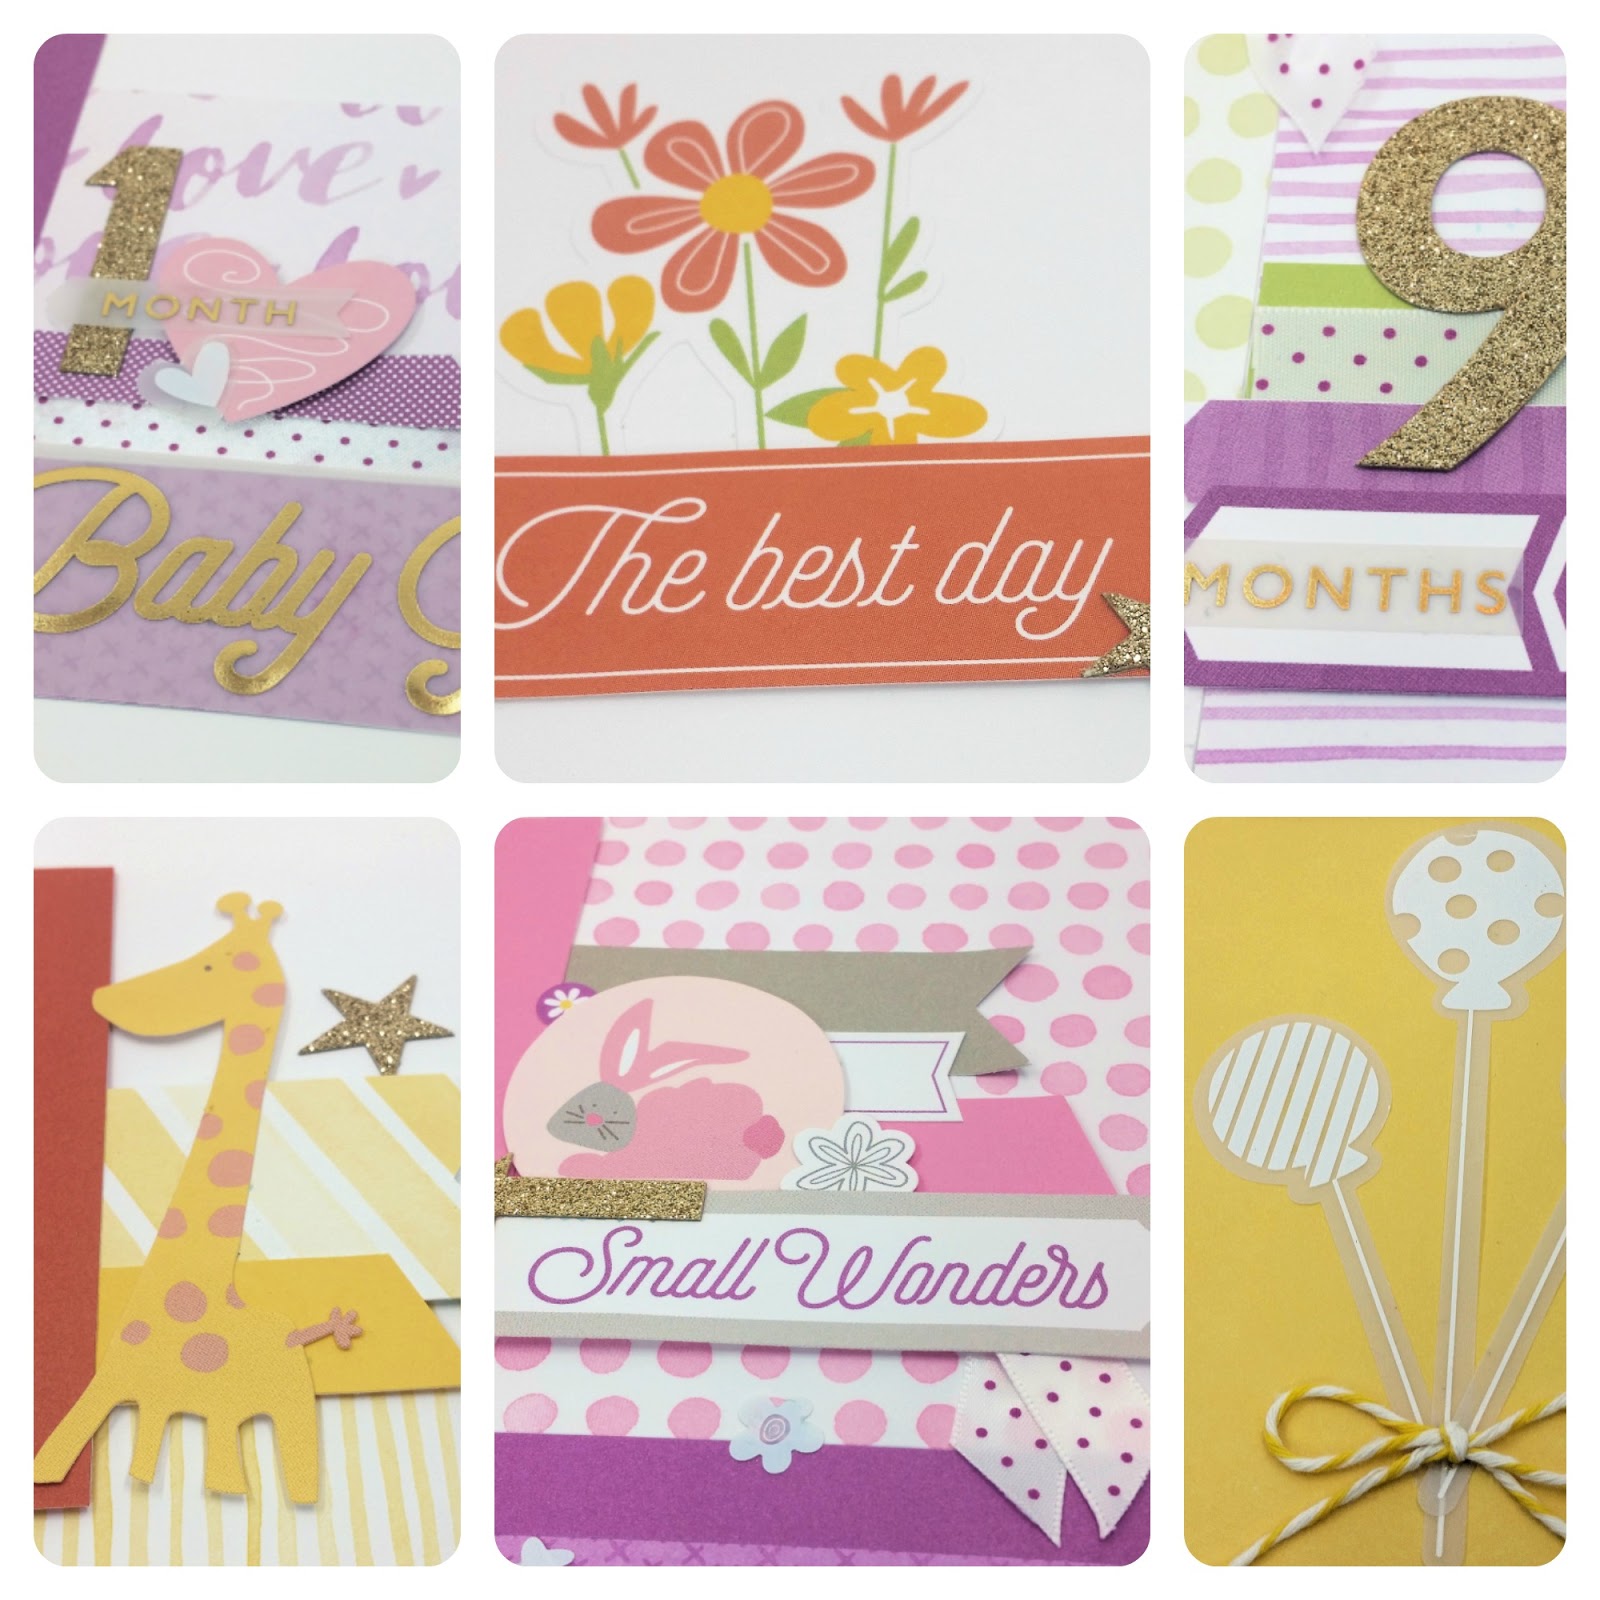
To make this album, I made use of the numbers 1 through 12 from the complements pack and made a page for each year of the baby’s life. So the first page has room for a photo of the newborn little girl.

I then created a layout for each of the following two months of the baby’s life. For each of these layouts, I choose a color combination that I thought went well together. I used a mix of solid and the patterned fundamental papers.

Once I had the basic pattern for the page laid out, I added coordinating ribbon, stickers and chipboard from the Complements pack. Of course, I also added the gold glittery number for the month.


The final page of the album is for month 12 or 1 year. For this page, I added some balloons to celebrate this special birthday.

If you have more pictures than the space allowed in this album, I have a couple solutions for you!
Extra Photo Idea #1 – Attach Flip Flaps to your Memory Protector on top of the photo wells. I love this visual created by Close To My Heart to show hwow Flip Flaps can triple the number of photos on your pages.

Learn more about using Flip Flaps in this poston the Close To My Heart blog.
Extra Photo Idea #2 – Add some pocket Memory Protectors between the pages. These come in several designs including the new Pocket Plus protectors which are narrower than the full size protectors and allow the outer edge of the layouts to show as you flip through the photo pages.

Click hereto see all the Memory Protector designs.
Ready to make one? First click on the link below to download the free cutting and assembly directions. Then review the materials list to make sure you order everything you need before these products retire on July 31. Use the links to go directly to the items on my Close To My Heart website.
DOWNLOAD FREE ALBUM DIRECTIONS
Materials
·
Z3255 Whimsy Fundamentals Paper Packet (UPDATE: Already sold out! However, I have a couple packs in my inventory.Email me to order.)
·
1385 White Daisy Cardstock (12 sheets for page
bases)
· X5769 Thistle Cardstock (1 sheet)
· X5639 Sweet Leaf Cardstock (1 sheet)
· X5772 CanaryCardstock (1 sheet)
· X5751 SorbetCardstock (1 sheet)
·
X5773 Pixie Cardstock (1 sheet)
·
X5763 Smoothie Cardstock (1 sheet)
·
X5930 Slate Cardstock (1 sheet)
In addition to the materials listed above, you will need a paper trimmer and detail scissors to complete this workshop. I’d also suggest the following adhesives: tape runner, glue dots, glue pen and 3D foam tape.
I still think these pages could easily be modified to make a Baby Boy album with the remaining papers from the Whimsy Fundamental paper pack. I’ll leave that as a challenge for you since my time is running out. Please contact me if you have any questions about this project.
Keep Creating,
Rebecca
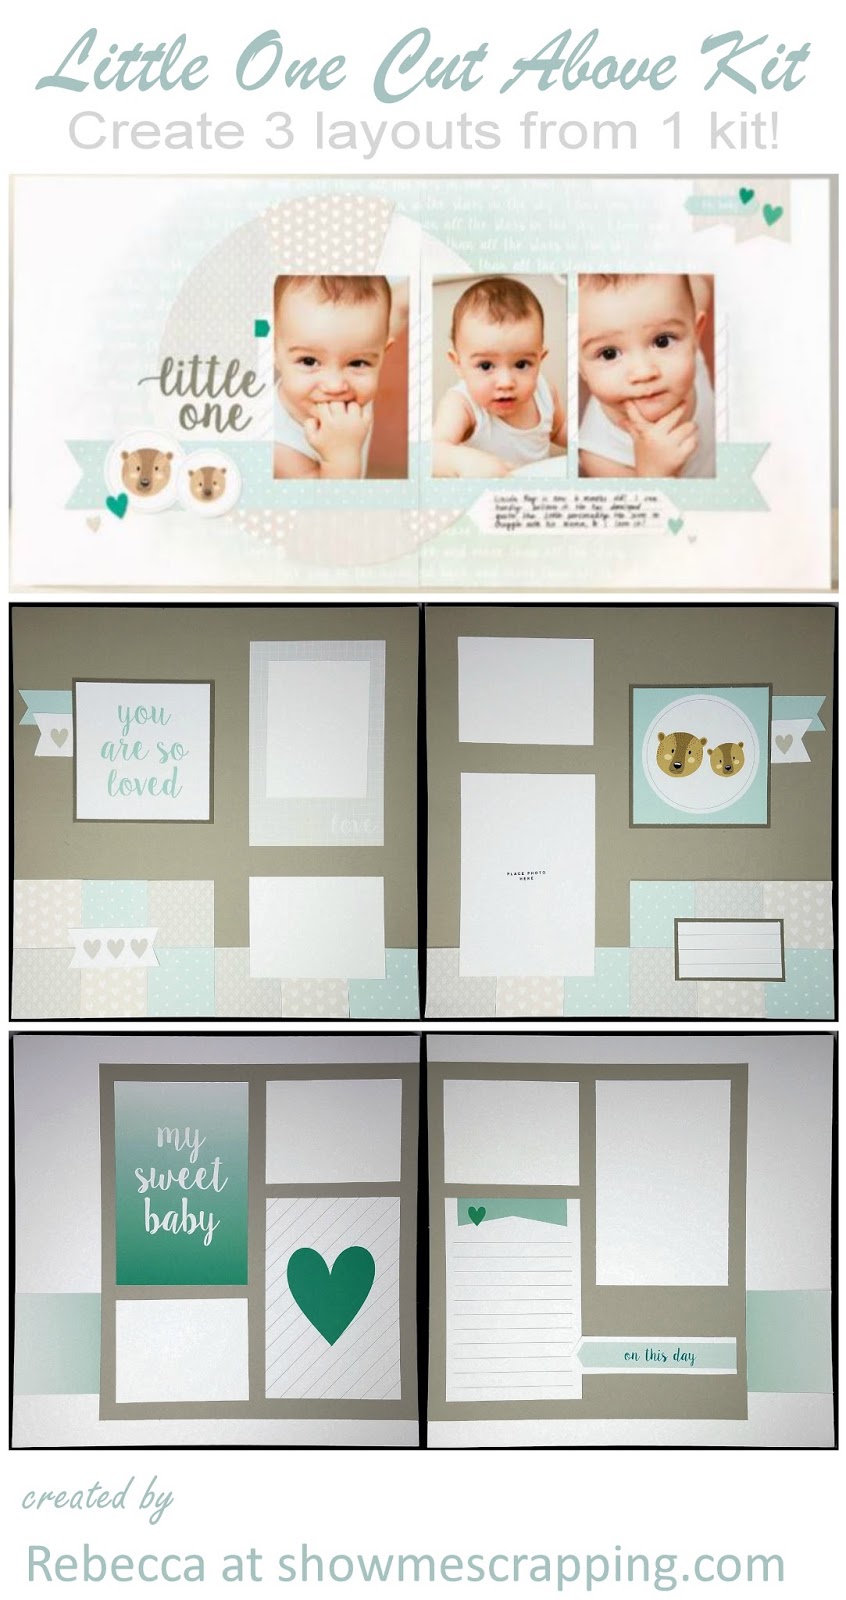
Earlier today, I posted the details of the Little One Cut Above kit as it was designed to be used. For those of you who prefer traditional scrapbooking, I’ve turned this kit into 3 two-page layouts by adding just a few sheets of cardstock.

You may recall that these kits include the materials needed to create one 2-page layout plus 12 cards (4″ x 6″) that you can put in the insert into pocket Memory Protectors along with your pictures. Although I love including pocket scrapbooking in my albums, I like to include my very favorite pictures on traditional pages. The cards include all the elements needed to create scrapbook pages: titles, embellishments (just trim them down) and journaling.

Using the pocket cards included in the kit, plus a few sheets of White, Slate and Whisper cardstock, I created two BONUS layouts!

This layout was created by trimming a number of the journaling cards. The basic design of the pages started with three patterned cards which were cut into 2″ x 2″ blocks and stacked them across the bottom of both pages. A sentiment card (“you are so loved”) was trimmed down to 4″ x 4″ for the title. Additional cards were trimmed to create the embellishments, jounnaling and a photo mat.

This layout also uses a pocket card for the title (“my sweet baby”). Two additional full sized cards are used in this layout. Additional cards were trimmed to create the arrow (“on this day”) and the ombre banners on each side.
If you have any questions about these layouts, I’d be glad to send you measurements and additional tips. Comment below or drop me anemail.
Don’t forget that the Little One Cut Above kit used for these layouts is half price during April — just $7.48! You’ll also want to check out the Forever & Always kit which is also on sale. Both of these kits retire at the end of the month (or sooner if supplies run out), so be sure to orders yours today!

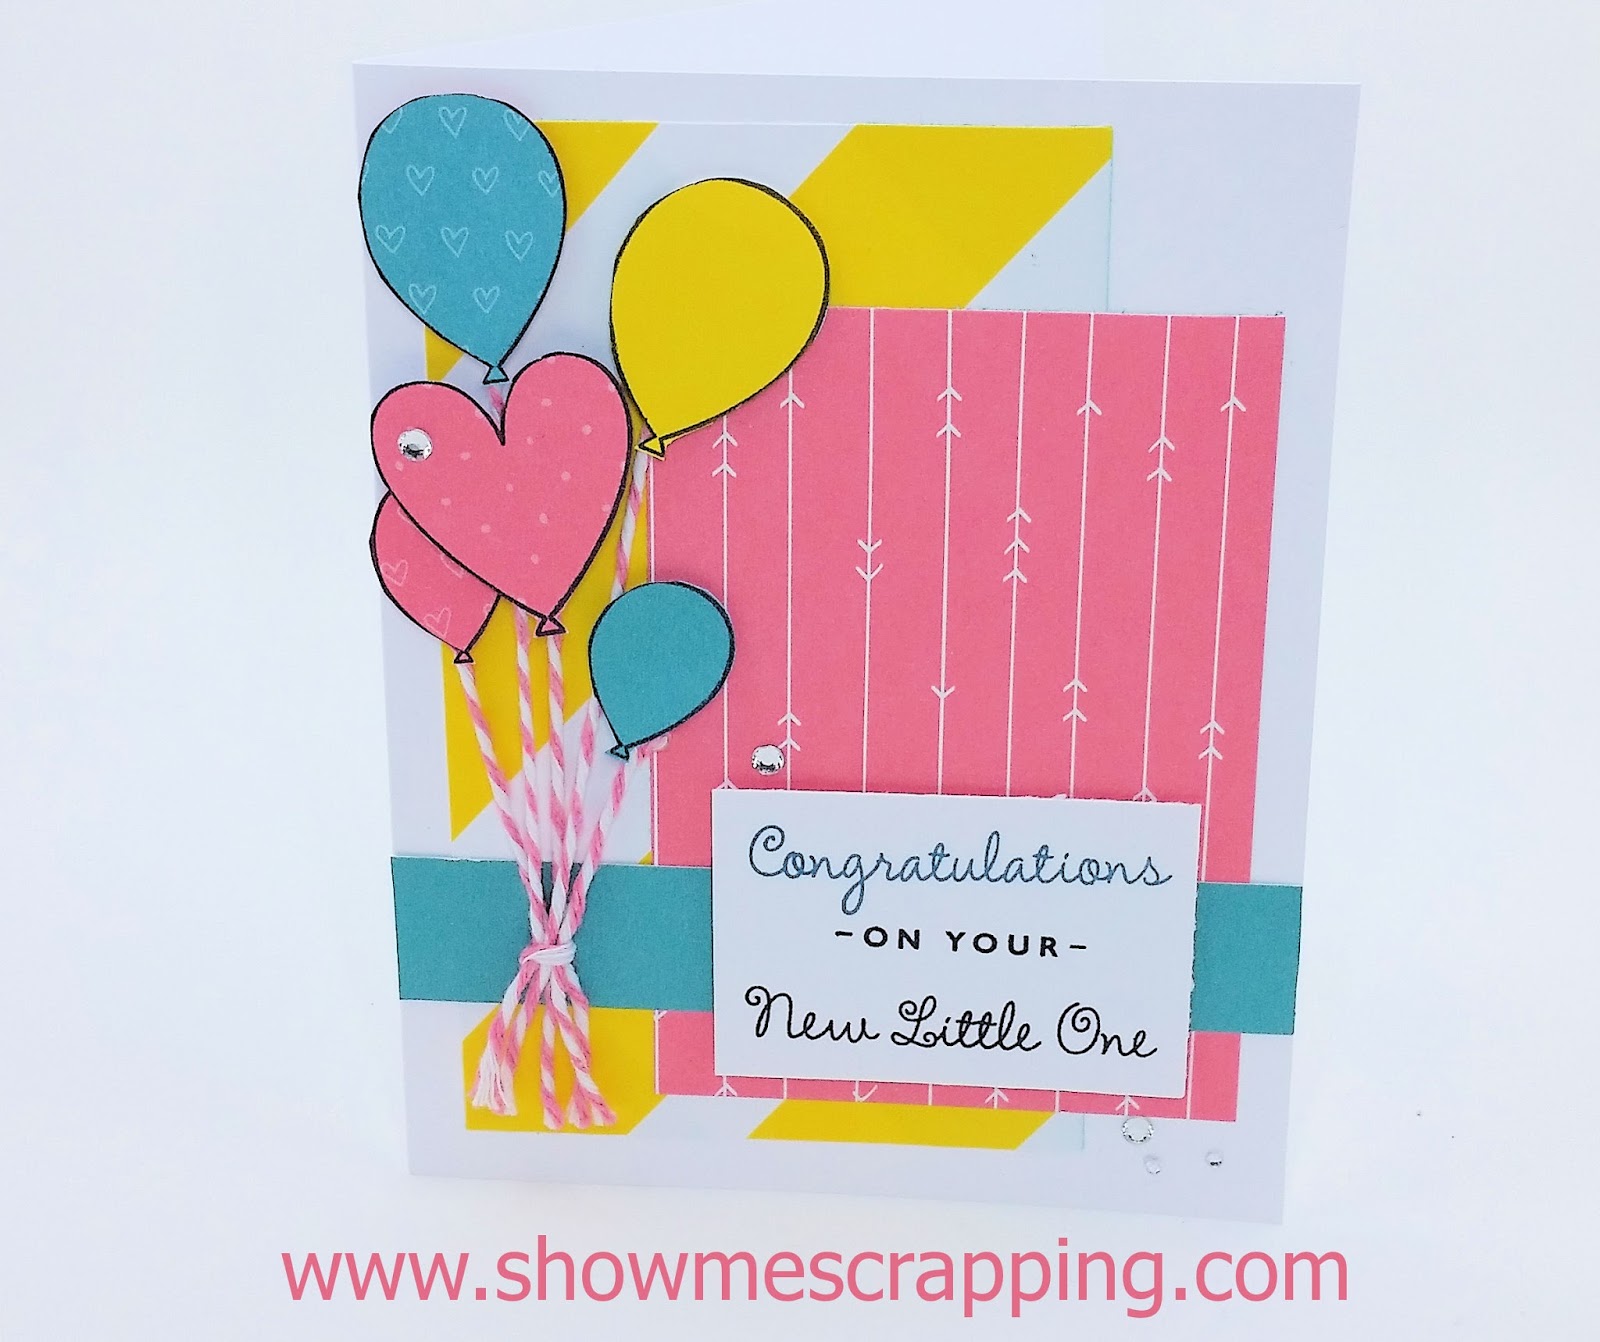
What is more exciting that welcoming a new little one into the family? I can’t think of anything and the bright colors from the Adventure Fundamentals papers and the cheerful balloons convey that excitement.

To make the card more dimensional, I cut out the balloons and popped them up with 3D foam tape. I used both regular and thin foam tape to create a variety in height.

The twine added to the 3D effect and helped ground the balloons on the card.

If you like this card, but need to cover another occasion? That’s ok! The stamp set I used,Happy For You (C1660) stamp sethas sentiments that cover lots of special days.

Guess what? This stamp set is also available in French & Spanish!
In fact 11 of our stamp sets now can be purchased in French and Spanish. As a mom of a girl taking her fourth year of French, I love these options. How fun!
Rebecca
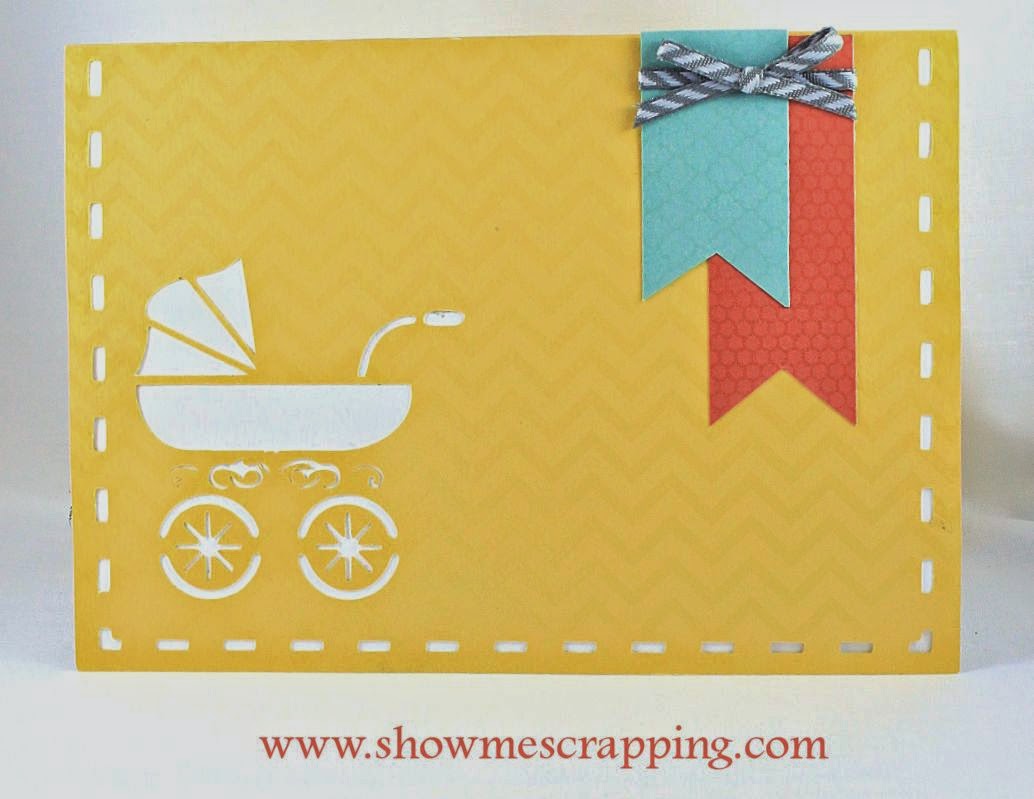
Here’s a card I’ve been meaning to share for awhile. Can you think of a cuter way to welcome a new baby than this card made using the Artfully Sent Cricut cartridge? If you have been a little intimidated by the pop up cards on this cartridge, relax! They really are easy to put together — the assembly booklet will help if you need a little help.
 |
| Outside of Baby Pop Up Card |
The outside of this card is oh so sweet with the baby carriage and faux stitching. But the inside is where it really pops. Literally! When you open the card, cute building blocks pop up spelling “Baby”.
 |
| Inside of Baby Pop Up Card |
2019 Update: Our retired Cricut image collections are now available to purchase using my special Cricut link! The Artfully Sent Cricut collection was first released by Close To My Heart in 2014 in a physical cartridge bundle. It retired a few years later without being offered as a digital-only collection. This made all of these great images unavailable to anyone who was unfortunate enough to miss out on this cartridge while it was available.
This fall (2019), Close To My Heart began a new partnership with Cricut which allows all of our image collections, including retired collections like Artfully Sent, to be purchased using special links only available from Close To My Heart consultants! This is an exciting development because many of you missed these collection the first time around.
Browse all Close To My Heart image collections>>
Note that the Artfully Sent images are also available in Cricut Access or can be purchased individually in Design Space for $1.99 for each project and $6.99 for the font. However, the best value is to purchase the full collection which includes all 700 individual images (projects plus font) for just $49.95. You can subscribe to Access or purchase the full collection on Cricut.com. (If you use the Cricut link in this post for your purchases, I’ll earn a small commission. Thank You!)
This card is found on page 23 of the handbook. The outer skin of the card is made with the “Pop-Up” function or F1 if you are using a Universal Mat. The inside is the same function with shift. All the cute baby close are found on the “Icon” function or F2.

To make a 5″ x 7″ card, set the size to 5″ as directed on the handbook page and everything will be cut to scale. If you are using an Explore machine, all of these pieces can be added to your project as one grouped image. Be sure to adjust the size before you ungroup. The correct size is 10″ tall (twice the height of the folded card) and 7″ wide.
The handy Assembly booklet that comes with the cartridge helps you see how the pieces go together.

The trickiest part is folding the liner in step 2 above. I found it easiest to fold the whole liner in half as if it was a flat card. Then reverse the center crease for the four sections with the letters so that the fold is sticking out. Then it will be easier to make the folds at the top and bottom of the blocks with the letters.

Here’s what the card looks like from the side once the folds are completed and the liner attached to the card base.

I cut the card base and the baby clothes from our Paper Fundamentals. This paper pulls double duty because the front and back of the paper are different. One side has a white geometric pattern and a shiny resist pattern is on the other. This allowed me to create two different looks for the clothing pieces cut from the same paper by simply turning one of them over.
The word Baby is cut from the inner liner of the card. I simply cut squares from the left over fndamental papers and attached them to the back of the blocks before connecting the liner to the skin of the card.
I hope this post helped take a little of the myster out of making a pop up card using the Artfully Sent cartridge. There are 50 pop up cards on the cartridge in total!

If you do not yet own the Artfully Sent cartridge, I’d love to help you get one in your hands. You can order it directly from my website — or contact me about setting up a party. You are already 2/3 of the way to earning free product!
Keep Creating!
Rebecca
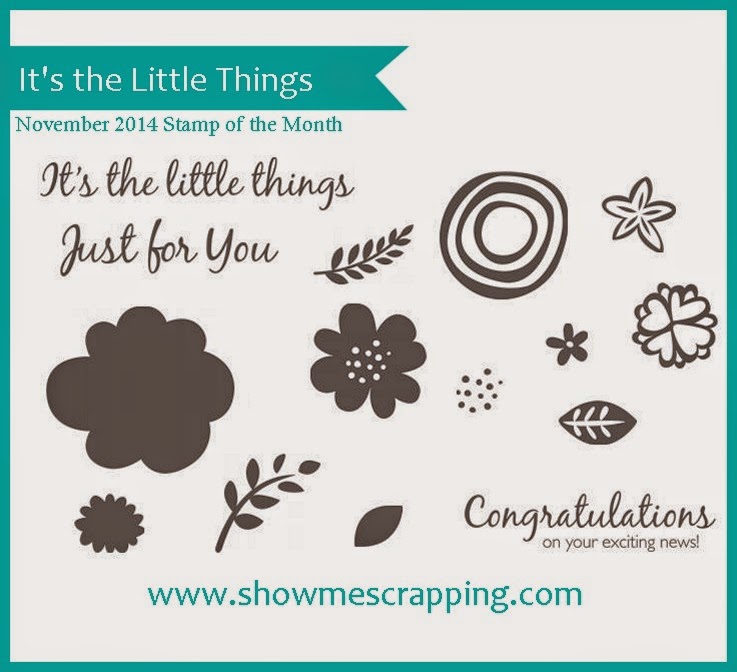
This new stamp set is loaded with flowers and sweet sentiments. The blooms can be stamped, colored and layered up to create dimensional artwork.
The November Stamp of the Month, “It’s the Little Things” includes all of these stamps:

This stamp set is only available through November 30. The full retail price is $17.95, but you can get yours for just $5; that’s over 70% savings. When you place an order of $50 or more in Close To My Heart products, you qualify for this special Stamp of the Month pricing.
Here are a few fun projects the creative folks at Close To My Heart dreamed up:


If you love the artwork in this picture, you are in luck. You can find supply lists and helpful hints on my Close To My Heart website –> LINK


When my sister sent me these precious pictures of her family and I thought the soft Skylark papers were the perfect way to say “Hello” to my new nephew, Moses. I finally had a chance to get the put the layout together and I’m quite happy with how it turned out. The layout pattern is “Classic Look” from Imagine by Jeanette Lynton.
This layout uses the same stamp set (Hello Blooms) as the card I posted a couple days ago. I love stamps that are versatile to work with both cards and layouts. You may notice that the flower and leaf cluster in the bottom right is a replica of the flower on the card.

For the layout, I cut out a couple more flowers and leaves, but picked a different flower shape to add variety. Also, I made centers for these flowers by stamping 1/2″ circles and attached them with foam tape.

I love the zipstrips and use them for ribbons, borders, banners or arrows. They are the most economical embellishment since they come with the paper and, of course, they always coordinate perfectly.


Here are close ups of the two pages in the layout.


Skylark – July Collection of the Month
All month, I’m posting pictures of projects made with Skylark, my collection of the month. When you order products from this collection and show them off, you are eligible to win a size M stamp set of your choice.

There are three steps to be entered into the drawing:
1. Place an order of $25 or more that includes a product from the Skylark collection* on my website (www.rebeccabrown.ctmh.com)
2. Create a project that includes something from at least one of the products listed above.
3. Post a picture of your completed project on Facebook or Instagram with the hashtag #showmeskylark.
Enter as many unique projects on separate posts as you want. One winner will be chosen randomly from all qualifying projects posted as of August 31.
Keep creating!
Rebecca

Today, I thought I’d show you the gift bag I made for the Babycakes mini-album from yesterday’s post.

I simply stamped it with a coordinating stamp from the Wild Wonder set, tied on a few strips of fabric and added tissue paper.
One quick trick is to put a pad of sticky notes wrapped in foam so there is a nice surface for stamping.

Although this not fancy at all, the matching gift bag added so much to the presentation of the gift.