Posted on

#30yearsofhappy – Day 29

This is our 29th day of the #30yearsofhappy challenge. I’ve been so inspired by the projects shared by Ellen and Julia. Have you joined the challenge? We invite you to link pictures of your projects at the bottom of this post.

The {best} Mini-Album


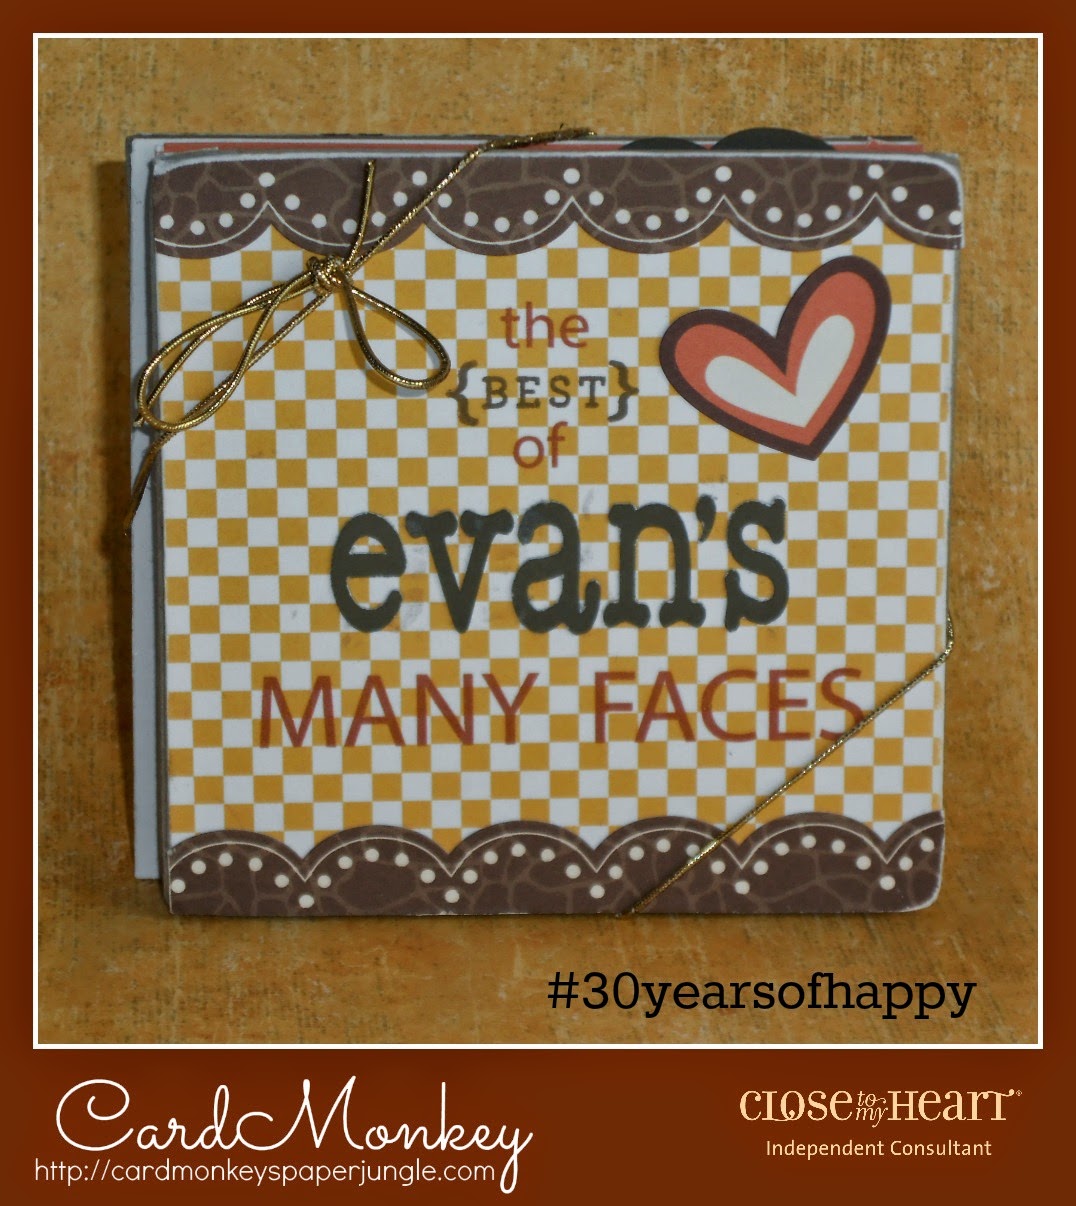
Ellen (www.cardmonkeyspaperjungle.com) saved her best for last with this accordian mini-album made with Flip Flaps. Do you recognize the chubby face of her grandson? You can bet that this book will have a special place in her purse and will be brought out to show often!

Check out Ellen’s blog post for additional pictures and to learn how she built this amazing album.

Ready to get your own #30yearsofhappy stamp set? Click this link to go my CTMH website. Pick our ANY of our stamp sets with total retail of $30 or more and you will be prompted to add this set for FREE!

I hope you will join us on this 30 day challenge. How many projects can you make with this set in September? Add your projects using the link invitation below.

Make some time for creating today!

Rebecca

An InLinkz Link-up

Posted on

Babycakes Gift Bag & Envelope

Today, I thought I’d show you the gift bag I made for the Babycakes mini-album from yesterday’s post. 

I simply stamped it with a coordinating stamp from the Wild Wonder set, tied on a few strips of fabric and added tissue paper.

One quick trick is to put a pad of sticky notes wrapped in foam so there is a nice surface for stamping. 

Although this not fancy at all, the matching gift bag added so much to the presentation of the gift.

Posted on

Babycakes Mini Album Kit

I have a brand new kit in my Show Me Scrapping store! I am so excited about this project for three reasons: 1) It is super easy (thanks to the Cricut), 2) It is super cute and 3) It is super affordable!

This cute mini-album makes a perfect gift for a new Mom or Grandma. They will enjoy adding pictures to document their precious bundle of joy.

In this kit you will get all this for just $15:

  • Set of 6 chipboard pages
  • 12 pieces of pre-cut cardstock to cover the pages
  • Lots of coordinating die-cuts
  • Badge button for the cover
  • Rings
  • Fabric strips to tie on the rings

The only thing you need to complete it is adhesives and a little time. The pages are approximately 4″ square and the finished album is just under an inch thick.

  (The kit comes with one each of “Baby Boy” and “Baby Girl” die-cuts)

Order a kit >>>

Interested in making a similar kit but with a different theme? You can!

The set of six chipboard pages are available on my website (Z1791) or as part of the Artiste Cricut Collection. Cut your selected paper to fit the pages exactly using the “Family” key on the Artiste cartridge (p. 60 of the handbook). Cut two of each page to cover both sides. 

From there it is up to you. Add die cuts, stamping, stickers or what ever your heart desires to dress up your mini-album.

What a fun way to document the moments of your life!

Keep Creating,

Rebecca

Posted on

Simple Babycakes Card

I have thoroughly enjoyed my Christmas and New Years break. Although I took a break from blogging, I’ve actually done a lot of crafting and have a stock pile of projects to share with you.

Tonight, I thought I’d just share a quick and simple baby congratulations card using the Babycakes paper and the Wild Wonder (C1558) stamp set.

This card really is simple — I used just three rectangle of paper and a piece of a zipstrip. The giraffe was super easy since it is a shape on the Artboooking Cricut cartridge. I finished the card off with badge button from the Babycakes assortment and a grey twist tie. The ticket was cut on the Cricut using Art Philosophy.

Hope you enjoyed this simple card. I’ll be back soon with more quick and easy projects — I promise. 

In the meantime, keep creating!

Rebecca