Posted on

Find your Perfect Match – 3 Valentine’s Day Projects in 1

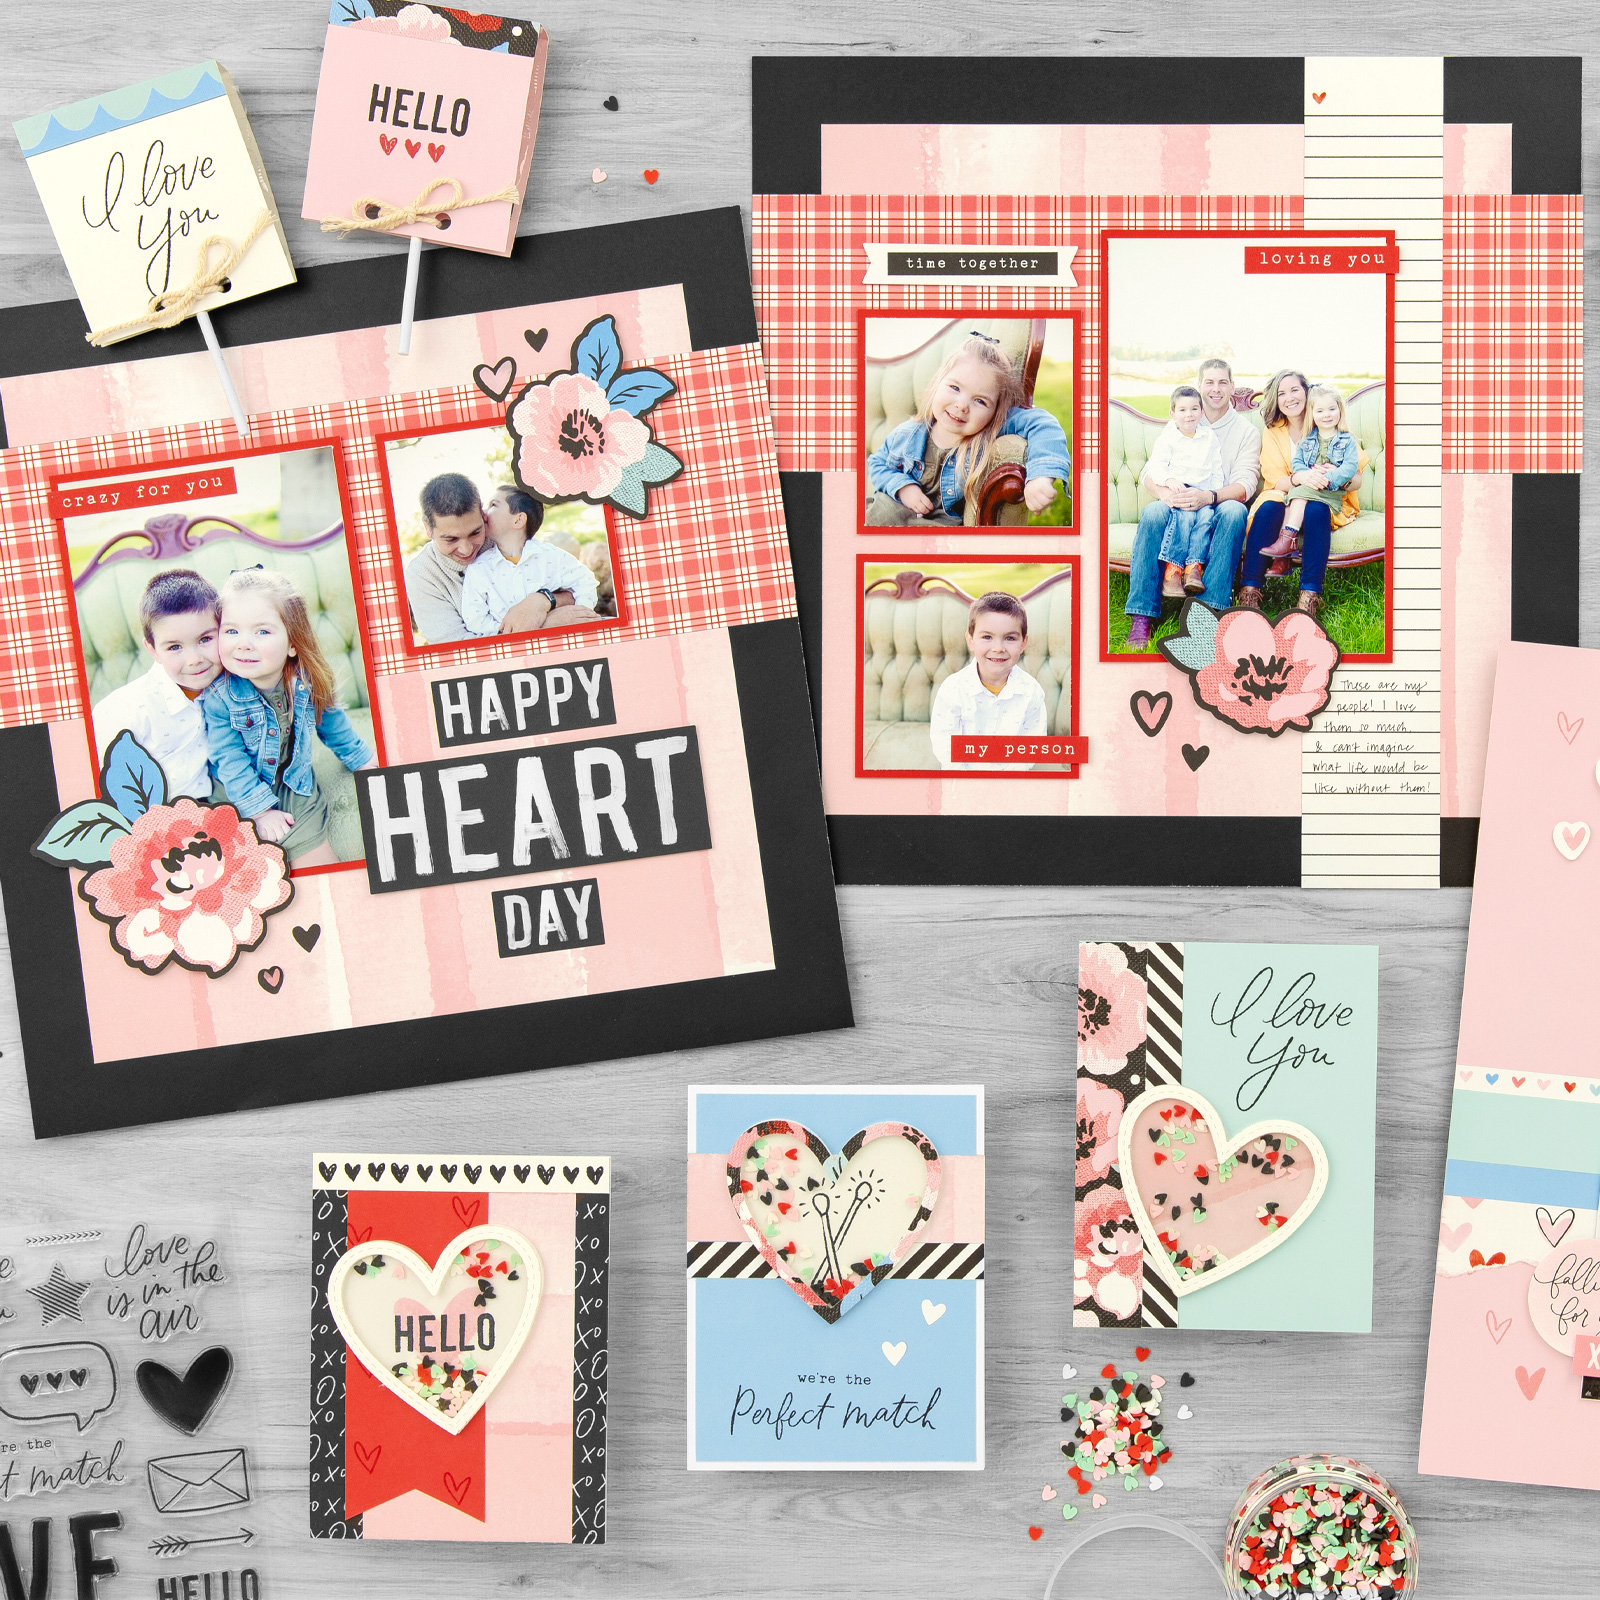
Celebrate the love in your life with the adorable Perfect Match collection! Valentine’s Day meets its papercrafting match with this adorable collection of products. This exclusive suite has everything you need to create stunning Valentine’s Day cards, scrapbook layouts, and more!

Continue reading Find your Perfect Match – 3 Valentine’s Day Projects in 1
Posted on

#30yearsofhappy – Day 30

We made it!! It’s day 30 of our of our #30yearsofhappy challenge. Did you miss any of the projects? You can view them all by clicking on this link. If you want to see even more projects made with this stamp set, you can visit my #30yearsofhappy Pinterest board by clicking on this link.

Don’t forget today is also the last day to get your set of these stamps! Scroll down to see how to place a qualifying order to get yours free.

You Are My Number 1 Treat Tube

You can never have too many ideas for giving treats to people you care about. This treat tube was decorated by Julia at www.createteachrepeat.blogspot.com. Such a sweet gift and a lovely way to end this month long challenge. Click on this LINK to Julia’s blog post for more information about this project.

Be sure to check back tomorrow to see the next project in our #30yearsofhappy challenge.

Hurry! Today is the last day to get your own #30yearsofhappy stamp set? Click this link to go my CTMH website. Pick our ANY of our stamp sets with total retail of $30 or more and you will be prompted to add this set for FREE!

I hope you will join us on this 30 day challenge. How many projects can you make with this set in September? Add your projects using the link invitation below.

Make some time for creating today!

Rebecca

An InLinkz Link-up

Posted on

#30yearsofhappy – Day 25

It’s a new day and that means a new #30yearsofhappy project! I hope you’ve enjoyed our other projects. Big thanks to Ellen and Julia who have shared their original artwork. If you missed any of these projects,click HERE to see them all.

Are you up for a challenge? You are invited to join us! Scroll to the bottom of this post for an invitation to post a link to your project using the #30yearsofhappy stamp set.

Picture Perfect Magnet

I cut this “poloroid” style frame using the Artbooking Cricut cartridge. It is on page 41 of the handbook. I used my picture to determine how big to cut it.

To assemble the magnet, I cut a square of chipboard just a little smaller than the picture frame. I attached the picture to the chipboard, then the frame on top.

I stamped the Picture Perfect stamp on a piece of scrap paper and trimmed it. I attached it to the frame with a little foam tape to add a little dimension.

My supply list: White cardstock, 3D foam tape and Artbooking Cricut Cartridge.

Be sure to check back tomorrow, when Ellen at www.cardmonkeysjungle.com will share another project made using this fun stamp set.

Want to get your hands on one of this sets? Here’s how: Go to my CTMH website and pick out several stamp sets you love with total retail of $30 or more. This will be easy because there are so many great new sets to pick from! When you view your shopping cart, you will be prompted to add #30yearsofhappy for FREE!

In the meantime, keep creating!

Rebecca

An InLinkz Link-up

Posted on

#30yearsofhappy – Day 22

Today, I bring you the 22nd project in our #30yearsofhappy challenge. Each day this month, I’ve shown you a project using one of the stamps on the #30yearsofhappy stamp set. My friends Ellen and Julia worked with me to bring you a project with each of the stamps.

Click HERE if you missed any of our earlier projects. 

This special stamp set, #30yearsofhappy, was designed to celebrate our founder and CEO Jeanette Lynton’s 30th anniversary in the scrapbooking and stamping industry. To get this stamp set free, simply place an order on my Close To My Heart website which includes $30 in current retail-priced stamps.

Are you up for a challenge? You are invited to join us! Scroll to the bottom of this post for an invitation to post a link to your project using the #30yearsofhappy stamp set.

For You Nugget Purse


This cute little bag holds a sweet surprise: a Dark Chocolate Nugget with Almonds. Putting together the purse gave me a chance to try out the new score board. It passed! One trick I’d pass on is that if you are making single score marks to use the score groove on the edge. Make sure score line is lined up with the grove on the top and bottom edge.

Once all of the score lines have been made, wrap the sizes around and clip them together with the Nugget inside.

 Then bring the front and back up. I fastened them together at the top with a glue dot.

My supply list: Chalk It Up paper, Teal shimmer trim, Neutral Metalic Baker’s Twine and Artiste Cricut Cartridge.

Be sure to check back tomorrow, when Ellen at www.cardmonkeysjungle.com will share another project made using this fun stamp set.

Want to get your hands on one of this sets? Here’s how: Go to my CTMH website and pick out several stamp sets you love with total retail of $30 or more. This will be easy because there are so many great new sets to pick from! When you view your shopping cart, you will be prompted to add #30yearsofhappy for FREE!

In the meantime, keep creating!

Rebecca

An InLinkz Link-up

Posted on

#30yearsofhappy – Day 18

It is already day 18 of the #30yearsofhappy challenge. Want to see more ideas for this stamp set? Search on #30yearsofhappy on Facebook or Instagram. Close To My Heart has been publishing one project each day, plus other consultants and customers have also been using that hashtag on their project pictures.

Be Happy Cookie Wrapper


Julia at www.createteachrepeat.blogspot.com has once again give us a beautiful idea for wrapping a sweet gift. She used the “Be Happy” Banner stamp on both the box and the tag. How could you not feel happy if someone presents you with a cookie all wrapped up so lovely.

Follow this LINK to Julia’s blog post to learn more about how she made this project.

Be sure to check back tomorrow to see the next project in our #30yearsofhappy challenge.

Ready to get your own #30yearsofhappy stamp set? Click this link to go my CTMH website. Pick our ANY of our stamp sets with total retail of $30 or more and you will be prompted to add this set for FREE!

I hope you will join us on this 30 day challenge. How many projects can you make with this set in September? Add your projects using the link invitation below.

Make some time for creating today!

Rebecca

An InLinkz Link-up

Posted on

#30yearsofhappy – Day 10

September is National Stamping Month and Close To My Heart is celebrating all month long by giving away a fun stamp set with qualifying orders!  This special stamp set, #30yearsofhappy, was designed to celebrate our founder and CEO Jeanette Lynton’s 30th anniversary in the scrapbooking and stamping industry. To get this stamp set free, simply place an order on my Close To My Heart website which includes $30 in current retail-priced stamps.

This stamp set features 30 mini images and sentiments. Since there are 30 days in September, my friends and I thought it would be fun to present a project on our blogs using one of these stamps each day this month. Follow along as Ellen, Julia and I stamp our way through the month!

Are you up for a challenge? You are invited to join us! Scroll to the bottom of this post for an invitation to post a link to your project using the #30yearsofhappy stamp set.

Yum Cookie Bag

Today’s #30daysofhappy project uses the “Yum” stamp. This project is so simple because the bag already had the lovely geometric pattern.

I just wrapped a strip of cardstock and ribbon around the Designer Creations bag. I cut the white spiked circle using the Art Philosophy cartridge. Then stamped on canery cardstock and trimmed by hand. I added the circles to the project using glue dots.

My supply list: Designer Creations Slate Paper Bag, Canery cardstock, Slate Diagonal Striped Ribbon and Art Philosophy Cricut Cartridge. (And cookie!)

Be sure to check back tomorrow, when Ellen at www.cardmonkeysjungle.com will share another project made using this fun stamp set.

Want to get your hands on one of this sets? Here’s how: Go to my CTMH website and pick out several stamp sets you love with total retail of $30 or more. This will be easy because there are so many great new sets to pick from! When you view your shopping cart, you will be prompted to add #30yearsofhappy for FREE!

In the meantime, keep creating!

Rebecca

An InLinkz Link-up

Posted on

Flavored Water & Snack Gift Idea

Need a quick and easy gift idea? I love making a drink mix and snack holder by cutting “door hanger with box” on the Cricut. Just assemble the box, loop it over the lid of a favorite drink and fill with yummies.

The door hanger is from the Art Philosophy Cartridge. It’s on page 25 of the handbook using the shift key and layer function (bottom right hand corner of page).

The hanger is cut with a notch on one side. When I added the treats to the box, it didn’t want to stay on the bottle. So covered it with some washi tape and the hole was still large enough to slip over the water bottle lid. You can see this better in this side-view picture.

This “door hanger” can be used on other beverage bottles like soda or wine. In fact it would work on anything that is in a bottle — I just heard yesterday that Olive Oil collections are the new rage. How about buying a bottle of fancy oil for a friend. Put some seasonings, a special recipe or a gift card in the box. 

Until next time, keep creating!

Rebecca

Posted on

Babycakes Gift Bag & Envelope

Today, I thought I’d show you the gift bag I made for the Babycakes mini-album from yesterday’s post. 

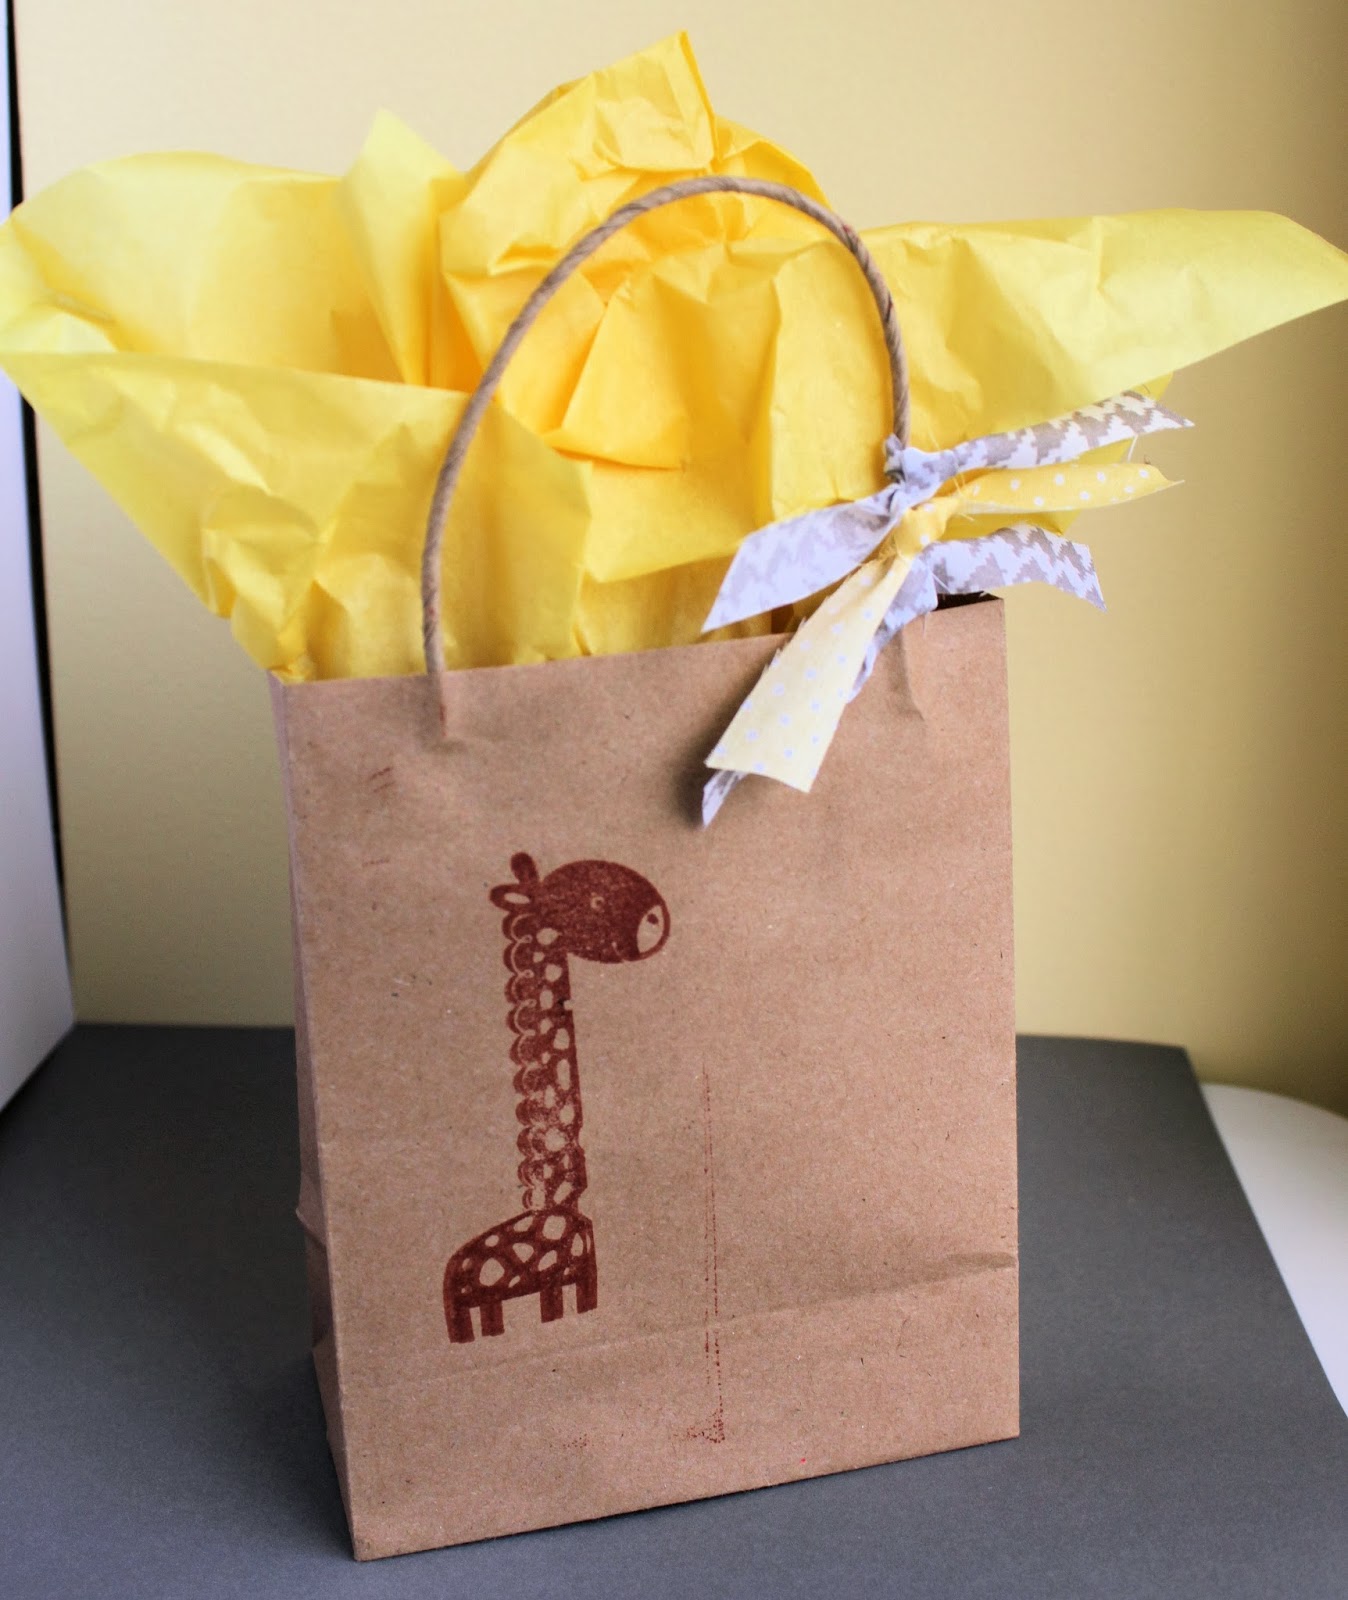
I simply stamped it with a coordinating stamp from the Wild Wonder set, tied on a few strips of fabric and added tissue paper.

One quick trick is to put a pad of sticky notes wrapped in foam so there is a nice surface for stamping. 

Although this not fancy at all, the matching gift bag added so much to the presentation of the gift.

Posted on 4 Comments

Illuminate Blog Hop

Welcome to our November Stamp of the Month Blog Hop! This month Close To My Heart is offering a stamp set called “Illuminate” throughout the month of November. This versatile set can be purchased exclusively through a Close To My Heart Independent Consultant for $17.95 or for only $5 with a qualifying purchase of $50.

In this hop, you will see projects featuring this exclusive and inspirational stamp set by many talented crafty ladies! Enjoy our blog hop.

If you have just hopped onto my blog, please start at the beginning at Lucy’s blog – Love2Create. If you came from Love2Create then you are in the right place!

My project is this hand-stamped candle. I absolutely love all the lamps and lanterns on this stamp set and I am planning to use them in other projects. But for this project, I decided to start with a source of light (my candle) instead of stamping one and just stamp the lovely sentiment.

Stamping on a candle has be on my crafty bucket list for awhile and I found that it was not as hard as I had feared. Thanks to a couple great tutorials (Melissa Rikerand Julie Staab), I was able to complete this project in about an hour.

The first thing you need (obviously) is a candle. You will also need tissue paper, wax paper, a craft heater, stamps and ink pad.

Ideally, your tissue paper will match your candle, but I did not have any that matched the soft yellow of this candle. So I made my own by inking a piece of white tissue paper with Buttercup ink. I started out sponging, but that was too slow so I got inky and just pressed the tissue into the ink pad. Then let it dry for a few minutes.

Although this tutorial is called stamping on a candle, that is not actually what I did. Instead I stamped on the tissue paper which I later adhered to the candle. I used Black ink and once it had dried, I trimmed around the sentiment.

Next, I laid the stamped image on the candle and cover with wax paper. 

Then I heated it with a craft heat gun until the wax paper turned shiny due to the wax melting. You want to make sure the wax on the underside of the sheet and the surface of the candle melts, so heat it just a few seconds after you see it change.

Next, I gently rubbed over the wax paper pressing the tissue into the melted wax of the candle. Slowly, I lifted off the wax paper. The first time I lifted it, one corner of the tissue paper stuck to the wax paper instead of the candle, so I just set it back down, heated and rubbed some more.

When I removed the wax paper, there were a few rough spots on the candle where the layers of wax had separated. To fix this, I heated those areas a little more and smoothed the wax by rubbing with the wax paper.

I finished off the candle with a little Huntington paper (cut with the Scalloped Border punch), Bronze Shimmer Trim and Brown Sparkles.

Your next stop on our Illuminate blog hop is 4 Hearts Scrapping with Jennifer.

Here is a complete lineup in case you get lost along the way:

Thanks for hopping along with us – we hope we were able to inspire you.

Have fun creating!

Photobucket