In This Together Cardmaking Workshop

March 18, 2021 @ 4:00 pm 6:00 pm CDT

Join me on the Close To My Heart Facebook page, for another fun craft event! To create along with us, order your kit on my website. Don’t worry, if there is not enough time to receive your order before the workshop, the videos will remain on the Close To My Heart Facebook group indefinitely.

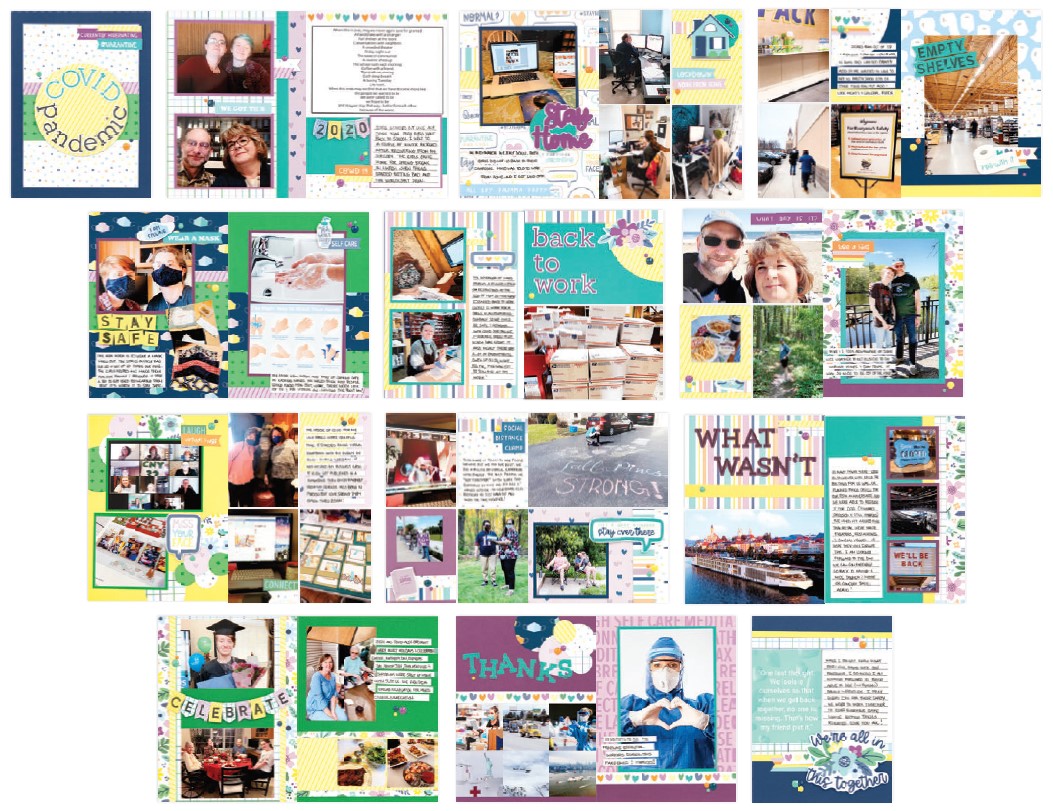
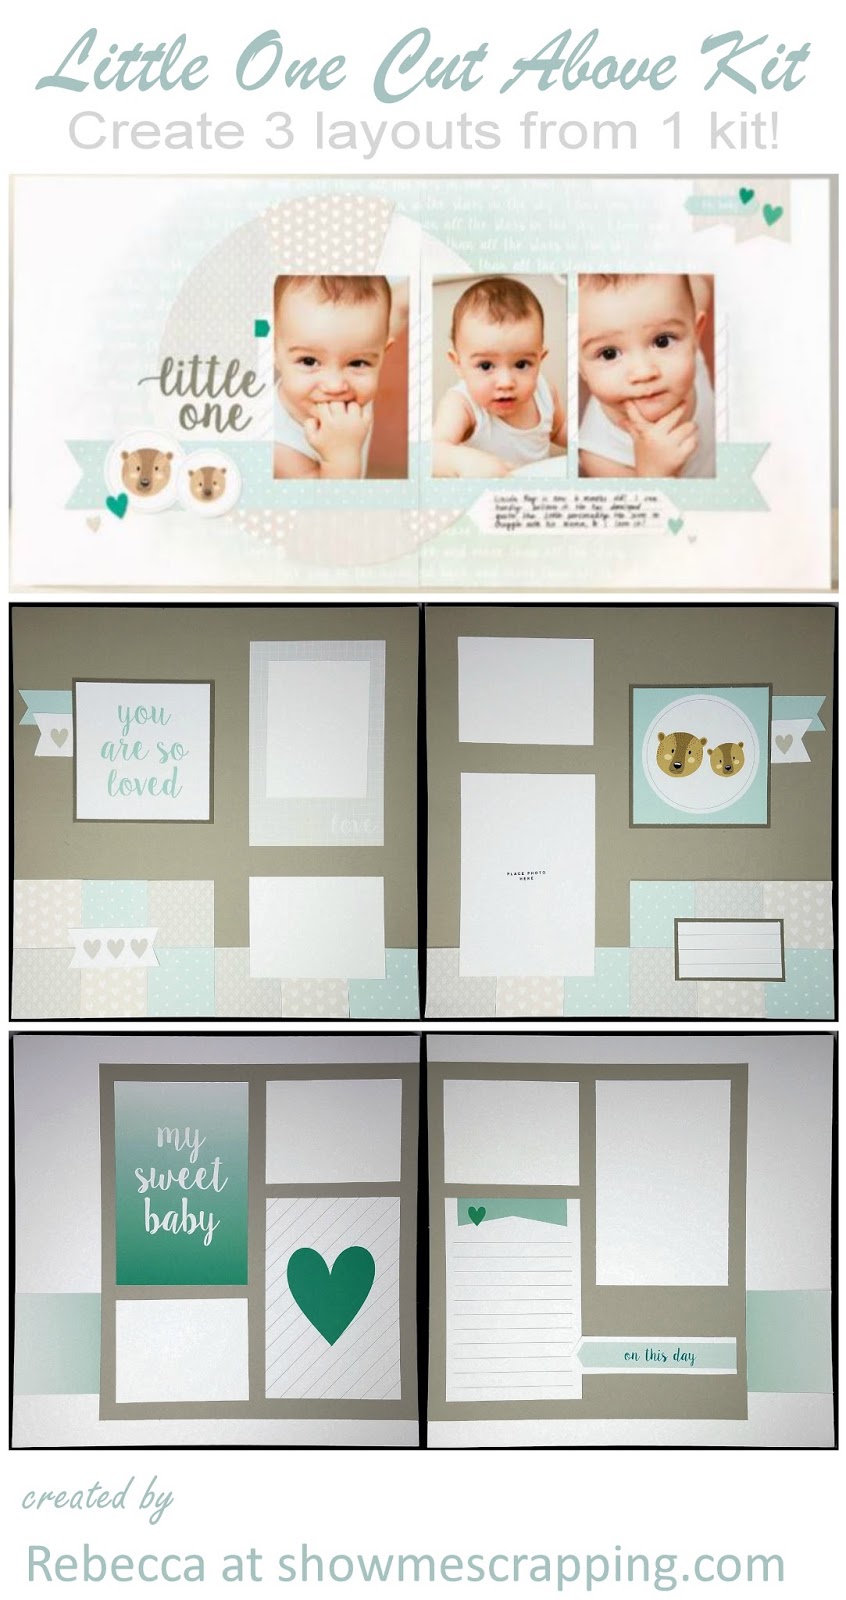
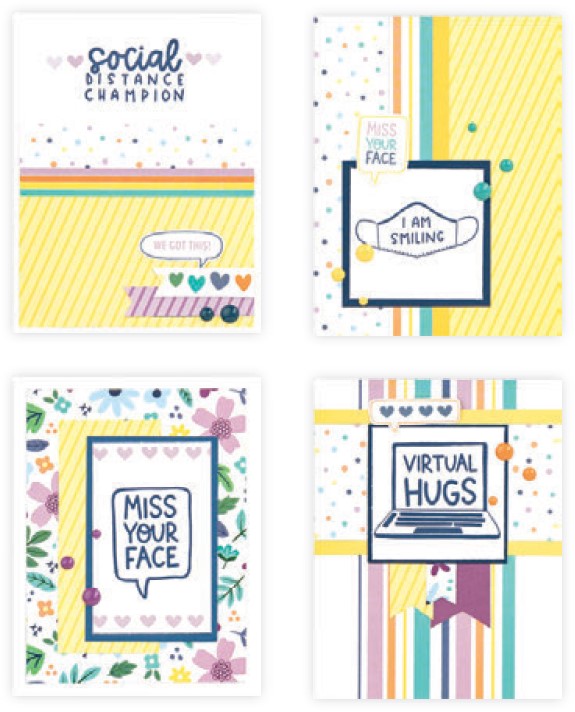
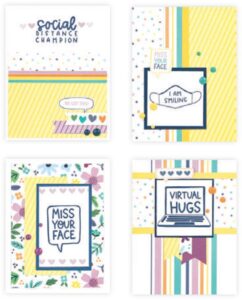
The materials in this kit can be used to make the two of each of the cards created during this workshop plus the three layouts for the March 19 workshop. The instructions for all of these projects is in a downloadable guide.

Additional supplies needed:

  • Pennant Banner Alphabet Stamp + Thin Cuts (Z3762)
  • Simple Serif Bundle (Z3865)
  • Grape Exclusive Inks™ Stamp Pad (Z6524)
  • Intense Black Exclusive Inks™ Stamp Pad (Z4189)
  • Lagoon Exclusive Inks™ Stamp Pad (Z2895)
  • Lemonade Exclusive Inks™ Stamp Pad (Z6517)
  • Sapphire Exclusive Inks™ Stamp Pad (Z2848)
  • 3-D Foam Tape (Z1151)

Be sure to join live on the Close To My Heart Facebook page to be entered to win awesome giveaway prizes during the event!

Free

Close To My Heart

View Organizer Website

Merry Making Virtual Event (Kids Crafts)

December 13, 2021 @ 3:00 am 5:00 pm CST

Join me on the Close To My Heart Facebook page, for another fun craft event! To create along with us, order your kit on my website. This virtual workshop will be lead by and is for kids. However, the layouts are truly for all ages!

Additional supplies: Anything you would like to decorate your ornaments with!

Be sure to join live on the Close To My Heart Facebook page to be entered to win awesome giveaway prizes during the event!

Close To My Heart

View Organizer Website

Pages for All Ages (CTMH Kids Craft)

March 30, 2021 @ 5:30 pm 7:30 pm CDT

Join me on the Close To My Heart Facebook page, for another fun craft event! To create along with us, order your kit on my website. This virtual workshop will be lead by and is for kids. However, the layouts are truly for all ages!

Additional supplies needed to make all of these projects:

  • Adhesives
  • Journaling Pen

Be sure to join live on the Close To My Heart Facebook page to be entered to win awesome giveaway prizes during the event!

Free

Close To My Heart

View Organizer Website

In This Together Scrapbooking Workshop

March 19, 2021 @ 4:00 pm 6:00 pm CDT

Join me on the Close To My Heart Facebook page, for another fun craft event! To create along with us, order your kit on my website. Don’t worry, if there is not enough time to receive your order before the workshop, the videos will remain on the Close To My Heart Facebook group indefinitely.

The materials in this kit can be used to make the three layouts created in this workshop plus the cards from the March 18th workshop. The instructions for all of these projects is in a downloadable guide.

Additional supplies needed to make all of these projects:

  • Lemonade Exclusive Inks™ Stamp Pad (Z6517)
  • Lilac Exclusive Inks™ Stamp Pad (Z6506)
  • Mink Exclusive Inks™ Stamp Pad (Z2825)
  • Sapphire Exclusive Inks™ Stamp Pad (Z2848)
  • Black Journaling Pen (.03) (Z3516)
  • 3-D Foam Tape (Z1151)

Be sure to join live on the Close To My Heart Facebook page to be entered to win awesome giveaway prizes during the event!

Free

Close To My Heart

View Organizer Website

In This Together Album Workshop

March 12, 2021 @ 4:00 pm 6:00 pm CST

Join me on the Close To My Heart Facebook page, for another fun craft event! To create along with us, order your kit on my website. Don’t worry, if there is not enough time to receive your order before the workshop, the videos will remain on the Close To My Heart Facebook group indefinitely.

Additional supplies needed:

  • Pennant Banner Alphabet Stamp + Thin Cuts (Z3762)
  • Simple Serif Bundle (Z3865)
  • Grape Exclusive Inks™ Stamp Pad (Z6524)
  • Intense Black Exclusive Inks™ Stamp Pad (Z4189)
  • Lagoon Exclusive Inks™ Stamp Pad (Z2895)
  • Lemonade Exclusive Inks™ Stamp Pad (Z6517)
  • Sapphire Exclusive Inks™ Stamp Pad (Z2848)
  • 3-D Foam Tape (Z1151)

Be sure to join live on the Close To My Heart Facebook page to be entered to win awesome giveaway prizes during the event!

Free

Close To My Heart

View Organizer Website

Posted on

New! DIY Wood Christmas Tags & 3D Ornaments – Bundled Savings

Bring some personalized rustic beauty to your holiday festivities with the wooden ornaments and tags in the Merry Little Christmas special! With a variety of ornament and tag options, you can choose which ones fit your celebrations best. The included SVG files allow you to match any decor and theme!

Continue reading New! DIY Wood Christmas Tags & 3D Ornaments – Bundled Savings
Posted on

Home Crafty Home — free download instructions for this new DIY home decor kit!

Our new Home DIY Decor workshop gives you the materials and instructions to make this cheery piece for your mantel, shelf or cabinet top! The kit uses our chipboard monogram letters, So Much Happy paper and puffy stickers and shapes cut using the Artistry Cricut collection.

Let’s take a look at what’s included in the kit

First you’ll get 11.5″ tall chipboard letters H, M and E. You’ll also get a special pack of paper which includes 6 sheets of the  So Much Happy patterned paper plus 5 sheets of cardstock (3 peach, 1 sapphire & 1 white) and finally, you’ll get a pack of So Much Happy Puffy Stickers.

Download Instructions>>

The downloadable workshop instructions include detailed directions from start to finish. Note that to complete the house-shaped “O” as shown, you’ll need to an Explore or Maker Cricut machine and the Artistry Collection. To make it super easy, you can click the link below to open a Design Space file with all the images sized correctly! 

Design Space file Link>>

If you like knowing exactly how to recreate a project step-by-step, you will love how thorough our directions are. However, if you have a more creative bend and enjoy making projects truly your own, use the directions for inspiration and let your imagination go wild. 

A few things you may want to consider: 

  • Think of a word that would be more meaningful to you or your family. Buy the letters you need but use this guide for inspiration for decorating and connecting them.
  • Choose a different paper pack to better fit your decor. Order the letters, paper pack and coordinating embellishments separately and use this printable guide for inspiration.
  • Add photos on the blank letter to make a more personal decor piece.

What would you change to make this project your own? Post your ideas in the comments.

Have a creative day,

Rebecca

Posted on

Create 6 pages with the Little One Cut Above Kit!

Earlier today, I posted the details of the Little One Cut Above kit as it was designed to be used. For those of you who prefer traditional scrapbooking, I’ve turned this kit into 3 two-page layouts by adding just a few sheets of cardstock.

You may recall that these kits include the materials needed to create one 2-page layout plus 12 cards (4″ x 6″) that you can put in the insert into pocket Memory Protectors along with your pictures. Although I love including pocket scrapbooking in my albums, I like to include my very favorite pictures on traditional pages. The cards include all the elements needed to create scrapbook pages: titles, embellishments (just trim them down) and journaling. 

Using the pocket cards included in the kit, plus a few sheets of White, Slate and Whisper cardstock, I created two BONUS layouts!

You are So Loved Layout

This layout was created by trimming a number of the journaling cards. The basic design of the pages started with three patterned cards which were cut into 2″ x 2″ blocks and stacked them across the bottom of both pages. A sentiment card (“you are so loved”) was trimmed down to 4″ x 4″ for the title. Additional cards were trimmed to create the embellishments, jounnaling and a photo mat. 

My Sweet Baby Layout

This layout also uses a pocket card for the title (“my sweet baby”). Two additional full sized cards are used in this layout. Additional cards were trimmed to create the arrow (“on this day”) and the ombre banners on each side. 

If you have any questions about these layouts, I’d be glad to send you measurements and additional tips. Comment below or drop me anemail

Don’t forget that the Little One Cut Above kit used for these layouts is half price during April — just $7.48! You’ll also want to check out the Forever & Always kit which is also on sale. Both of these kits retire at the end of the month (or sooner if supplies run out), so be sure to orders yours today!

Posted on

Snow Cute!

PicMonkey Collage

It snowed this morning, but not enough to accumulate. But it put me in the mood for a snowman. So I made these tasty little guys. Each one is the wrapper for a snack size candy bar. Perfect for stockings, a classroom of kids, scouts, etc.

These are loosely based on these cute little Rolo guys by Debby posted on her blog: http://www.debbysstampinspot.com/2012/12/rolo-snowmen.html.

Materials:

  • Fun/Snack sized Candy Bars (approx. 0.6 oz each)
  • Stretch gloves (I found two pair for $.97 at Walmart — that’s enough for 20 snowmen!)
  • Daisy White Card Stock
  • Black permanent pen
  • Orange Marker

Cut a piece of cardstock 3″ x 4″. Score a fold line approximately 3/4″ from each of the shorter sides. Draw a snowman face and buttons in the center. Color the carrot nose with the orange marker.

IMG_6398

Wrap around a candy bar folding on the score lines. It will have a mailbox shape as shown below.

IMG_6406

Cut the fingers/thumb off each glove to make hats for the snowmen. Use the body of the glove to make scarves – approximately 1/2″ x 3″. The picture below shows how to cut five hats and scarves from one glove.

IMG_6402

Role the edge of each hat slightly and slide on the top of the snowmen. Tie the scarves around the snowmen between the face and buttons.

IMG_6395

Let It Snow!

Rebecca