Posted on

Love the outdoors? Make these fun cards and learn some new techniques!

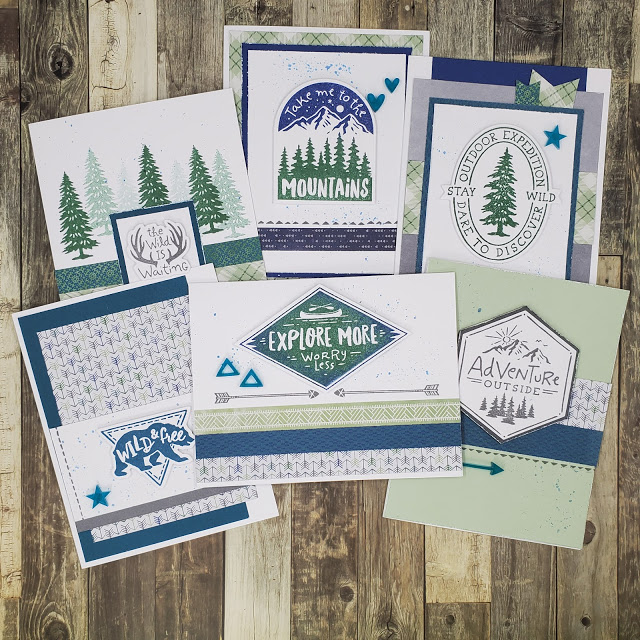
If you’ve been following my blog this month, you’ve seen several projects using products from the Aurora collection. Today, I’d like to share with your some outdoor themed cards I made recently using these products. 

You may have noticed that these cards do not really have greetings but instead a phrase that reflects an outdoor mentality. That leaves the occasion for the card up to you! You could easily add a “happy birthday”, “happy Father’s Day” or other sentiment to reflect any occasion. Or just add your personal note on the inside to let an outdoor lover know that you are thinking of them.

All of the stamping on these projects is from the Aurora – Scrapbooking Stamp Setand Thin Cut Set. Although these stamps can be used to make beautiful die-cut embellishments for your pages, as you can see they are versatile enough to work on cards too. 

Here’s a closer look at these cards along with a few notes about the techniques used.

Each of these cards has a single die-cut piece stamped with a coordinating image. Because our stamps and blocks are clear acrylic, you can see through them to place the image. To get the best transfer of ink, place the foam that is included with every stamp set under the paper before you stamp.  

The splatters on the tag were added using Sapphire ink. To get this look, squeeze your ink pad so that some ink remains on the inside lid. Then use a wet brush to pick up the ink. Tap the brush on your finger above the paper where you want the drops to be.

In addition to splatters using the technique from the first card, I distressed the edges of several of the papers with my scissors. Doing this with closed scissors keeps tearing to a minimum.

The trees in the mist on this card were created with second and third generation stamping. To get this look, ink the stamp up with Evergreen ink. After stamping, stamp again to create a lighter tree (2nd generation) and a thrid time for an even lighter tree (3rd generation) before inking the stamp up again.

The sky and trees on this card were stamped with a single stamp. You could cut the stamp — seriously, I cut my stamps all the time — to stamp them separately. However, I wanted to make sure it lined up correctly, so I just inked the sky off the edge of the Sapphire ink pad and the trees off the edge of the Evergreen ink pad. Then I was able to stamp both colors at one time.

This final card uses the Rock & Roll stamping technique. To achieve this look, ink the stamp with Evergreen ink. Then gently roll the edges of the stamp on the Sapphire ink pad before stamping on the die-cut.

Products used on these cards:

Aurora Paper Packet (X7256B)

Aurora – Scrapbooking Stamp + Thin Cuts (Z3711)

Aurora Acrylic Shapes (X7256E)

Cardstock (Peacock, Sapphire, Sage, Charcoal & White Daisy)

Ink Pads (Charcoal, Sapphire, Evergreen & Peacock)

See all of the Aurora products>>

I hope these cards encourage you to try new distressing or stamping techniques.

Keep Creating,

Rebecca

Posted on

What Makes Your Heart Happy? New kit just in time for Valentine’s Day projects! {FREE download}

Hi friends! I hope everyone is having a refreshing new year
thus far! One of my new year resolutions for 2019 was to be more organized and
make more time doing things that make me happy. For me, scrapping and crafting
is a form of self-care. It’s my creative outlet. It’s good for all of us to
find something we really enjoy and spend more time doing that thing. What about
you? Do you have a creative outlet too?

I got super excited when I saw the new Close To My Heart
workshop kit and stamp set. They named it “Heart
Happy
” and rightfully so. When you see all the adorable stuff it includes,
it’s going to make your heart happy too!

Even if you aren’t really big into celebrating Valentine’s
Day, that’s okay because this kit is so cute and versatile, it could be used
for a number of things. It’s perfect for couples, yes, but also for kids,
family, friends, spring time, and the list goes on. The possibilities are
endless.

Kit Contents

It’s such a fun bundle of goodies! Some of the things you
will discover in the Heart Happy kit
are heart happy stickers, silver glitter gems, red shimmer trim, heart happy
paper packet, A Piece of My Heart Stamp Set, 8 cardstock sheets (such a cute
variety of these), and of course 12 white card bases and envelopes.

Make a love letter, send out handmade valentine cards, make
scrapbook pages… these are just some of the ideas I have floating around in my
head right now. I’m so in love with this kit! J

Need Inspiration? 

The sky is the limit on what you can do with this kit, but if you like some project inspiration, click below for a download a FREE WORKSHOP GUIDE that includes the directions for the project below. This includes 2 single-page layouts, 1 two-page layout, 10 cards and 5 tags. Believe it or not, you can make ALL of these projects from a single workshop kit!

Click for FREE Project Guide!


If you are excited to try it, just click here to order and start
having some fun! Right now you can get the entire kit + stamp set for the
special price of $40.95 or if you’d like the kit without the stamp set, it’s
available for $35.95. When you place your order, be sure to check that you have the following ink pads: Ballerina, Candy Apple Red, Raspberry & Sapphire (if you are making the projects shown above).

As you can see, there are all kinds of special hand-made
with love goodies you can create with this kit! If you’d like to share any
creations or ideas, please feel free to drop it in the comment section. We can
inspire one another to create some beautiful projects!

Have a Creative Day!

Rebecca

Posted on

City Sidewalks Sparkles in this Wreath Card – FREE Design Space project file!

I have one more project to show you from the City Sidewalks cartridge. (Be sure to scroll down the the bottom of the page to see how to get a FREE Design Space file to recreate this card!)

This card is super simple using the Merry Christmas sentiment and wreath from New England Ivy and Pomegranate cardstock. I dressed them up a bit by layering a piece of Pomegranate cardstock and glitter paper under the images. Typically, I’d embellish more, but it seemed complete with the sparkle under the images.

FREE Design Space file!

You can get a copy of the Design Space files used to create this card as well as the two City Sidewalks cards below by simply signing up for my newsletter using the link below! 


>>Click here to sign up for the Show Me Scrapping newsletter and receive the City Sidewalks cards Design Space files.

(The free Design Space link is only available to new subscribers in December 2016.)

IMPORTANT: Note that you will not be able to cut this file unless you have linked the City Sidewalks cartridge. If you do not have it yet, you can order it HERE. This cartridge retires on December 31, so don’t put off getting your copy!


If you’d like to see other City Sidewalks projects I’ve created, click here.

Until next time, happy creating,

Rebecca

Posted on

Get Fancy with the Florence Collection

Have you seen the Florence paper collection? The rich colors of this paper make it perfect for travel as well as special occasions. It also is great for home decor items like this lovely dream catcher.

When you buy the Florence Workshop Your Way, you get everything you need to make six decorative scrapbook pages.

You can print the instructions on the workshop resource page of my website.

The kit also includes two sheets of double sided Picture My Life cards that you can cut apart. These can be used alone in pocket pages or added as titles, journaling and alternative papers to your layouts. 

You will have some paper left over that you can stretch by adding more solid cardstock to make additional layouts. Or you can add a few more products and make this set of beautiful cards!

These cards use the A Bunch of Love stamp set. When you add your own cards and bases, you’ll have enough product left to make two of each of them (8 all together).

Notice the blue lines around a couple of the images? This means that this stamp set has a coordinating set of thin cuts. No fancy cutting needed to get these cut out cleanly. In the photo above, the stamped images were dressed up with a few dabs of watercolor.

Again, you can print the directions to all of these Florence projects on the workshop resources page of my website. Are you a visual learner? On the Resource page you will also find links to step-by-step videos

Just a reminder that the Florence collection is only available for a limited time and will retiring on August 31. In addition to the complete kit, you can purchase the paper and embellishment sets separately. You can see the whole collection HERE


Happy Creating,

Rebecca

Posted on

Celebrate National Scrapbooking Month – Taste of Summer

Celebrate National Scrapbooking Month during the month of May with the exclusive fruity Taste of Summer paper packet! You get 12 pieces of these bold & beautiful papers for just $8.95. Perfect for documenting your summery memories or making cheerful cards.

Plus everyone who orders this paper pack from me will receive instructions for making the layouts and cards pictured below!

Taste of Summer Layout supply list:

  • Documenting Moments My Acrylix Stamp Set (D1647)
  • Taste of Summer Paper Packet (CC1038)
  • White Daisy Cardstock (1385)
  • Black Exclusive Inks Pad (Z2105)
  • White Shimmer Trim (Z2013)
  • Sequins Silver Assortment (Z2013)
  • Marvy Uchide LePen Journaling Pen (Z1979)

Taste of Summer Cards supply list:

  • Finding the Words My Acrylix Stamp Set (D1646)
  • Taste of Summer Paper Packet (CC1038)
  • White Cards & Envelopes Value Pack (X254)
  • Black Exclusive Inks Pad (Z2105)
  • Canary Exclusive Inks Pad (Z2643)
  • Sunset Exclusive Inks Pad (Z2191)
  • Silver Shimmer Trim (Z1799)
  • Bitty Sparkles (Z1263)

All of the items on the supply list can be found on my shopping website (www.rebeccabrown.ctmh.com). Once you place your order, I’ll email you pdf versions of the layout and kit directions. I know you’ll enjoy making these cheerful layouts and cards.

Keep creating, 

Rebecca

Posted on

NEW Cards for Next Monday’s Workshop

This weekend, I made some new cards for next Monday’s card workshop. My favorite is this coffee cup one. However, I’d have to cross off “coffee” and add Diet Mountain Dew, lol.

 This birthday card uses one of my favorite papers from the past, Wings.

 I also added a couple valentine’s cards.

Here are a few more of the cards you’ll have to choose from:

See something you’d like to make? You will have two hours to make as many cards as you like. You pick which ones you want! Would you like to come?

REGISTER NOW

Posted on

You’ve Got a Friend – May Stamp of the Month – Just $5

The Close To My Heart mission statement is centered around “celebrating relationships”. Friendships are one of the most important relationships you can have and this stamp set gives you five different images with phrases to celebrate them. 

Do you have a friend you’d like to surprise with a “just because” card? Or maybe you’d like to commemorate them in a layout. 

The May Stamp of the Month, “You’ve Got a Friend” includes all of these stamps:


This stamp set is only available through May 31. The full retail price is $17.95, but you can get yours for just $5 — over 70% savings. When you place an order of $50 or more in Close To My Heart products, you qualify for this special Stamp of the Month pricing.

Just $5 with a $50 purchase!


Start shopping>>

Here are a few fun projects the creative folks at Close To My Heart dreamed up:

If you love the artwork in this picture, you are in luck. You can find supply lists and helpful hints on my Close To My Heart website –> LINK

Start Shopping>>

Posted on 1 Comment

Clean and Simple Congratulations

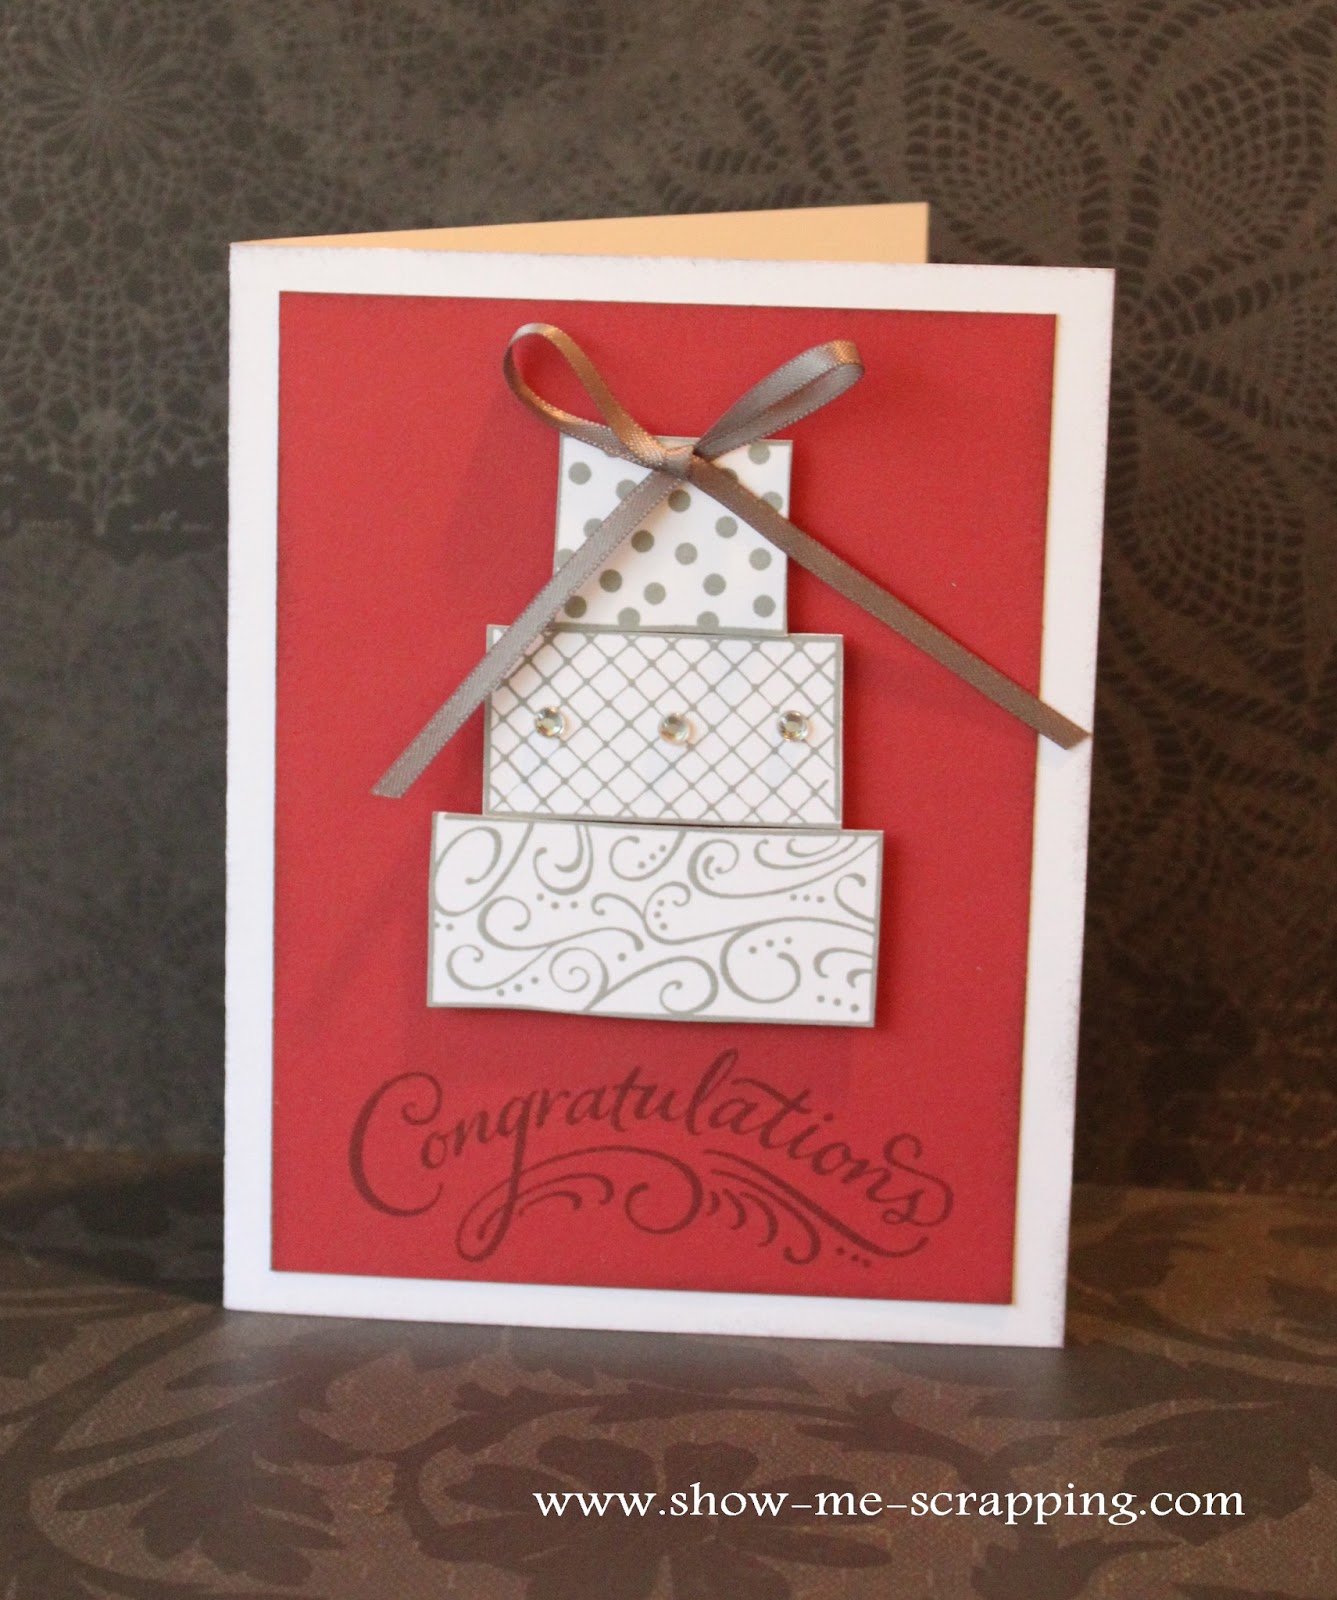
Today, I wanted to show you a really quick and easy wedding congratulations card I made using The Happy Couple stamp set. (Did I tell you I love this set?)

This simple card was made by stamping with Slate ink on Cranberry and White Daisy cardstock. The cake pieces were attached with foam tape to add dimension. I finished it off with a little ribbon and sparkles.

I love simple! Don’t you?

Photobucket

Posted on 1 Comment

The Happy Couple…For Always

Ever since I saw the new Idea Book, I knew I wanted to make some cards using the For Always paper and The Happy Couple stamp set. They had to have been literally made to go together. 

Here’s my first creation. 

What do you think? This card was easy peasy. I just pieced together some rectangles of B&T over a black base. Then stamped the sentiment on white and mounted on Cranberry cardstock. Finally, added a little ribbon and a few Sparkles. Done!

There are so many great images on The Happy Couple stamp set for wedding, anniversary, showers, or Valentines Day cards. You could even build a fun birthday cake with the rectangles.

Which one(s) should I use next?

Photobucket

Posted on

Unlock My Heart

Today, I want to show you a quick, interactive Valentine’s Day card I made with the La Belle Vie papers. This is what the card looks like when you give it.

IMG_7091

The band slides off to reveal this interlocking heart.

IMG_7093

Unlock the heart and open the card to reveal the message.

IMG_7092

This card is on page 71 of the Artiste Cricut Cartridge. Use the Card button to create the card base. Press Shift and the Card button to make the slide.

p 71

Just a reminder that La Belle Vie is one of 8 paper packs that will be discontinued on January 31, 2013. Follow this link to pick up yours before they are gone.