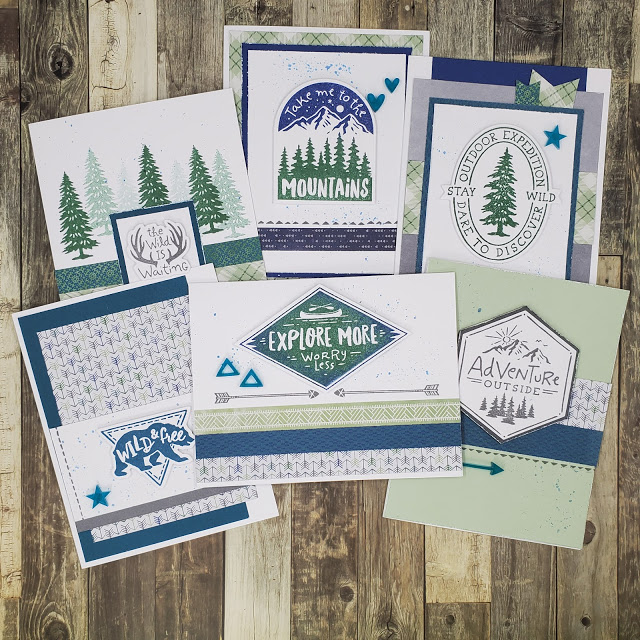
If you’ve been following my blog this month, you’ve seen several projects using products from the Aurora collection. Today, I’d like to share with your some outdoor themed cards I made recently using these products.

You may have noticed that these cards do not really have greetings but instead a phrase that reflects an outdoor mentality. That leaves the occasion for the card up to you! You could easily add a “happy birthday”, “happy Father’s Day” or other sentiment to reflect any occasion. Or just add your personal note on the inside to let an outdoor lover know that you are thinking of them.
All of the stamping on these projects is from the Aurora – Scrapbooking Stamp Setand Thin Cut Set. Although these stamps can be used to make beautiful die-cut embellishments for your pages, as you can see they are versatile enough to work on cards too.

Here’s a closer look at these cards along with a few notes about the techniques used.

Each of these cards has a single die-cut piece stamped with a coordinating image. Because our stamps and blocks are clear acrylic, you can see through them to place the image. To get the best transfer of ink, place the foam that is included with every stamp set under the paper before you stamp.

The splatters on the tag were added using Sapphire ink. To get this look, squeeze your ink pad so that some ink remains on the inside lid. Then use a wet brush to pick up the ink. Tap the brush on your finger above the paper where you want the drops to be.

In addition to splatters using the technique from the first card, I distressed the edges of several of the papers with my scissors. Doing this with closed scissors keeps tearing to a minimum.

The trees in the mist on this card were created with second and third generation stamping. To get this look, ink the stamp up with Evergreen ink. After stamping, stamp again to create a lighter tree (2nd generation) and a thrid time for an even lighter tree (3rd generation) before inking the stamp up again.

The sky and trees on this card were stamped with a single stamp. You could cut the stamp — seriously, I cut my stamps all the time — to stamp them separately. However, I wanted to make sure it lined up correctly, so I just inked the sky off the edge of the Sapphire ink pad and the trees off the edge of the Evergreen ink pad. Then I was able to stamp both colors at one time.

This final card uses the Rock & Roll stamping technique. To achieve this look, ink the stamp with Evergreen ink. Then gently roll the edges of the stamp on the Sapphire ink pad before stamping on the die-cut.
Products used on these cards:
Aurora Paper Packet (X7256B)
Aurora – Scrapbooking Stamp + Thin Cuts (Z3711)
Aurora Acrylic Shapes (X7256E)
Cardstock (Peacock, Sapphire, Sage, Charcoal & White Daisy)
Ink Pads (Charcoal, Sapphire, Evergreen & Peacock)
See all of the Aurora products>>
I hope these cards encourage you to try new distressing or stamping techniques.
Keep Creating,
Rebecca


