
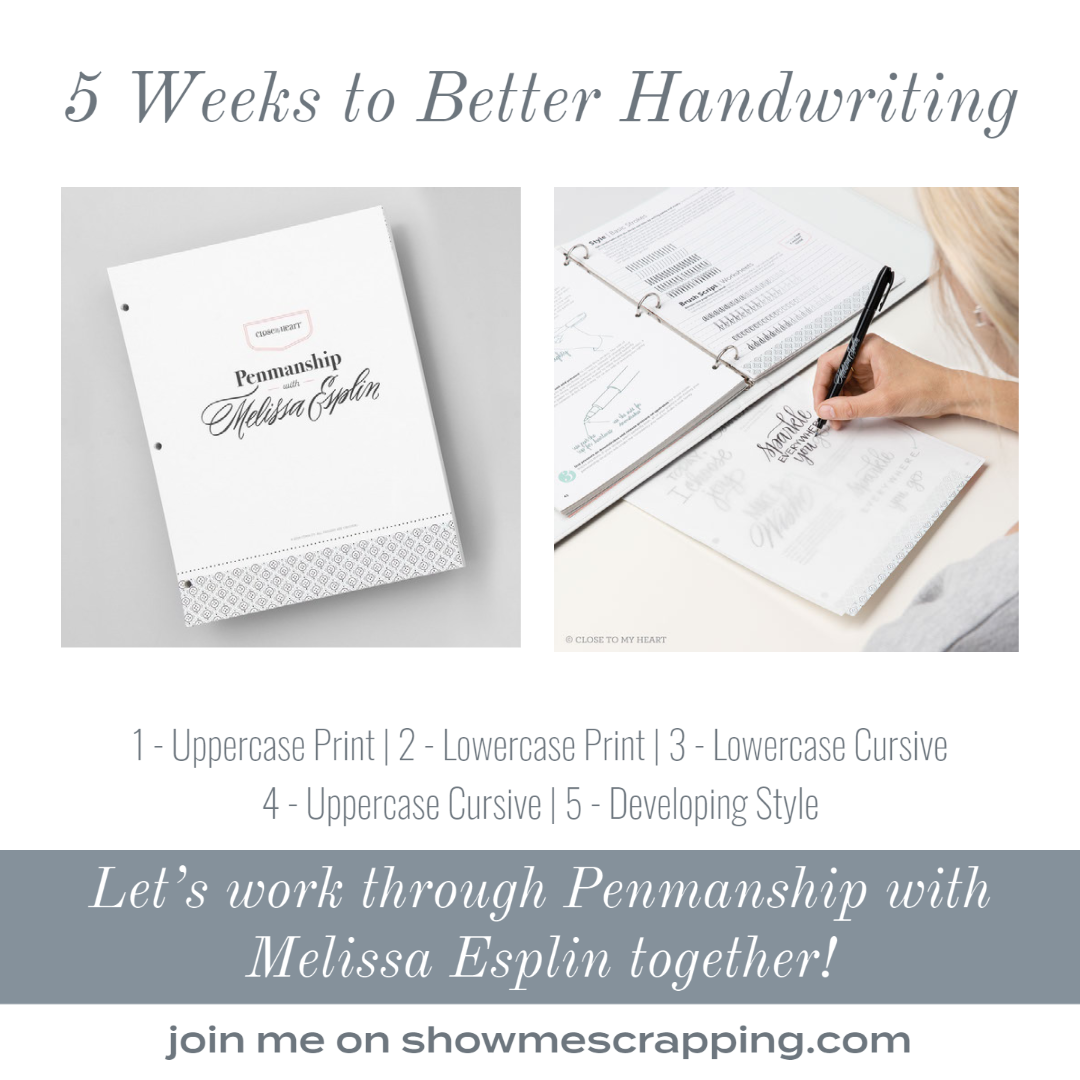
Last week, I kicked off a series of posts focusing on improving handwriting. I’m working my way through the Penmanship with Melissa Esplin book and invite you to join me!

Last week, I kicked off a series of posts focusing on improving handwriting. I’m working my way through the Penmanship with Melissa Esplin book and invite you to join me!
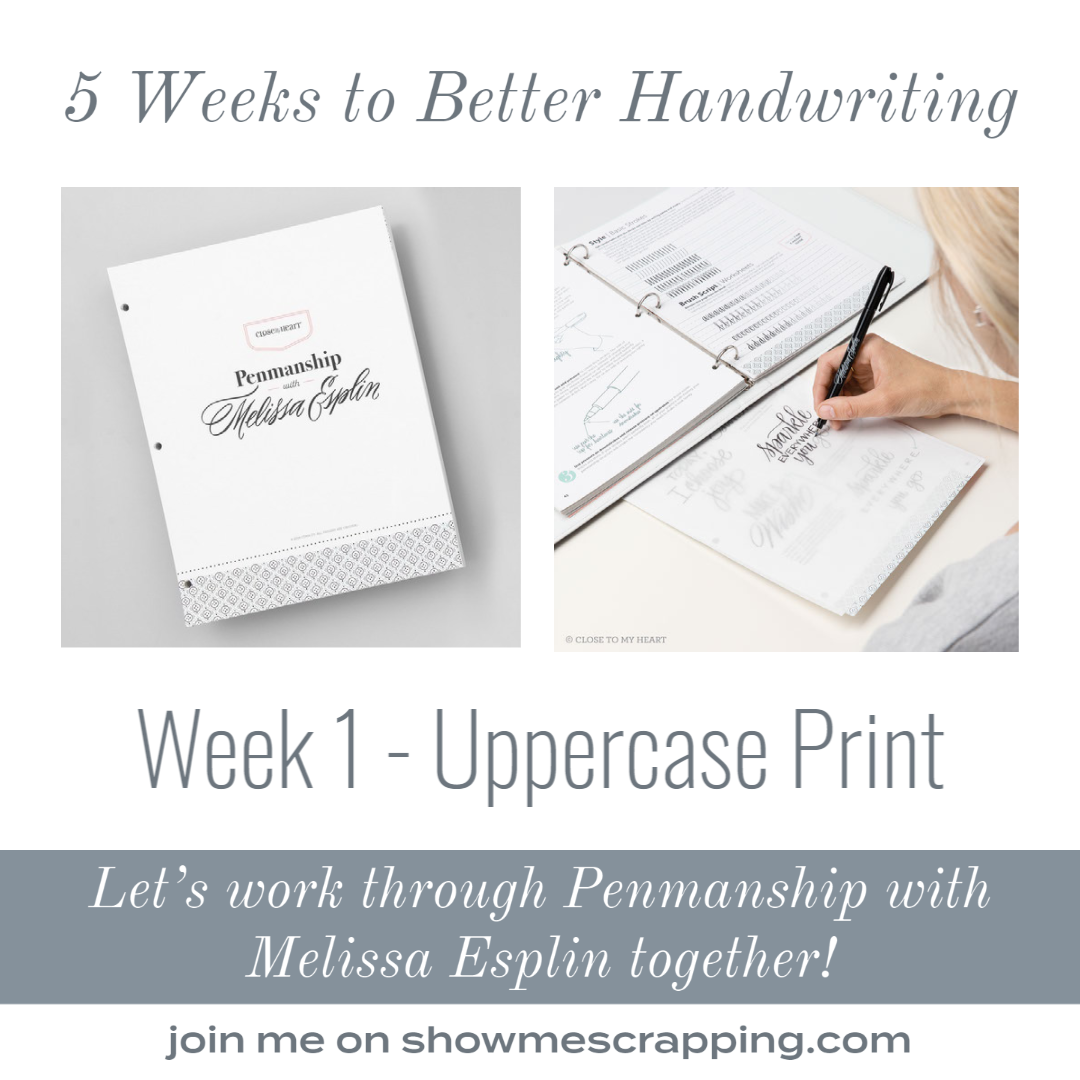
Last week, I kicked off a series of posts focused on improving handwriting. I’m working my way through the Penmanship with Melissa Esplin book and invite you to join me! . This week, I tackled chapter 1 and in this post, I’ll show you some of my practice work and share a few tips I learned.

How happy are you with your handwriting? Are you like me and wish that your penmanship was more consistent?


If you’ve been following my blog this month, you’ve seen several projects using products from the Aurora collection. Today, I’d like to share with your some outdoor themed cards I made recently using these products.

You may have noticed that these cards do not really have greetings but instead a phrase that reflects an outdoor mentality. That leaves the occasion for the card up to you! You could easily add a “happy birthday”, “happy Father’s Day” or other sentiment to reflect any occasion. Or just add your personal note on the inside to let an outdoor lover know that you are thinking of them.
All of the stamping on these projects is from the Aurora – Scrapbooking Stamp Setand Thin Cut Set. Although these stamps can be used to make beautiful die-cut embellishments for your pages, as you can see they are versatile enough to work on cards too.

Here’s a closer look at these cards along with a few notes about the techniques used.

Each of these cards has a single die-cut piece stamped with a coordinating image. Because our stamps and blocks are clear acrylic, you can see through them to place the image. To get the best transfer of ink, place the foam that is included with every stamp set under the paper before you stamp.

The splatters on the tag were added using Sapphire ink. To get this look, squeeze your ink pad so that some ink remains on the inside lid. Then use a wet brush to pick up the ink. Tap the brush on your finger above the paper where you want the drops to be.

In addition to splatters using the technique from the first card, I distressed the edges of several of the papers with my scissors. Doing this with closed scissors keeps tearing to a minimum.

The trees in the mist on this card were created with second and third generation stamping. To get this look, ink the stamp up with Evergreen ink. After stamping, stamp again to create a lighter tree (2nd generation) and a thrid time for an even lighter tree (3rd generation) before inking the stamp up again.

The sky and trees on this card were stamped with a single stamp. You could cut the stamp — seriously, I cut my stamps all the time — to stamp them separately. However, I wanted to make sure it lined up correctly, so I just inked the sky off the edge of the Sapphire ink pad and the trees off the edge of the Evergreen ink pad. Then I was able to stamp both colors at one time.

This final card uses the Rock & Roll stamping technique. To achieve this look, ink the stamp with Evergreen ink. Then gently roll the edges of the stamp on the Sapphire ink pad before stamping on the die-cut.
Products used on these cards:
Aurora Paper Packet (X7256B)
Aurora – Scrapbooking Stamp + Thin Cuts (Z3711)
Aurora Acrylic Shapes (X7256E)
Cardstock (Peacock, Sapphire, Sage, Charcoal & White Daisy)
Ink Pads (Charcoal, Sapphire, Evergreen & Peacock)
See all of the Aurora products>>
I hope these cards encourage you to try new distressing or stamping techniques.
Keep Creating,
Rebecca

When life is tough, sometime the only thing you can do is “just keep swimming”. Find out below how you can get the stamp set I used for this card for just $5 and get a kit to make this card for free!

I just sent this card to my daughter who is working so hard in college despite the chaos caused by moving to online courses and sheltering in place. I’m proud of her and thought she might need a little reminder to just keep moving forward. I’m sure you know someone is also facing challenging circumstances due to the Coronavirus outbreak and needs some encouragement.
I absolutely love the April Stamp of the Month, O-Fish-ally Awesome! It has all kinds of sea life: fish, star fish, crab, coral and sea grass. Plus you get the aquarium, bubbles, sign, sand and more! The sentiments are filled with under water “puns”.

This fun stamp set is only available to purchase in April 2020. It is a “size D” (AKA large) stamp set and regularly priced at $18.95. However, when you have $50 in your cart, you can add it for just $5!
FREE CARD KIT
When you purchase the O-Fish-ally Awesome Stamp Set on my Close To My Heart website (at full or discounted price), I’ll send you a kit to make this shaker card! If you have not tried our our shaker window tools, you will love learning how to do this. I did a tutorial in my Creative Friends facebook group last week. You are invited to join the group and check it out!

Kit includes
– Card base
– Seas the Day papers
– Shaker window base and frame (cut using the Shaker Window & Confetti Thin Cut set)
– Shaker window foam and acetate
– White enamel dots
– Sliver loose sequins

To finish the kit, you’ll need some ink, markers (or colored pencils) and adhesive. On the sea floor and sea life, I used Mink, Smoothie, Sage and Intense Black ink and for the sentiment, Sapphire ink. The fish and shells were colored with various TriBlend markers.
If you’d like one of these kits, simply place an order on my Close To My Heart website that includes the O-fish-ally Awesome stamp set. Start shopping now>>
Always create,
Rebecca
Last week, I posted some great tips to ensure success even if you are a new to stamping. Today, I’m going to share with you a few more facts about Close To My Heart’s stamp sets. Read on to test your knowledge about clear stamping.
![]()
As you browse the stamps on my website or in the Idea Book, you may notice that some stamps have a colored outline. These are not just for decoration. Each image that is outlined in blue coordinates with Thin Cuts metal die (see sample below). Images outlined in red coordinate with one of our Cricut collections.
 |
| D1706/Z3373 School Kids |
Because Close To My Heart operates in several countries around the world, we have a handful of stamps that are regional specific and not in the US Idea Books. However, these stamps are available in the US on my website. I’ve have several of these in my collection and used them on school projects (my daughter took several years of French) and travel projects.

Scrapbookers CAN Stamp!
There is a tendency to link stamping with card-making, but the truth is that stamping can add so much to your pages. Many of the stamps available in the market are not made for scrapbooking. However, Close To My Heart has many stamps made just for scrapbooking. On my website, you’ll find many stamps with images that are proportioned for your pages and sentiments related to memory keeping.
 |
| D1775 Central Park – Scrapbooking |
If you look at the item numbers of our stamp sets, you’ll notice that they all start with a letter. This letter tells you the size of the stamp set. Specifically, it tells you the size of the carrier sheet used to hold the stamps.
Size A stamp sets come on a carrier sheet that is 3″ x 3″. The carrier sheet for a size B stamp set is 4″ x 4″, size C is 4″ x 6″ and size D is 6″ x 6″. We sometimes refer to a size E stamp set as a “double D” because these sets fill two 6″ x 6″ carrier sheets.
All of the stamps size A through E conveniently come in the same size plastic envelopes that fit perfectly in our My Acrylix Organizer and the new Designer Travel Stamp Case.

The item number for our stamps of the month is S followed by four digits representing the year and month, but are size D. So the July Stamp of the Month, Highlight Reel’s number is S1807.

Our smallest stamp sets start with an M (for “mini”). These stamps fit on a 2″ x 2″ block and are sold in smaller envelopes than the other sizes. The My Acrylix Mini Stamp Organizerwill hold 28 of these stamp sets.

It takes 9 to 12 months for a stamp set goes from concept to available for purchase. Want to know more about the process that Close To My Heart uses to develop new stamps?

Want still more facts? Click HERE to read Close To My Heart’s post titled “19 Things You May Not Know About Our My Acrylix Stamps” in which the published the infographic above. It really is an interesting read.
So did you learn anything new about My Acrylix stamps?
Happy Stamping,
Rebecca

Let’s talk a little about using and caring for your Close To My Heart My Acrylic stamp sets. These tips will help ensure that you get a clean, crisp stamped image every time!

Tip #1 – Choose a blockas close to the size of the stamp as possible.
Tip #2 – Make sure no air bubbles between the stamp and block.
Tip #3 – Season new stamps by inking and stamping on scrap paper several times.
Tip #4 – Use the foam insert that comes with your stamps under your paper for even stamping.
Tip #5 – Don’t worry if your stamps become discolored with use.
Tip #6 – Always clean your stamps and blocks after each use.

Watch this video to see learn more about using acrylic stamps. You’ll also learn the difference between Outline, Solid, Base and Shade stamps.
Ready? I have a deal for you!
Stampaganza is back! During the month of July, our stamp sets are buy 2 get 1 free.

In addition, we’ve brought back some favorite retired stamps. This month only, you can order individual or complete sets of the “Solo” alphabet and number stamps. Each of these sets features a letter or number plus related words and image.


You don’t want to miss this opportunity to get all your favorites at a great price!

Earlier today, I was cutting 5″ x 7″ mats for a page kit and thought others may be interested to see how to get FOUR from a standard sheet of scrapbook paper (12″ x 12″).

The trick is to not make your first cut all the way across the paper. Otherwise, at most you will be able to create THREE 5″ x 7″ pieces.
Here’s how you do it:
STEP 1: Make a cut 5 inches from the left side of the paper just over 5 inches long.
STEP 2: Turn your paper so that this cut is perpendicular to the blade and 7″ from the top of the paper trimmer. Make a cut 7″ from the edge starting at the top and stopping at the previous cut. If you are using a Fiskar’s paper trimmer, you can use the horizontal handle of the blade casing as a guide for where to stop. This creates your first 5″ x 7″ piece!
STEP 3: Turn the paper 90 degrees counterclockwise and cut 5″ from the left edge. This creates your second 5″ x 7″ piece!
STEP 4: Repeat STEP 4 to create the third 5″ x 7″ piece.
STEP 5: This leaves you with an odd L-shaped piece of paper. Trim the 2″ square off to create the final 5″ x 7″ piece.
Want a visual? Here’s a video showing the process.
VIOLA! It’s that simple! With a little practice you’ll wonder why you settled for getting three pieces in the past!
Enjoy this tip? Please like the video on YouTube and follow my channel.

Close To My Heart just posted four videos on Youtube with each one featuring a different key on the new Flower Market Cricut cartridge. In my last post, I discussed how each key on the overlay (or page in the handbook) had a different flower and related images.

Yesterday, Close To My Heart announced that they will be posting a video for each of these keys! In each video, you will learn how to create the primary flower image and see projects using the coordinating images. In this first video, Monica walks you through how to make the layered bluebells on page (or key) 10 of the handbook. She also shows a lovely baby scrapbooking page using the bluebells and related images.
Three other videos in this series are ready for you to watch:
This cartridge is fully loaded with 14 images on each of 50 keys which is a total of 700 images! Over the next few weeks, additional videos are coming featuring each of the remaining keys.
Click here to download my free Flower Market Index>>
Don’t own this cartridge yet? I’d love to help get one into your hands! View Flower Market in my online shop>>
Before you check out don’t forget to add on the Stamp of the Month and a Create Kindness kit.


Have $150 or more on your wish list? Given that two new amazingly beautiful Idea Books were just released, I bet you do! I’m offering DOUBLE HOSTESS REWARDS for parties that close in September! Contact me right away for details.


Dandelions are usually thought of as pests, but at Close To My Heart we’ve risen them to the status of flower by including them on the new Cricut cartridge “Flower Market”. And the result? I think the dandelion is pretty, but you can judge for yourself.
Watch my video to see how a few pieces of paper transform into a Dandelion.
Wasn’t that fun? This is just one of many flowers (both 3D and flat) on the Flower Market cartridge. I can’t wait to try the next one.
Until next time,
Rebecca