Posted on

Revisiting the Grand Tetons using the Wander Scrapbooking Workshop

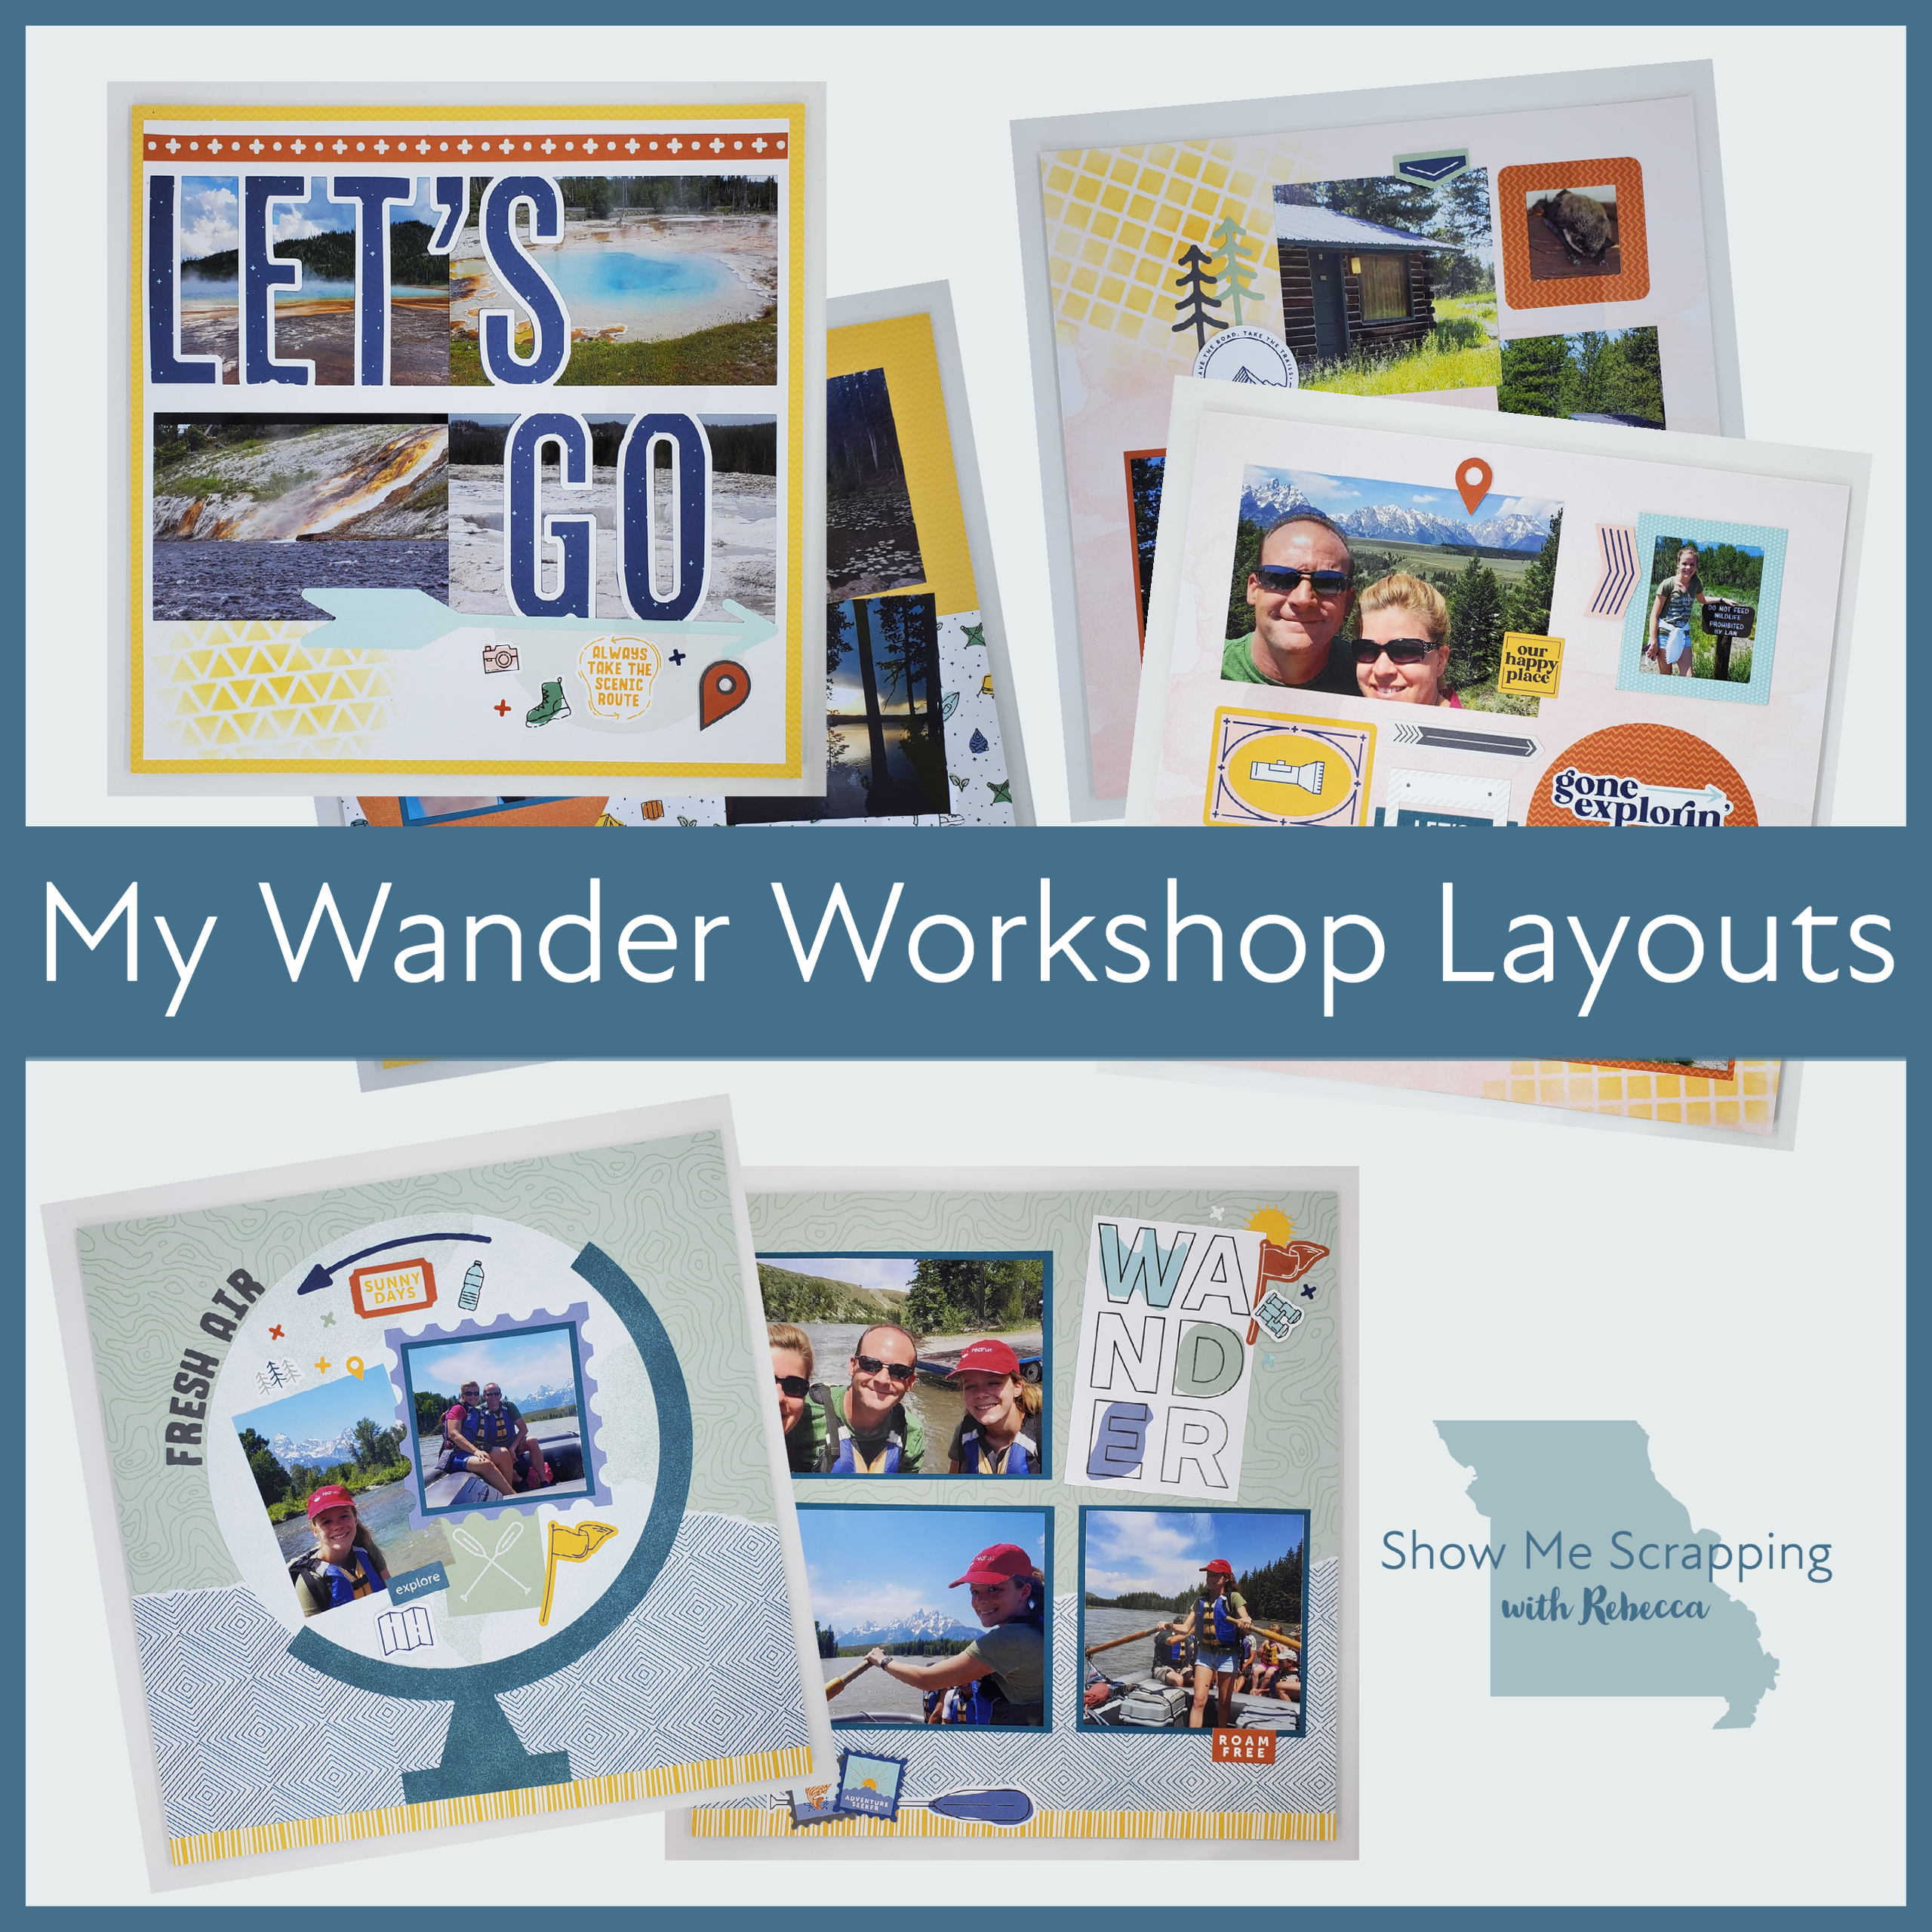
I love the pages I made with the Wander Scrapbooking Workshop. In this post, I’ll show you my the modifications I made to these pages and how I finished them off with my photos from our trip  a few years ago — it seems like yesterday, but these photos are from way back in 2017. 

One thing I LOVE about these workshops is that you can assemble them exactly like the samples, tweak to fit your pictures or use the pieces to completely do your own thing. I’m a “tweaker”. My layouts are 80-90% like the samples, but I wait until I have my photos to nail everything down. Most often, I rearrange the pieces to fit an extra photo or two. Because of our simple color coordination, I can easily make additional photo mats from cardstock.

Continue reading Revisiting the Grand Tetons using the Wander Scrapbooking Workshop
Posted on

Love the outdoors? Make these fun cards and learn some new techniques!

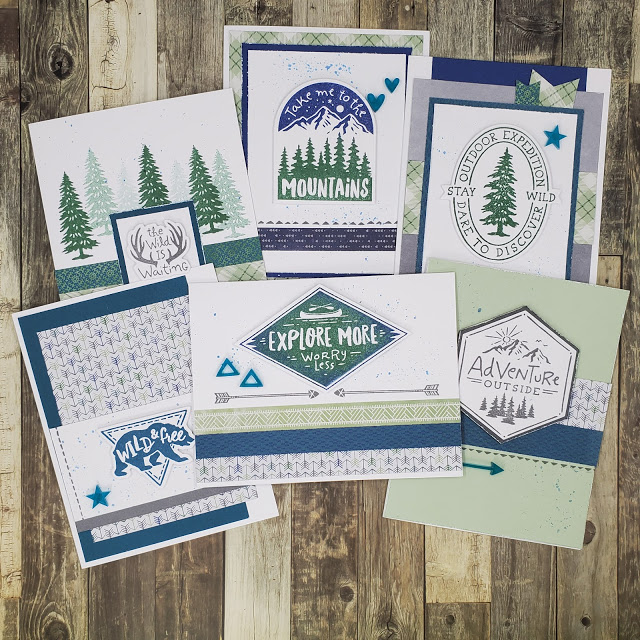
If you’ve been following my blog this month, you’ve seen several projects using products from the Aurora collection. Today, I’d like to share with your some outdoor themed cards I made recently using these products. 

You may have noticed that these cards do not really have greetings but instead a phrase that reflects an outdoor mentality. That leaves the occasion for the card up to you! You could easily add a “happy birthday”, “happy Father’s Day” or other sentiment to reflect any occasion. Or just add your personal note on the inside to let an outdoor lover know that you are thinking of them.

All of the stamping on these projects is from the Aurora – Scrapbooking Stamp Setand Thin Cut Set. Although these stamps can be used to make beautiful die-cut embellishments for your pages, as you can see they are versatile enough to work on cards too. 

Here’s a closer look at these cards along with a few notes about the techniques used.

Each of these cards has a single die-cut piece stamped with a coordinating image. Because our stamps and blocks are clear acrylic, you can see through them to place the image. To get the best transfer of ink, place the foam that is included with every stamp set under the paper before you stamp.  

The splatters on the tag were added using Sapphire ink. To get this look, squeeze your ink pad so that some ink remains on the inside lid. Then use a wet brush to pick up the ink. Tap the brush on your finger above the paper where you want the drops to be.

In addition to splatters using the technique from the first card, I distressed the edges of several of the papers with my scissors. Doing this with closed scissors keeps tearing to a minimum.

The trees in the mist on this card were created with second and third generation stamping. To get this look, ink the stamp up with Evergreen ink. After stamping, stamp again to create a lighter tree (2nd generation) and a thrid time for an even lighter tree (3rd generation) before inking the stamp up again.

The sky and trees on this card were stamped with a single stamp. You could cut the stamp — seriously, I cut my stamps all the time — to stamp them separately. However, I wanted to make sure it lined up correctly, so I just inked the sky off the edge of the Sapphire ink pad and the trees off the edge of the Evergreen ink pad. Then I was able to stamp both colors at one time.

This final card uses the Rock & Roll stamping technique. To achieve this look, ink the stamp with Evergreen ink. Then gently roll the edges of the stamp on the Sapphire ink pad before stamping on the die-cut.

Products used on these cards:

Aurora Paper Packet (X7256B)

Aurora – Scrapbooking Stamp + Thin Cuts (Z3711)

Aurora Acrylic Shapes (X7256E)

Cardstock (Peacock, Sapphire, Sage, Charcoal & White Daisy)

Ink Pads (Charcoal, Sapphire, Evergreen & Peacock)

See all of the Aurora products>>

I hope these cards encourage you to try new distressing or stamping techniques.

Keep Creating,

Rebecca
Posted on

Eagle Ridge Ranch Memories using Aurora Scrapbooking Workshop

I love the pages I made with the Aurora Scrapbooking Workshop. In this post, I’ll show you my the modifications I made to these pages and how I finished them off with my photos from our trip to a ranch in Idaho a couple years ago. 

One thing I LOVE about these workshops is that you can assemble them exactly like the samples, tweak to fit your pictures or use the pieces to completely do your own thing. I’m a “tweaker”. Usually, I change them up to add more pictures. As you’ll see when you look at my pages, I was able to fit a lot more photos without loosing the integrity of the designs. The samples for these pages had 14 photos, but my completed pages have 38! This was accomplished with minor changes to the pages and adding Flip Flaps andPocket Plusprotectors.You can see them all in the video at the end of this post. 

Before I show you the rest of my pages, let’s take a look at the kit. 

The contents include:

  • Aurora Paper Packet + Sticker Sheet (X7256S)
  • Additional cardstock sheets (1 Eggplant, 1 Peacock, 1 Sage)
  • Exclusive die-cut sheets
  • Aurora Acrylic Shapes (X7256E)
  • 4 Top-load 12″ Ă— 12″ Memory Protectors™ photo placeholders
  • Printed instructions

Here’s a look at the sample pages that are shown in the directions for the kit.

I love these kits because they give me ready-to-assemble pages, but with the freedom to make them my own. I only made minor changes to the Fresh Air layout at the top of this post including replacing the 3″ x 4″ photo in the top right with a 4″ x 6″ — I just couldn’t crop off that beautiful scene showing the mountain top where we stayed. Since the photo mats were cut from the included piece of Eggplant cardstock, this was an easy change. 

The second single page in the workshop has an interactive spinner element. As I was assembling this page, I struggled with how to give viewer of my album access to the spinner. I considered cutting the page protector, but instead moved so that the turner is just beyond the top edge of the paper so that it extends outside of the memory protector. I rearranged the pieces further to fit four photos on the page.

For the first two-page layout, I replaced combined two 3″ x 3″ photos on the left side into a 3″ x 6″. Once again, this change was easy since the photo mats are cut from a full sheet of Peacock cardstock. On the right side, I moved the photos and journaling spot over to make room for a series of photos of the horses we enjoyed visiting on our walks. There was plenty of the Peacock paper left to create a mat for these photos too.

For the last layout, I pretty much followed the workshop guide. However, for this whole set of pages I had additional photos that I wanted to include that did not fit. I accomplished that by adding several flip flaps and using pocket plus protectors between the pages. Here’s a quick video showing the completed set of pages. 

This kit includes the materials to make 6 scrapbook pages. In the kit you get a full color printed workshop guide with step-by-step directions. If you’d like more instruction on this kit, Close To My Heart is hosting a virtual workshop on June 23. Details coming soon on the Close To My Heart Facebook page

I hope this post has given you some ideas about modifying kits and patterns to fit your photos and memories. 

Keep creating!

Rebecca

Posted on

Jack: Perfect for your “Little Man” and your “Big Man” as well!

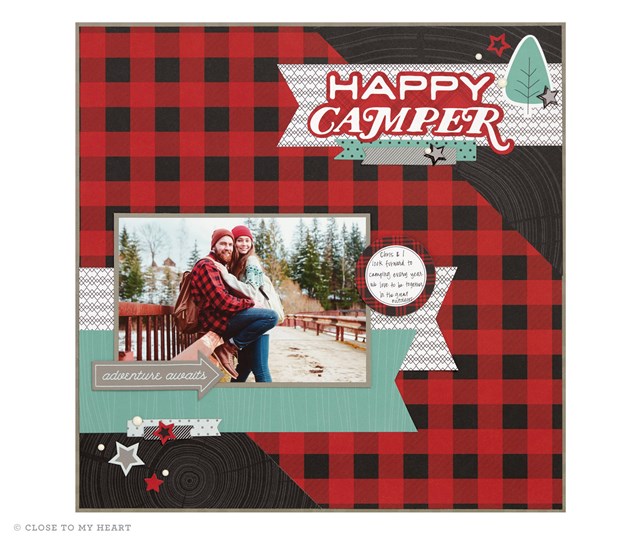
Much of the Close To My Heart marketing for theJack paper collection centers around the theme of “Little Man”. Although these words appear on the stickers and pocket cards, the outdoor prints of this paper is really not childish and is totally appropriate for your “Big Man” as well.

The layout above from the Close To My Heart Art Studio really shows off the beautiful prints in these papers. You’ll find bold plaids, wood grains, tree growth rings and a stitched design. There is also this fun bearded man print! Isn’t that awesome!

Since it is my Collection of the Month for August, when you order the Jack Scrapbooking Workshop Your Way (or a total of $26.95 from pages 34-43 in the Seasonal Expressions 2 Idea Book) from me, I’ll add theToday Stamp Set(M1172) to your order for free! (Email your order to me to take advantage of this offer.)

This workshop includes the following coordinating items:

Jack Paper Pack(12 double sided sheets of printed cardstock)

Jack Complements (stickers and chipboard pieces)

Black & White Dots

Whisper Thick Twine (10 yards)

– 4 sheets of solid cardstock (1 Juniper, 2 Whisper and 1 White Daisy)

On my Workshop Resource page, you can print directions to these products to make the these three 2-page layouts.

Your workshop also includes two sheets of Picture My Life pocket scrapbooking cards. The same designs are on the front and back, but one side is portrait and the other landscape. You can use these directly on your pages or put them in pocket memory protectors.

The workshop guide also includes details on how to make 9 cards (3 of each design) using your left over paper!

To make these cards, you will need these additional supplies:Jack Cardmaking Stamp + Thin Cuts, Ink Pads (Archival Black, Juniper and Ruby), White Cards and Envelopes and adhesives.

If you have any questions about this collection or how to get thefree stamp set, please just let me know.

Keep creating!

Rebecca