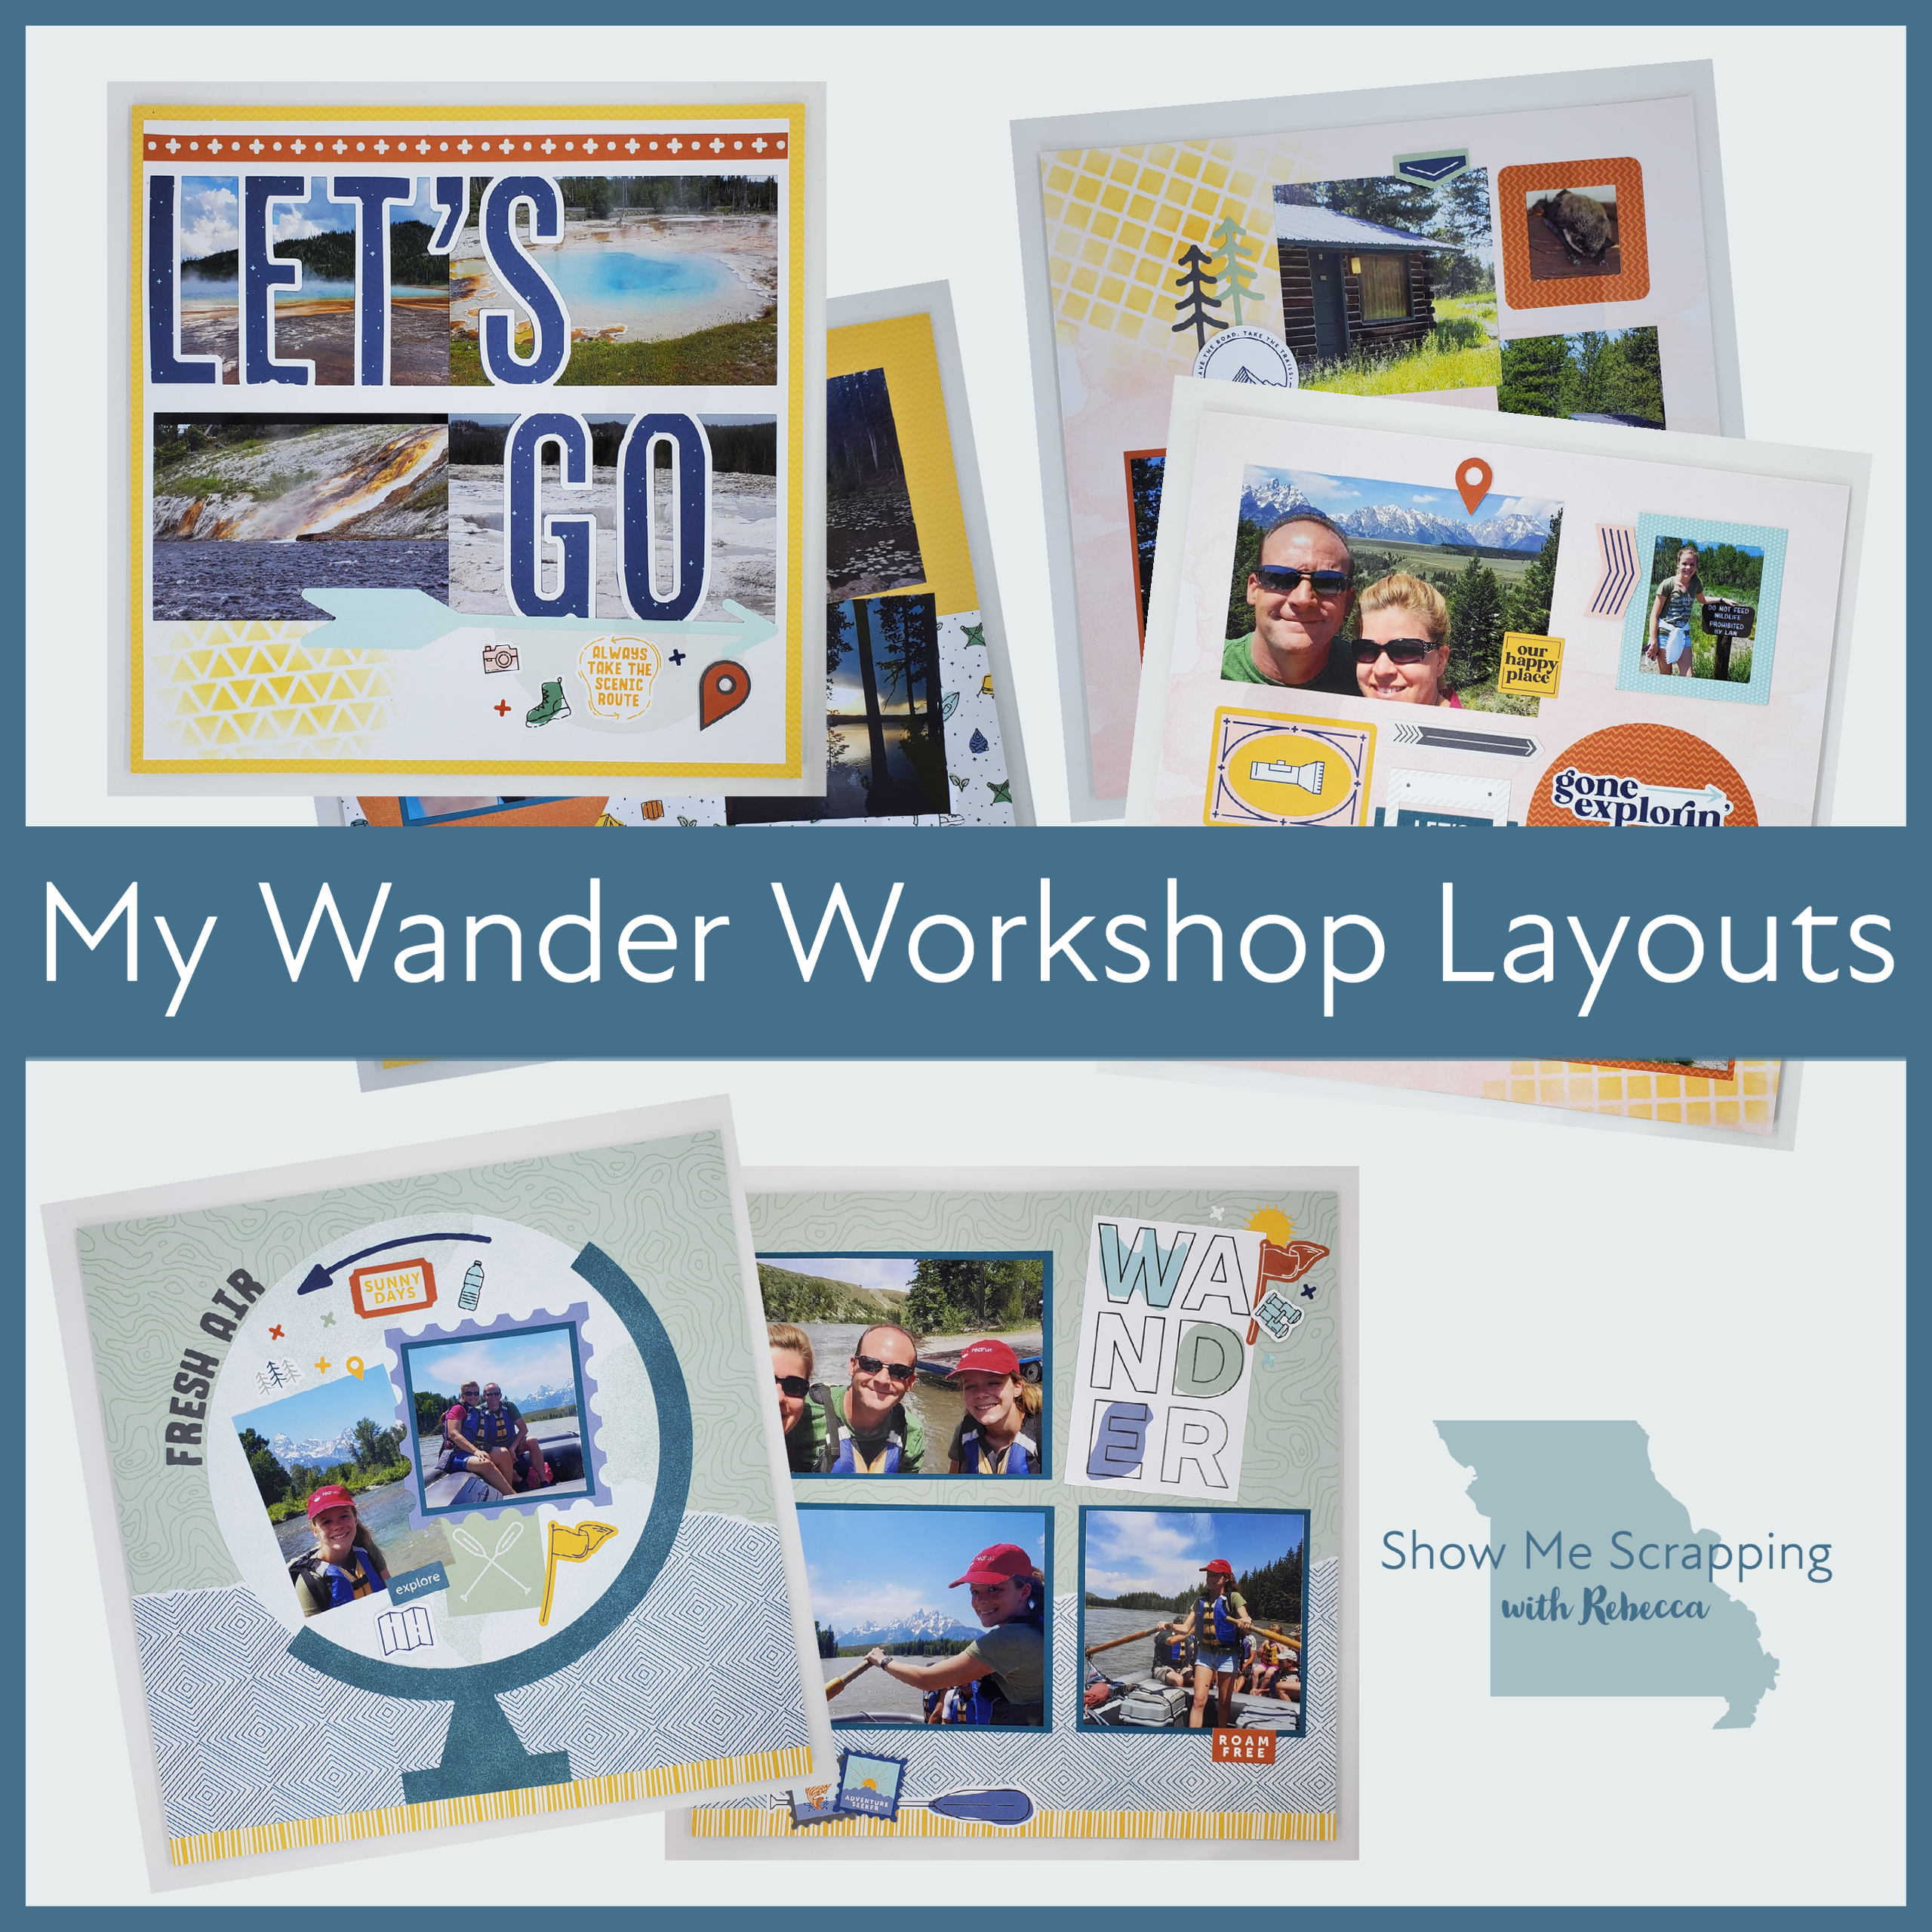
I love the pages I made with the Wander Scrapbooking Workshop. In this post, I’ll show you my the modifications I made to these pages and how I finished them off with my photos from our trip a few years ago — it seems like yesterday, but these photos are from way back in 2017.
One thing I LOVE about these workshops is that you can assemble them exactly like the samples, tweak to fit your pictures or use the pieces to completely do your own thing. I’m a “tweaker”. My layouts are 80-90% like the samples, but I wait until I have my photos to nail everything down. Most often, I rearrange the pieces to fit an extra photo or two. Because of our simple color coordination, I can easily make additional photo mats from cardstock.
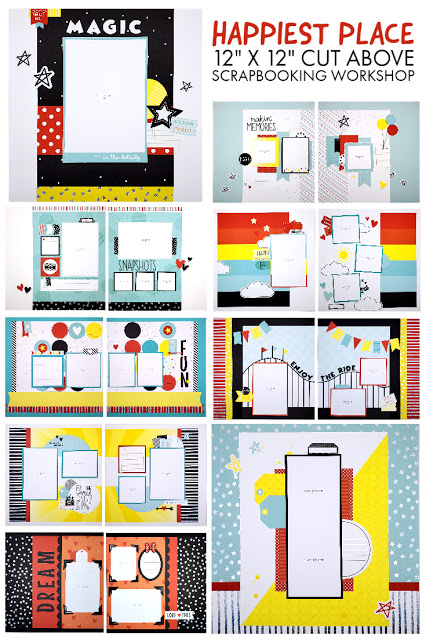
In case you missed it, all of the products in our popular Happiest Place collection are on sale for 20% of through the end of July! This collection was first released last summer and it includes paper, embellishments, SVGs and an 8.5″ x 11″ Cut Above scrapbooking album kit. Using the FREE downloadable directions below plus a extra paper, you can transform this kit to make 16 beautiful 12″ x 12″ Disney-themed pages!
If you are a 12″ x 12″ scrapbooker like me, you may not have thought the Happiest Place kit was for you. But with a little extra paper, you can tweek this kit to make 16 beautiful Disney-themed pages!
I’m so excited about this kit! The Cut Above page designs are perfect for 8.5″ x 11″ albums. Gut since all of my albums are 12′ x 12″, I added added base pages, the beautiful silver trimmed Coordinating cardstock plus a few extra pieces of solid cardstock to make these full size layouts.
I kept a lot of the features that make our Cut Above workshops so great like printed papers, stickers and die-cuts that are labeled by layout number. Each of my layout uses the pieces that go with the cooresponding 8.5″ x 11″ layout. This means you can sort the pieces that come in the kit and follow my cutting directions to add additional pieces to each of your stacks. Once everything is cut, use the assembly guide to create each 12″ x 12″ layout.
Here’s a closer look at the completed pages:
The kit includes several Flap Flaps. If you have not used these before you will fall in love. The guide that comes in the kit includes directions for placing them on your finished pages. You can follow those steps even if you make the 12″ x 12″ pages. I did use a few of the pieces shown in the flip flaps when I redesigned the pages, but that just leaves more room for your photos — we always have more photos don’t we?
Speaking of more photos, even though these pages have more area thatn the originals, I did not add additional photos. I wanted to keep the directions simple, but there is certainly room on most of the pages for another photo or two. You will have extra cardstock left if you want to cut mats for those pictures.
*The Cut Above Workshop and Coordinating Cardstock are included in the Happiest Place Product bundle which is 20% off retail during July. So check it out because if you can use the additional items in the bundle (most likely you can), that is the better deal.
I’m so excited to add these layouts to my albums. We are definitely a Disney family and I have a couple trips that I have not finished scrapbooking. However, I didn’t want to delay getting these directions to you, so I will be adding my photos later. A great thing about this kit is that it includes white photo place holders so you can add your photos later. I like to trim my photos an extra 1/4″ smaller so that the place holder becomes a photo mat.
I love the pages I made with the Aurora Scrapbooking Workshop. In this post, I’ll show you my the modifications I made to these pages and how I finished them off with my photos from our trip to a ranch in Idaho a couple years ago.
One thing I LOVE about these workshops is that you can assemble them exactly like the samples, tweak to fit your pictures or use the pieces to completely do your own thing. I’m a “tweaker”. Usually, I change them up to add more pictures. As you’ll see when you look at my pages, I was able to fit a lot more photos without loosing the integrity of the designs. The samples for these pages had 14 photos, but my completed pages have 38! This was accomplished with minor changes to the pages and adding Flip Flaps andPocket Plusprotectors.You can see them all in the video at the end of this post.
Before I show you the rest of my pages, let’s take a look at the kit.
Here’s a look at the sample pages that are shown in the directions for the kit.
I love these kits because they give me ready-to-assemble pages, but with the freedom to make them my own. I only made minor changes to the Fresh Air layout at the top of this post including replacing the 3″ x 4″ photo in the top right with a 4″ x 6″ — I just couldn’t crop off that beautiful scene showing the mountain top where we stayed. Since the photo mats were cut from the included piece of Eggplant cardstock, this was an easy change.
The second single page in the workshop has an interactive spinner element. As I was assembling this page, I struggled with how to give viewer of my album access to the spinner. I considered cutting the page protector, but instead moved so that the turner is just beyond the top edge of the paper so that it extends outside of the memory protector. I rearranged the pieces further to fit four photos on the page.
For the first two-page layout, I replaced combined two 3″ x 3″ photos on the left side into a 3″ x 6″. Once again, this change was easy since the photo mats are cut from a full sheet of Peacock cardstock. On the right side, I moved the photos and journaling spot over to make room for a series of photos of the horses we enjoyed visiting on our walks. There was plenty of the Peacock paper left to create a mat for these photos too.
For the last layout, I pretty much followed the workshop guide. However, for this whole set of pages I had additional photos that I wanted to include that did not fit. I accomplished that by adding several flip flaps and using pocket plus protectors between the pages. Here’s a quick video showing the completed set of pages.
This kit includes the materials to make 6 scrapbook pages. In the kit you get a full color printed workshop guide with step-by-step directions. If you’d like more instruction on this kit, Close To My Heart is hosting a virtual workshop on June 23. Details coming soon on the Close To My Heart Facebook page.
I hope this post has given you some ideas about modifying kits and patterns to fit your photos and memories.
TheCraft with Heart scrapbooking subscription program is a fun way to get a kit for two layouts delivered to your door automatically each month.
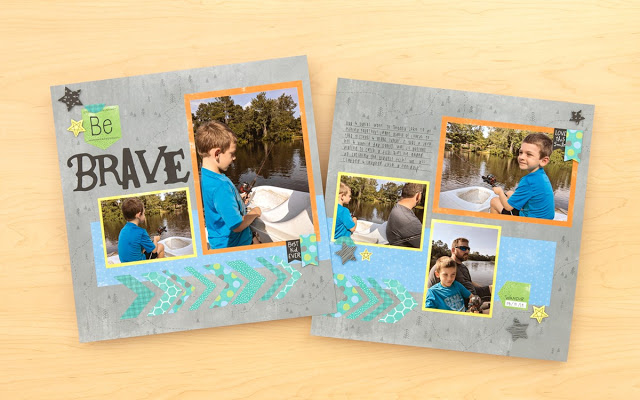
The two layouts for May (shown below) coordinate with the Aurora collection that is now available in our new May/June catalog. With titles “Reach for the Stars” and “Be Brave” these pages are perfect to celebrate heroes (or heroes in training) in your life. During the last few months, so many have stepped up and done extraordinary things. Snap some pictures to preserve these memories!
Not only are the Craft With Heart layouts beautiful, they are also super fast to assemble. Thanks to beautiful pre-printed base pages, paper pieces, die-cuts and stickers you’ll have completed pages in minutes.
There is NO cutting, NO stamping, NO big decisions!
These layouts are ONLY AVAILABLE available through our subscription program. If you’d like to get these beautiful, easy layouts, follow these three steps:
In case you missed it in the chart above, in addition to the lower kit prices there is significant savings on the kits themselves plus shipping and handling when you choose the 4-month or 12-month options.
4-Month Plan Savings
First you save 10% on every it. In addition, under this option you only receive (and pay for) a shipment every 4 months. This means that over the course of a year, you save a total of $93.15.
12-month Plan Savings
When you pay for 12 months at a time, you save 20% off each kit. In addition, there is NO SHIPPING and handling charge! This saves you a total of $138.48 over the course of a year. You also get a coupon for 30 free photo prints from Persnickety Prints! It really is the best deal.
Also when you choose the 4-month or 12-month during May through August, your first shipment includes the layouts for all four months. Below are pictures of the other six layouts you will receive in your box. Note that if you love the first two, you need to check out the Stitched Togetherpaper collection.
BONUS TIME!
If you are ready to subscribe, I am ready to give you some bonus products! Everyone who subscribes under the 4-month or annual option between today and May 31 will receive a few bonus items to help you complete your layouts. When you subscribe on the 4-month plan, I’ll send you a Black Journaling Pen (.03) AND a Close To My Heart Adhesive Runner! Since each kit is a complete kit that is ready to assemble, with these additions, you will have everything you need to get started.
When you subscribe on the 12-month plan, I’ll send you the Journaling Pen, and Adhesive Runner, plus a pack of 3-D Foam Dots! I love using these double-sided adhesive to pop up elements on my layout. While these are not technically essential, these are always handy when I’m scrapbooking to add dimension to my projects.
Remember these bonus items are only when you subscribe before the end of May 2020! For more information watch the unboxing video below.
Mark your calendards for the St. Louis Area Home School Craft Fair. It is Saturday, November 10 from 10 am to 4 pm at West County Assembly of God (13431 N. Outer 40 Rd, Chesterfield, MO).
I’m bringing some handmade cards and scrapbook pages. There will be lots of other handmade items available for purchase: jewelry, knitted/crocheted items, wood burning plaques, sock animals, baked goods, wreaths, tote bags, wooden toys, headbands, birdhouses, ornaments and much more.
So come on by to start your Christmas shopping and support area home schoolers. If you do, please stop by my booth to say “Hi!”. For more information go to www.craftfair2012.com.