In case you missed it, all of the products in our popular Happiest Place collection are on sale for 20% of through the end of July! This collection was first released last summer and it includes paper, embellishments, SVGs and an 8.5″ x 11″ Cut Above scrapbooking album kit. Using the FREE downloadable directions below plus a extra paper, you can transform this kit to make 16 beautiful 12″ x 12″ Disney-themed pages!
I just added six new kits to my online store! The first four kits are made with the More Magical papers and are great for Disney memories.
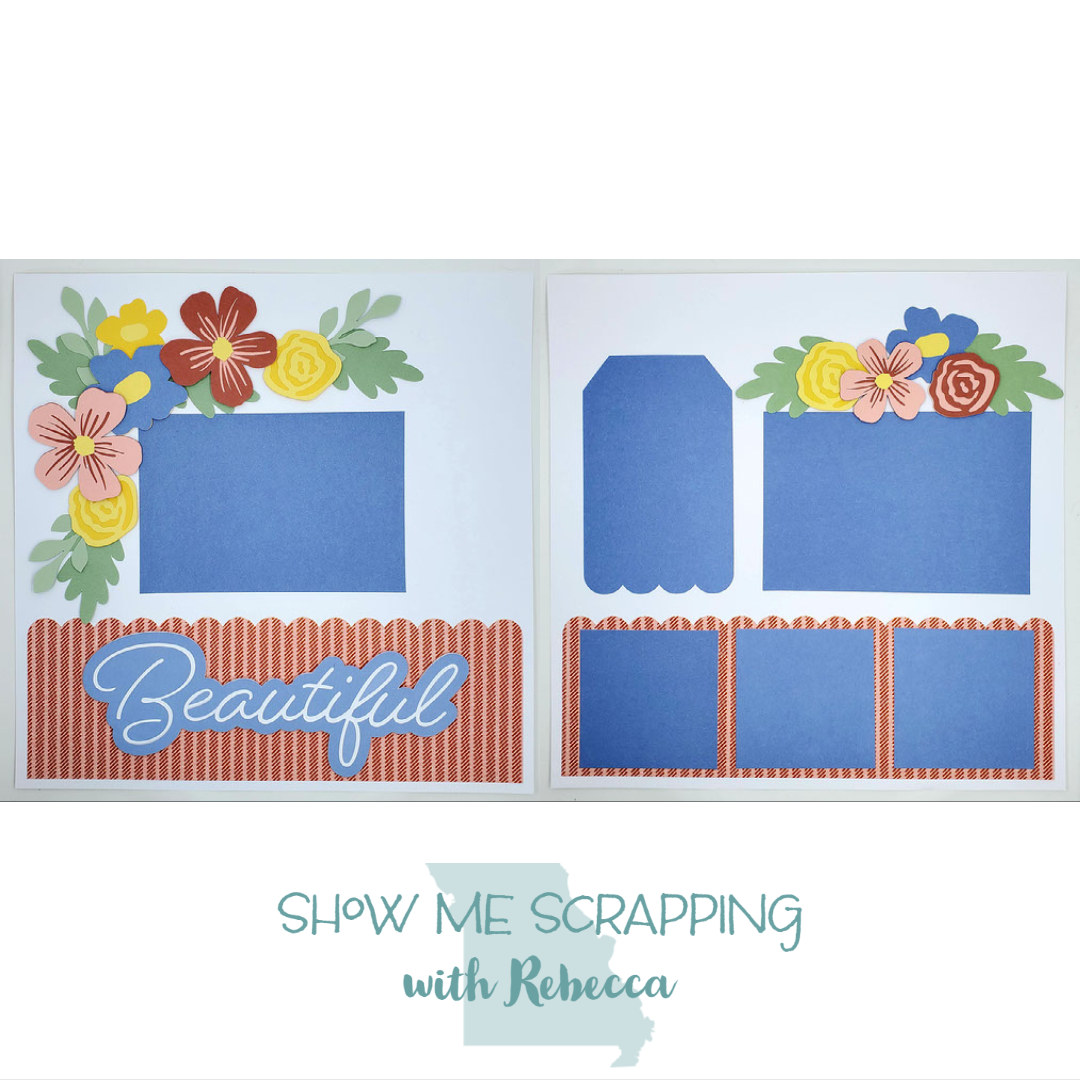
Those of you who attend the crop at First Baptist Church in Arnold will recognize the last two layouts. Each month, I bring a project and these are the layouts we made in November and January and feature the beautiful Serenity and Happiness Lives Here paper collections.
Each of these kits include the base pages, papers and any die cuts or embellishments shown on the samples. None of the papers are attached giving you the flexibility to rearrange the pieces to fit your photos. All of these layouts are available to order on this website under the “Page Kits” tab. Start shopping>>
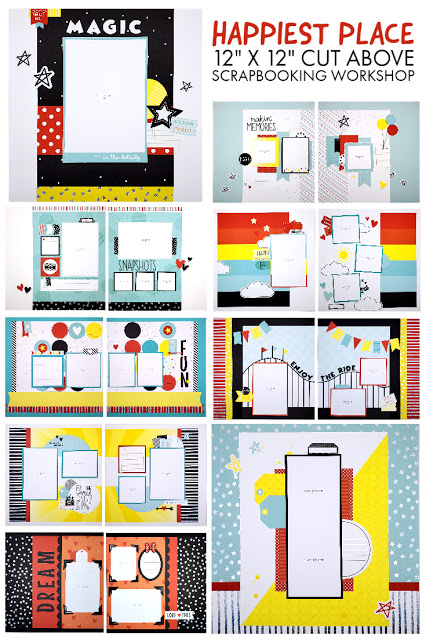
If you are a 12″ x 12″ scrapbooker like me, you may not have thought the Happiest Place kit was for you. But with a little extra paper, you can tweek this kit to make 16 beautiful Disney-themed pages!
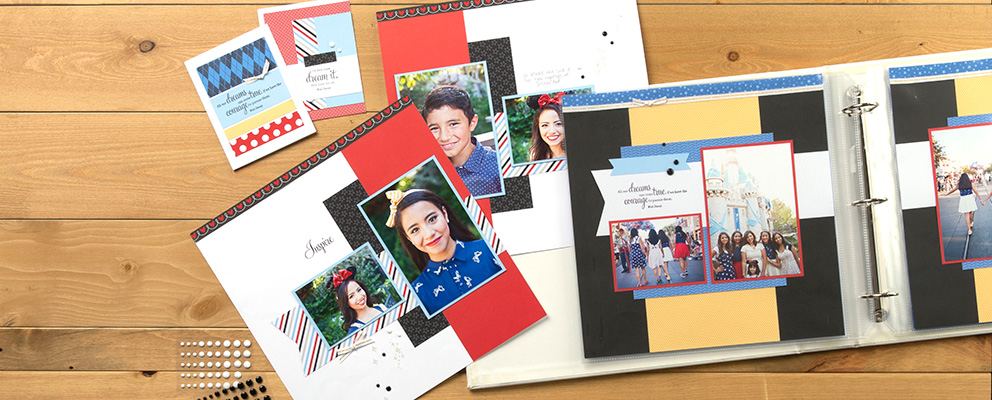
I’m so excited about this kit! The Cut Above page designs are perfect for 8.5″ x 11″ albums. Gut since all of my albums are 12′ x 12″, I added added base pages, the beautiful silver trimmed Coordinating cardstock plus a few extra pieces of solid cardstock to make these full size layouts.
I kept a lot of the features that make our Cut Above workshops so great like printed papers, stickers and die-cuts that are labeled by layout number. Each of my layout uses the pieces that go with the cooresponding 8.5″ x 11″ layout. This means you can sort the pieces that come in the kit and follow my cutting directions to add additional pieces to each of your stacks. Once everything is cut, use the assembly guide to create each 12″ x 12″ layout.
Here’s a closer look at the completed pages:
The kit includes several Flap Flaps. If you have not used these before you will fall in love. The guide that comes in the kit includes directions for placing them on your finished pages. You can follow those steps even if you make the 12″ x 12″ pages. I did use a few of the pieces shown in the flip flaps when I redesigned the pages, but that just leaves more room for your photos — we always have more photos don’t we?
Speaking of more photos, even though these pages have more area thatn the originals, I did not add additional photos. I wanted to keep the directions simple, but there is certainly room on most of the pages for another photo or two. You will have extra cardstock left if you want to cut mats for those pictures.
*The Cut Above Workshop and Coordinating Cardstock are included in the Happiest Place Product bundle which is 20% off retail during July. So check it out because if you can use the additional items in the bundle (most likely you can), that is the better deal.
I’m so excited to add these layouts to my albums. We are definitely a Disney family and I have a couple trips that I have not finished scrapbooking. However, I didn’t want to delay getting these directions to you, so I will be adding my photos later. A great thing about this kit is that it includes white photo place holders so you can add your photos later. I like to trim my photos an extra 1/4″ smaller so that the place holder becomes a photo mat.
Photos of the projects for the Happiest Place virtual events have been released. I’m sure you’ll love them as much as I do!
If you are a Disney fan like me, I’m sure you LOVE our new Happiest Place Collection! Last week, I posted the schedule for August workshops that will take place on the Close To My Heart Facebook page. That schedule includes a three-day event using the magical Happiest Place collection on August 26 – 28.
We now know what the cardmaking and scrapbooking projects will look like!
Cut Above Album (8/26)
The project for this session has already been revealed, but I’ll include it here so you can see all the projects we’ll be making during the 3-day event. We will be making a 16 page 8.5″ x 11″ album. The kit comes together quickly thanks to printed base pages, die-cuts and stickers.
Cardmaking Workshop (8/27)
During the second session, we’ll make 16 individual magical cards. Yes, I said SIXTEEN!! And there is such a variety of styles, patterns and sentiments! These cards lend themselves perfectly for birthday wishes, but they can be used for all other happy occasions. You could even use them as announcements or invitations for a trip to the Happiest Place!
At the virtual event, we will walk through the steps to create these cards, from cutting the papers to stamping to embellishing. Along the way, you’ll learn lots of card making tips and tricks!
Scrapbooking Workshop (8/28)
I can’t wait to make these nine pages and adding pictures from our last trip to Disney World! During final session, we’ll make a single page and four 2-page layouts.
Details
These FUN & FREE virtual craft event will happen each day starting a 5 pm CST August 26 – 28 on the Close To My Heart Facebook page. Note that Close To My Heart will have prize drawings during the event. Be sure to click “GOING” on the Event Page for a chance to win.
The Happiest Place products used for all of these projects are conveniently included in the Happiest Place Bundle (CC7209 or CC7211) at 20% off retail price during JULY only.
In this HUGE bundle you get so much! Once you finishe the event projects you will have supplies left over for a few more projects. Plus of course you’ll have the stamp and thin cuts to use forever. The Bundle includes:
Happiest Place Cut Above Layout Kit
Happiest Place Paper Packet + Sticker Sheet
Happiest Place Coordinating Cardstock
Happiest Place Acrylic Shapes
Happiest Place Stamp + Thin Cuts
To make all the projects during the event, you’ll need the following supplies:
Stamp Pads: Archival Black, Candy Apple, Glacier and Lemonade
Preserve the happiest of memories and create truly magical artwork with the exclusive collection, Happiest Place!
The Happiest Place collection includes a whole suite of coordinating products, including an extra-large paper packet with 12 patterned paper sheets! Your projects will shine thanks to silver glitter foil accents on coordinating stickers and cardstock sheets. Add in stamps, acrylic shapes, SVG’s, and complete album workhop, and you have the recipe for hours of unforgettable crafting fun!
Be sure to check out the Happiest Place Product Bundle, which includes several of the items in this collection at a 20% discount in July!
Paper Packet
The Happiest Place paper packet includes 12 sheets of duo-sided pattered paper. Each sheet includes an additional 1/2″ zip strip that lists the coordinating colors on one side and has a decorative design on the other. Let’s take a closer look at the papers!
You can get the paper pack with our without the coordinating sticker sheet. Don’t you love the silver glitter foil accents on the stickers?
Coordinating Cardstock
The cardstock pack gives you 12 more sheets of paper to work with in coordinating colors of Candy Apple, Glacier, Lemonade, White Daisy and Black. Half of these papers have silver foil stars or stripes on one side. This really extra accent really adds some pizzazz to your projects!
Acrylix Shapes
The Happiest Place Acrylic Shapes pack includes assorted matte black acrylic pieces that go along with the theme. The back side is shiny which means for each image (except for the words), you can choose matte or shiny!
Stamp Set and Thin Cuts
The Happiest Place stamp set is the perfect way to add more words, images and icons to your projects. With stamps you can make your own accents with any color you’d like. This stamp set is available alone or you can get it bundled with coordinating Thin Cuts. The blue shading in the image below shows you what thin cuts are included.
Digital Art
We also have two brand new sets of Digital Art: Titles and Designs. These collections include SVG files that you can upload to Cricut or other design software to add even more creativity to your Happiest Place projects! After downloading the images, you can manipulate them in a program like Cricut Design Space™. Resize it, remove layers, and much more! Each different color in the image indicates different layers that can be edited and cut individually with your chosen software and personal cutting machine.
I love digital art because I can cut it any size and out of any material that I choose. Wouldn’t one of these titles be perfect to cut from Heat Transfer Vinyl for the front of the album?
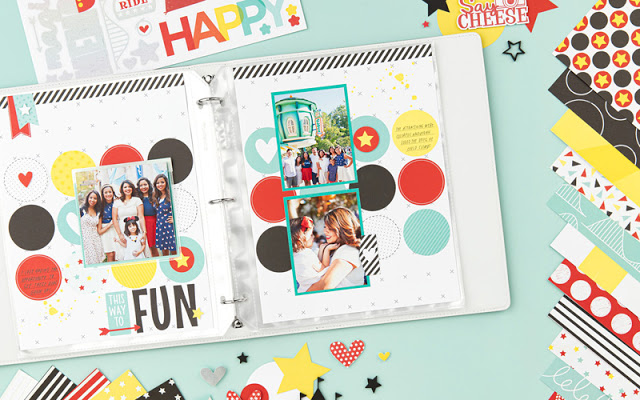
Cut Above Album
The Happiest Place Cut Above workshop makes sixteen 8.5″ x 11″ pages. The only thing you need to complete this kit is your favorite adhesives. This is thanks to base pages that are pre-printed with designs, cut paper, die-cut pieces and stickers. You also get a full color instruction guide so you know exactly how to finish your pages.
As I mentioned at the beginning of this post, the best value is to order the Happiest Place Bundle. You will get the Paper Packet + Sticker Sheet, Coordinating Cardstock, Acrylic Shapes, Stamp + Thin Cuts plus the Cut Above Layout Kit! It really is a wonderful assortment of products to unlock your creativity! It’s 20% off only in July 2020.
WOW! That’s a lot of products to celebrate your Happiest Place isn’t it?
On August 26 – 28, Close To My Heart will be hosting virtual events using the products in the Happiest Place bundle. You can see samples of the projects, supply lists and more information on the events page. Be sure to order your bundle in July to get the 20% off dicount.
I’ve created a few other Happiest Place projects that I’ll share with you over the next few days. Stay tuned!
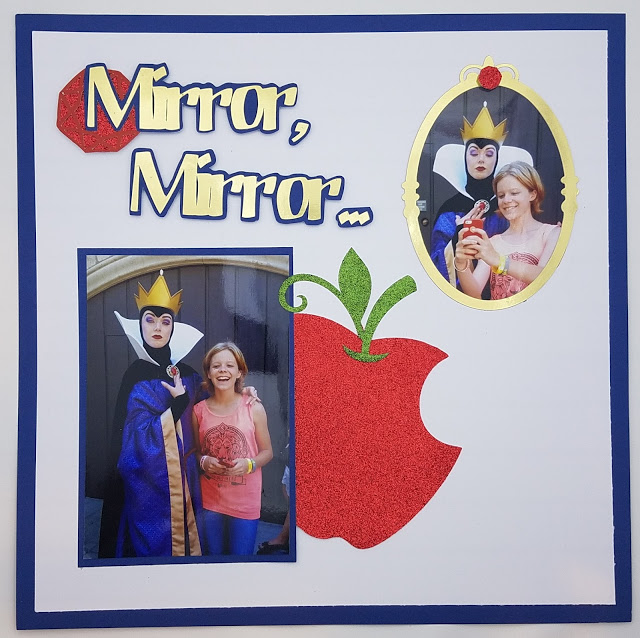
Anyone else missing getting out and going places? Today, I was thinking of one of my favorite places to visit and thought I’d share this layout from our trip to Disneyland a few years ago.
These pictures bring back the memories of this trip. My daughter was totally into taking selfies at the time and collected them with each character she met on the trip. The exchange happening in these pictures was priceless. The Evil Queen, being from Once Upon a Time, had never seen a cell phone of course and was very interested in the miniature “mirror”. It was a moment of Disney magic that still makes me laugh when I see these photos.
To make this layout special enough for these special photos, I used red and green glitter paper (retired) and gold foil paper. I love how well these specialty papers cut on the Cricut. Be sure to use the custom material settings to get the best results.
Want to make this project? Click the link below to open the Design Space file.
I’m so excited that we brought back the popular Magical paper collection. As an avid Disney lover, this was one of my favorite collections and since it retired, I’ve taken a couple trips to the parks so I’m glad to have it back to scrap those pictures. Since we have updated the colors, this paper collection is called “More Magical” and it is available through September 30 (or while supplies last).
Today, I wanted to tell you a little more about this bundle of products. These papers plus the exclusive coordinating stamp set (CC8183 Dreams) can be used for lots of projects. But you are like me and like to have a little help getting started, you can download a workshop guide to get complete directions for creating four 2-page layouts and eight cards. You can make the pages, the cards or both!
To make these projects, you’ll need the Dreams Stamp Set (CC8183), More Magical Paper Packet (CC8181), 12 additional sheets of cardstock (3 White, 2 Black, 3 Bluebird, 2 Candy Apple and 2 Carolina), White & Gold Ribbon (Z3189), Black & White Dots (Z3314) and 8 cards and envelopes.
If a few of these color names don’t sound familiar, that’s because Bluebird, Candy Apple and Carolina are new colors that are not available other than in through the More Magical special until September 1!
If you are not familiar with the Close To My Heart workshop guides, you need to check it out to see how through they are. Each guide includes a complete cutting diagram for each sheet of paper.
The guide also has a diagram and step by step assembly directions for each project.
Regardless of your papercrafting experience, the guide will ensure that your pages will be beautiful and look professionally made! Of course, if you have any questions along the way, I’m here to help you figure it out.
Here’s a closer look at the 4 layouts in the workshop:
And here’s a look at the cards. You’ll have enough paper and other supplies to make four each of these two designs.
Ready to get your hands on this workshop? I have two options for you to choose between. Don’t wait to order, this workshop is only available through September 30!
Option #1 – Cut your own papers: Order the workshop directly from my Close To My Heart website and have it delivered to your door. Print the guide for directions to cut the papers and assemble the projects. The workshop is available through September 30. Be sure to add Black and Mink ink pads to your order if you don’t already have them. Order now>
Option #2 – Let me do the cutting: Have your kit make a quick stop at my house and I’ll cut your papers! Your kit will also include a full color print of the workshop guide. Order now>>
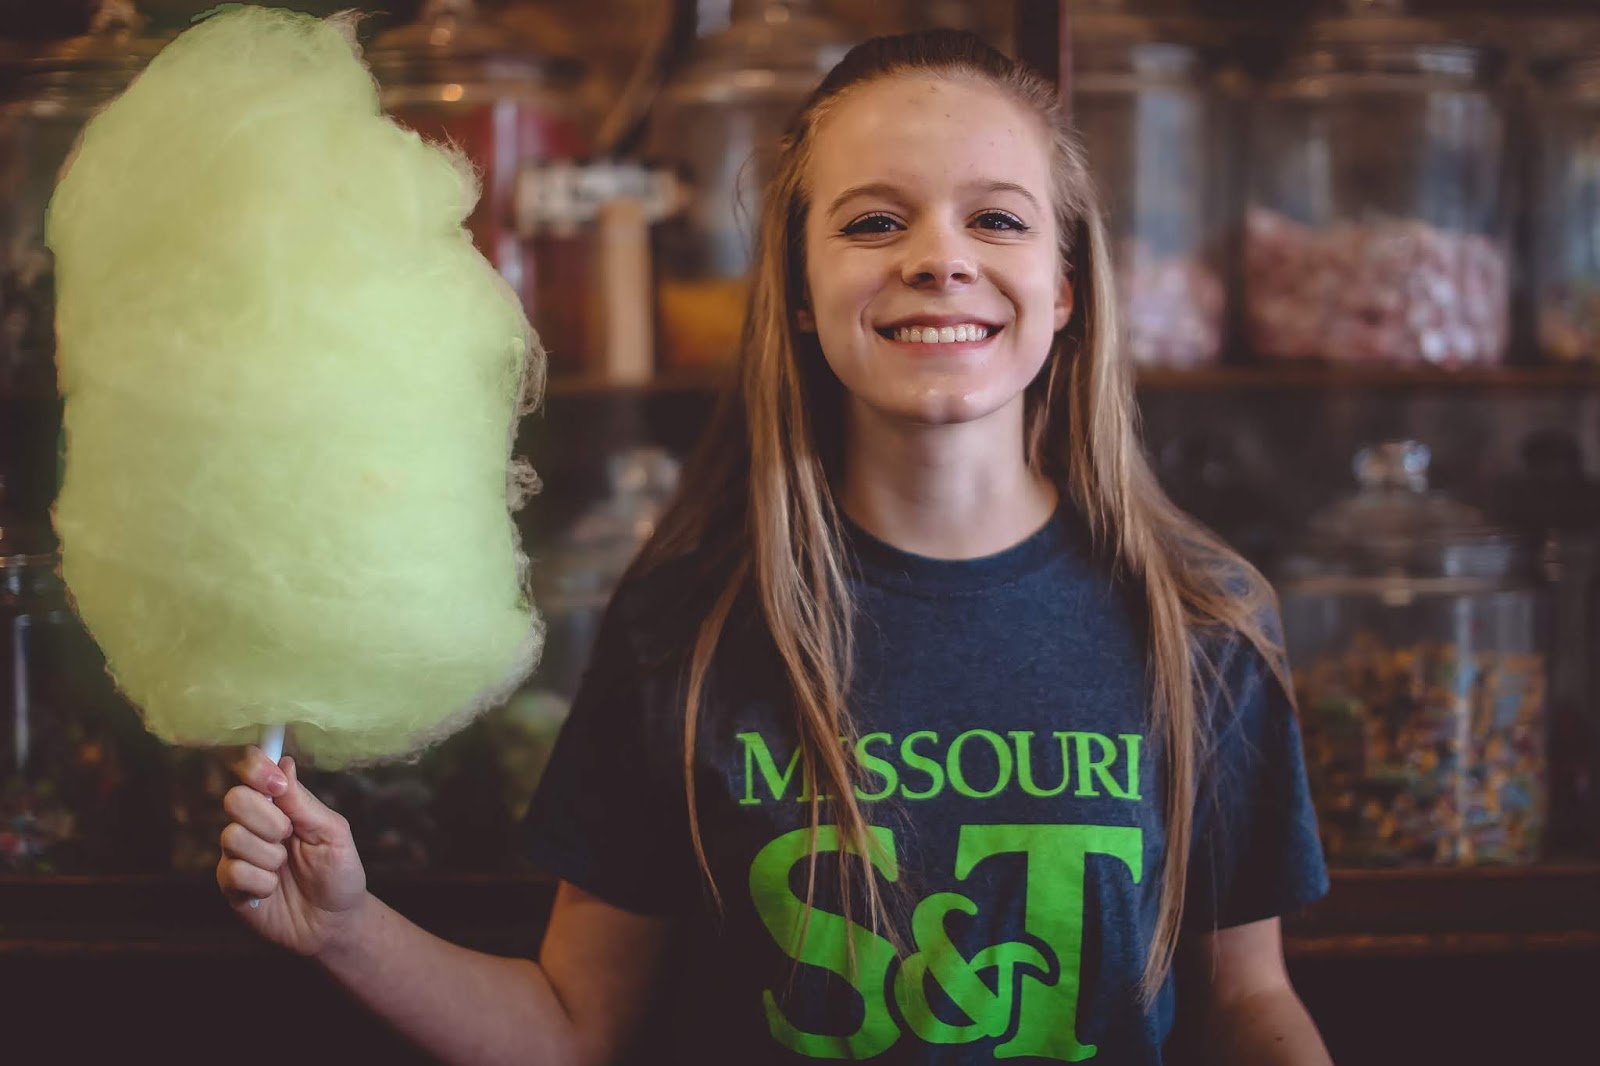
August is a month of change for my family with my only daughter headed off to college. She’s excited that in less than two weeks she’ll officially be a Missouri S&T Minor. I’m excited for her, but also know that I’ll miss her a lot!
Photo by Ashleigh Murphy of Anew Market Creations
August also a lot happening at Close To My Heart. We have more specials this month than we ever had. You’ll want to take advantage of all of this. Keep reading for more information about each of these fun specials.
I’m very, very, very excited about our new scrapbooking subscription program. (Did I mention I’m excited?) Through this program, you will receive two Cut Above (i.e. fast, yet beautiful) 2-page layouts in your mail for each month of the year.
The full program will roll out in September, but the annual payment option is now open! When you subscribe in August, you’ll be shipped all EIGHT layouts for the first 4 months (September – December) right away. You’ll get another set of 8 each upcoming January, May and September. Learn more or subscribe>>
If these papers looks familiar, you are not mistaken. We’ve brought back the popular Magical paper from a few years ago with some updated colors. For this specials, we’ve added an exclusive stamp set and embellishments to make a coordinating set especially for your “magical” memories. Items are available individually or you can save 25% when you buy a bundle. Learn more or order More Magical>>
Preserve the best of your child’s school years with the You’ve Got Class collection. This unique workshop includes paper and other supplies to make 14 single page scrapbook layouts. You also get a set of our True Fit Folios which can be added to your albums to provide a place for keepsakes! Learn more or order You’ve got Class>>
The Here’s to You collection features four exclusive stamp sets designed to make elegant cards and layouts for your special occasions. A free download includes directions for a one-page layout and seven cards.Learn more or order Here’s To You>>
This is the stamp we’ve been waiting for! It is filled with images to celebrate our fun hobbies. You can get this stamp set for just $5 when you have $50 in your cart! See the full stamp>>
Whew, that was a lot to share with you. I love that Close To My Heart is creating these bundles of products to make it faster and easier for you to get some projects done. All of the More Magical, You’ve Got Class and Here’s to you projects shown above are from free downloadable workshop guides. If you’d like the pdf of these, just shoot me an email to request them. I’d also be happy to send you the recipe for the “Do What You Love” card featuring the Stamp of the Month.
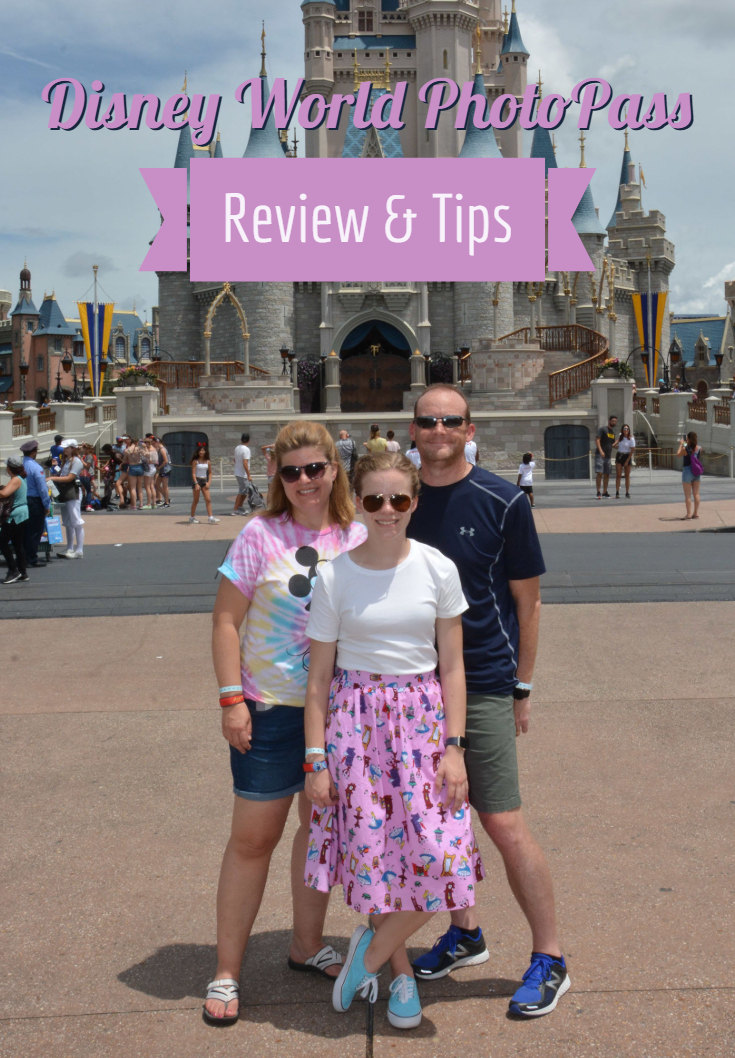
Last week, we spent three jam packed days visiting all four parks at Disney World in Orlando, Florida. Although we have been there several times, this trip was special because our daughter graduated from High School in May and will be heading off to college in August. Because family vacations may look different in the future, I wanted to make sure that we had lots of pictures to remember this trip.
As an avid scrapbooker, I always put my phone to good use taking snap shots and selfies. However, I wanted to make sure we got a few pictures of the whole family and didn’t want to have to ask strangers to take them. The Disney PhotoPass Service and Memory Maker seemed like a good solution. In this post, I’ll summarize how the plan works and give you tips for making the most of the service. While I have done my research and believe this to be accurate as of July 2018, be sure to review the current details on Disney’s website before purchasing the plan.
The first time I used Disney PhotoPass was almost 10 years ago. In October 2009, the whole Brown clan traveled to Orlando together and spent a week “doing Disney”. This included 15 people in 4 families and we purchased the package together. I was thrilled with the quality and quantity of photos we had to remember this amazing trip.
Although the PhotoPass system has changed a bit since 2009, the end result is still a great variety of pictures to document the fun days at Disney World.
WHAT IS PHOTOPASS AND MEMORY MAKER?
Here are a few FAQs that help explain the basics of how the system works. (The information presented here is based on my understand of the current program as of July 2018. Please refer to the Disney website for complete details.)
Q: What is PhotoPass?
A: PhotoPass is a free photo taking service throughout the Walt Disney World Resort. You can get photos taken at many iconic locations, on rides, at restaurants and even at a studio at Disney Springs.
Intense! Can you tell we are competitive?
Q: How can I view or purchase my photos?
A: Each time your photo is taken, you will either receive a photo card from the photographer or have your Magic Band or park ticket scanned. To view or order prints of your pictures, you will need to set up an account on the Disney website and link the photo cards, Magic Band or park ticket. Once your photos are linked, you can purchase downloads, prints and other photo products like calendars and mugs.
Q: What is Memory Maker and is it worth the price?
A: Memory Maker can be purchased to allow you to download all of the PhotoPass photos from your trip. The current cost when purchased in advance is $169. The current cost of a single download is $16.95, so this is a great option if you are planning to purchase 10 or more images. The price for prints is also reduced significantly when you purchase the Memory Maker. For example, a single 5″x7″ print is regularly $18.95 but just $0.95 when you have Memory Maker.
Q: Can I get free downloads?
A: Disney VISA card holders can receive free downloads of photos taken at the special character experiences at Epcot and Disney Hollywood Studios. Even though we bought Memory Makers and thus didn’t need the free downloads, we visited both of these locations. Since these are exclusive to card members, the lines were very short — basically walk up — and offer unique photo experiences. At Epcot, our pictures included both Mickey and Pluto and at Hollywood Studios, we had an exclusive meeting with Kylo Ren! We really enjoyed this perk.
Certain annual pass holders also receive free downloads.
December 2019 Update: We took a quick trip to Disney World over Christmas. We did not purchase PhotoPass, but did get photos taken at the Epcot Visa character experience. After a quick scan of my magic band, I was able to see all the photos taken at this location in the App on my phone. Once I was home, I was able to download all of them for free! Great perk of having a Disney Visa.
MEMORY MAKER TIPS
Because Memory Maker is a pretty steep investment, I’d suggest you educate yourself before your trip to make sure you get as much out of it as possible. You will definitely want to review the information on the Disney website carefully. I’d also like to offer up these tips to help you make the most of your Memory Maker package.
1 – Purchase Memory Maker at least three days prior to your first day at Walt Disney World to save $30. However, be aware that the purchase is nonrefundable, so don’t purchase until your plans are definite.
2 – Be sure everyone in your group is on the Family & Friends List of the Memory Maker owner in My Disney Experience. Only the owner can download images, but all of the photos linked to the tickets and Magic Bands of the Family and Friends will be available to the owner who can then share them with the group. This is especially important if the group will be splitting up for some of the time at Disney World.
3 – Set the expectations of your kids (and husband?) that you will be stopping often for photos. The photographers know how to get good pictures for the location they are in and can complete a mini-photo shoot relatively quickly. Fortunately for this trip, my daughter was excited to get some fun pictures, but a few years ago I may have had to bribe her with the promise of a Mickey ice cream bar to get smiles for the pictures
4 – Keep your eyes out for roaming Disney photographers. Even on busy days like we had the week of July 4, they are readily available near landmarks like Cinderella’s Castle in Magic Kingdom. But you can find them throughout the parks as well. If there is a line at one photographer, look around there is probably another nearby.
5 – Do what the photographers ask you to do, even if it doesn’t make sense. Certain photos will become “Magic Shots” with titles or animated characters when they appear in your account. So be prepared to hold out a hand or point or act cold or blow a kiss. Just play along with the fun.
6 – Look for the photo kiosks as you exit rides. Some of the rides automatically detect the newer Magic Bands, but otherwise you need to scan your Magic Band or ticket to collect these action shots.
7 – At greetings, relax and interact with the characters instead of posing immediately. Encourage your kids to talk with and hug on their favorite Disney friends. Not only is it fun, but the photographers will often snap candid pictures which will likely become favorites. We love seeing the personality of Mickey and his friends, as well as the princesses’ come through.
8 – Don’t be afraid to make special requests. We found the photographers very willing to take individual pictures or pictures of just the girls (my daughter took a friend) or just my husband and I. Of course, if others are waiting you’ll want to keep it brief, but otherwise if you want a picture of yourself standing in front of the castle with your arms in the air, just ask!
9 – Don’t forget to download your images! It’s easy to let this slide when you get home and step back into non-vacation mode, but the images are only available for 45 days on the Disney website so set a reminder on your calendar so you don’t miss out!
SUMMARY
So, would I recommend Memory Maker to friends headed to Disney World? Generally, yes but it would depend on a few things including the length of their trip, the size of their family or group and of course their budget.
We had over 300 pictures taken on our three days in the parks (plus breakfast at ‘Ohana’s on day 4 before we started the drive home). In addition to pictures of us, we also received about 40 bonus pictures of Disney characters and park scenes. I’m not sure that I’ll use them but they are included with the package.
So if you are like me hoping to get a number of great family shots of a special occasion, I’d recommend considering investing in Memory Maker. If instead, you anticipate downloading just a handful of pictures, I’d say skip the Memory Maker purchase and pay to download individual images.
If this information has been helpful or if you have questions, please let me know if the comments below. If you have used Disney’s PhotoPass or Memory Maker, please tell me your tips.
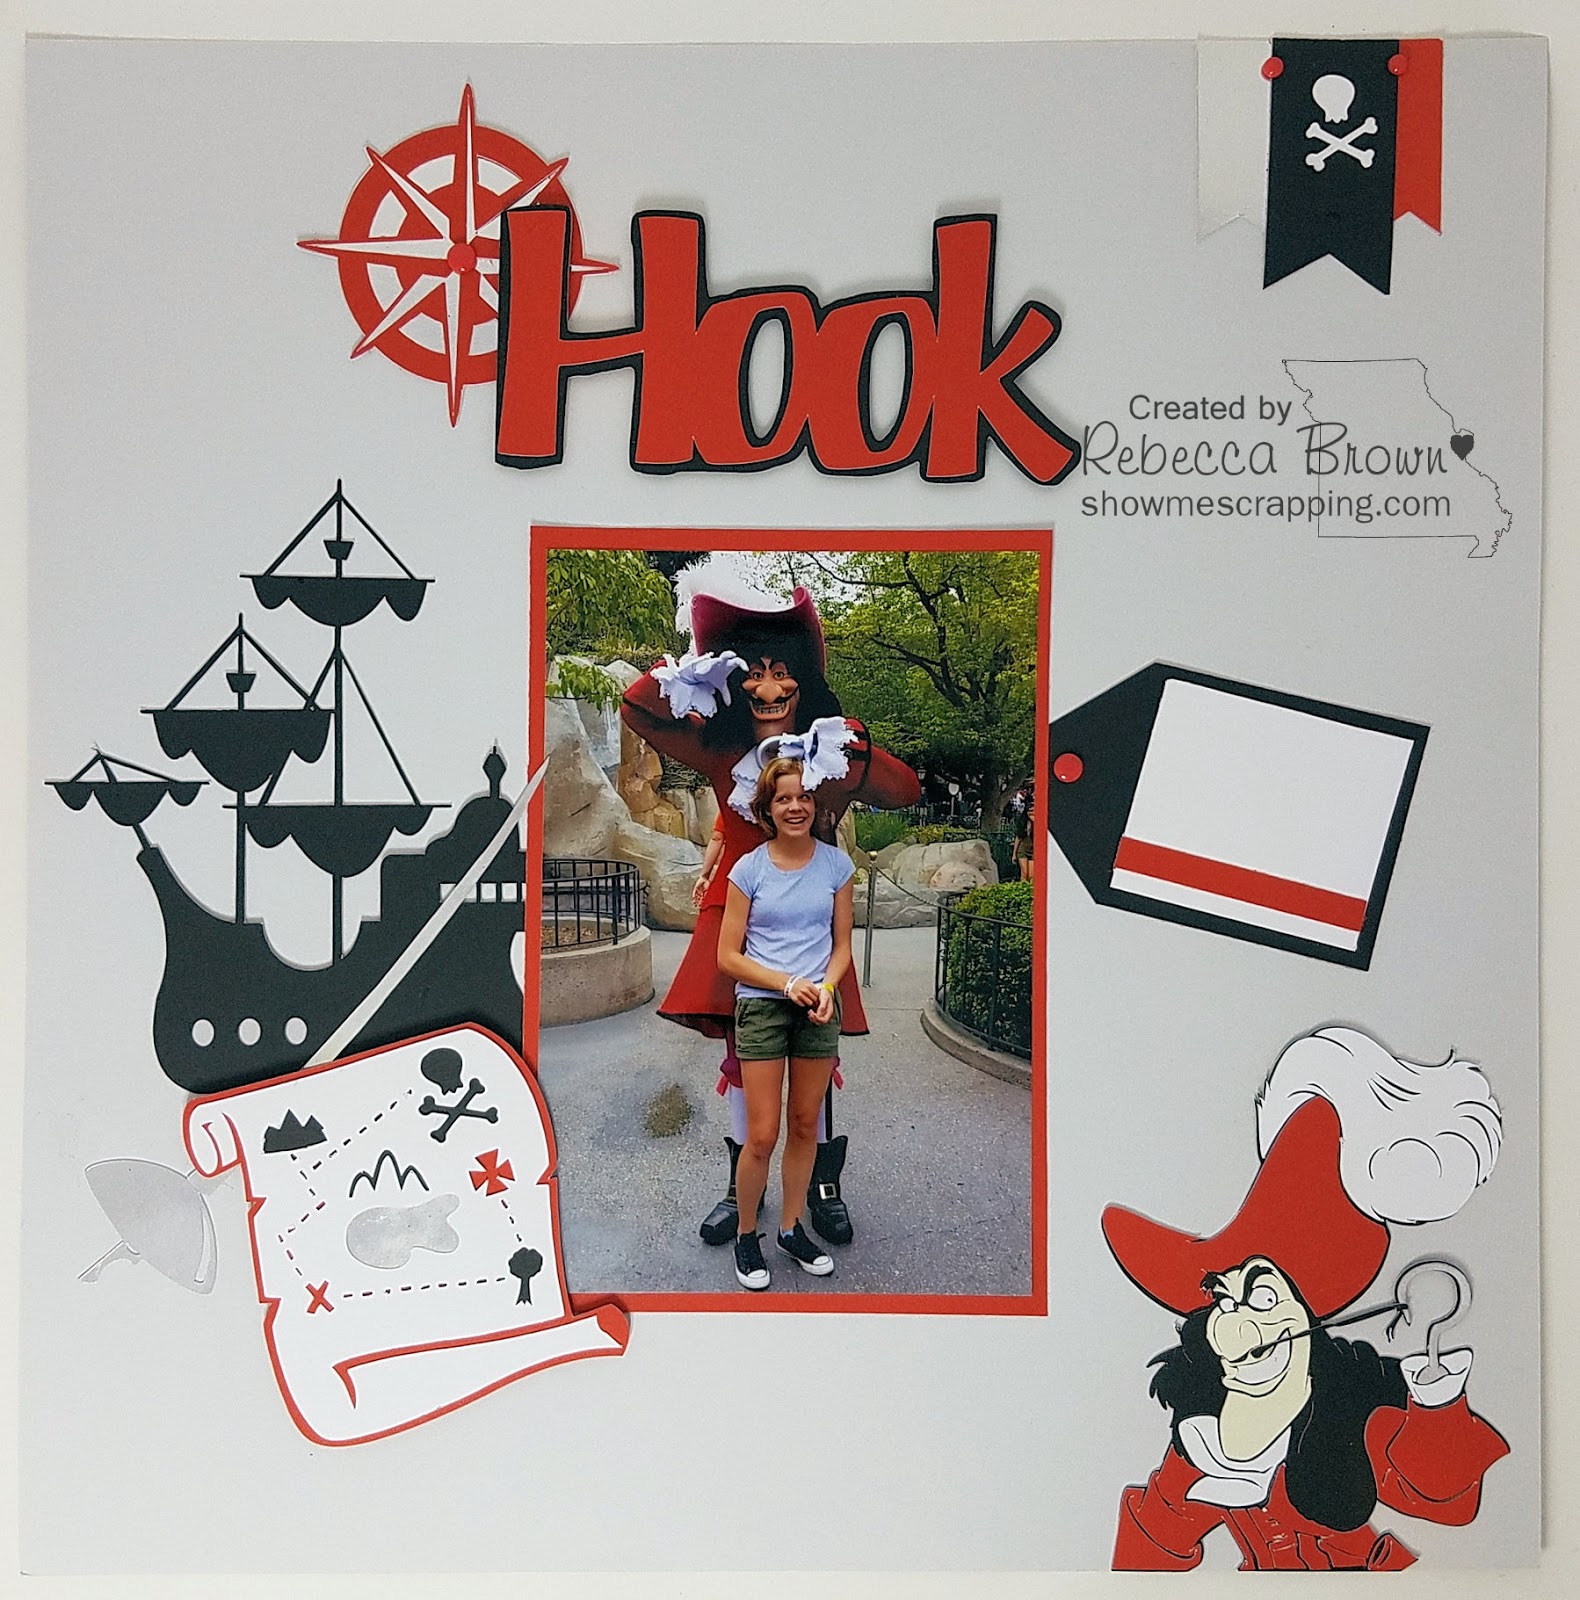
Over the last year or so, I’ve realized that I use most of my creative time to work on projects for my business. My old scrapbooks have been somewhat neglected. When I have worked on my personal pages, it is often when my energy and creative juices are depleted. The goal is often to just “get it done” and as a result the pages are over-simple.
So, I’ve decided to be sure to have a little time carved out each week to focus on a project or two JUST FOR FUN! This page is a result. Note that NONE of the images are from my beloved Close To My Heart cartridges — gasp! Instead, I pulled from the Disney Classics cartridge to create this Captain Hook themed layout. (However, I did use CTMH cardstock of course and also our Silver Foil Paper.)
Are you like me and need to start making time for your personal projects? Maybe you don’t have a scrapbooking business distracting you, but I bet you have other things that fill up your days. I started with Close To My Heart for this very reason — I was not finding time to scrapbook and thought that doing it as a job would force me to make time. I had found that I needed regular creative time to handle the stresses of life. My plan has worked well for me most of the time, but I still have to be careful to carve out time for my personal projects.
I’d love to hear from you! In the comments, I’d love to hear your struggles with making time for your hobbies — scrapbooking or other. If you are inspired to mark off some creative time, please share what you are working on!