Posted on

Sheltering in Place Projects! What are you making?

While sheltering in place last weekend, I hosted a virtual crop with my Close To My Heart team. Aren’t they beautiful? We had a fun time catching up, laughing and at times just working in silence — together.  It was so much fun, we have scheduled another one for next weekend!

We had originally planned to get together for a team day crop that Saturday, so we tried to make this as close as possible to an in-person crop. To to this, each of us tried to clear our schedule as much as possible just like we would if we were leaving home to spend a weekend with our crafting buds. 

Just like a face-to-face crop, we achieved three things 1) we escaped for a few hours from our daily stress and responsibilities, 2) we were productively creative and 3) we enjoyed the community with each other. 

Personally, I have neglected my personal projects for a long time so spent some time prior to the crop dusting off some projects. All together I finished 21 pages! The layouts below are from the 2018 Close To My Heart trip to Thailand. Most of these pages are from an album that CTMH gifted to each of us who earned the trip. I had “built” the pages prior to the trip but they have been waiting for photos for over 2 years. I’m so happy to finally have them done! 

The last three pages are from a live aboard dive trip to the Similan Islands that Eric and I added on after we said good-bye to our Close To My Heart friends. The pictures on the last layout were taken by fellow diver and photo journalist Lorenzo Moscia who generously shared his gorgeous photos with us. 

Other layouts from my Thailand album were posted on August 17, 2018, August 24, 2018, and September 2, 2018. I’ve got a couple more layouts still to go…maybe I’ll get them done during the next virtual crop. 

I hope by sharing these layouts, I’ve encouraged you to set aside some time to get away from the day-to-day struggles plus the more-than-normal trials that you may be going through. In addition, to cropping with my team virtually, I have also hosted virtual crops on my “Crafty Friends” facebookgroup for my VIP customers and friends. You are invited to join the funin that group! 

Whether with us, other friends or not, I hope you are able to carve out some time to create this weekend. Please share your projects with me! In the comments below, tell me what you are working on. If you can, post a link to photos! Can’t wait to hear all about it.

Have a wonderful (creative) weekend,

Rebecca

Posted on

Just in time for Summer: Seaside is Back! (free workshop download)

Just in time for summer, we’ve brought back a popular paper pack from a few years ago. You can purchase the Seaside paper pack, cardstock and stamp set separately or save 25% when you buy the bundle.


We’ve also created a beautiful workshop to make 4 scrapbook pages and 6 cards. You can download the direction for free HERE!

You can also get a pack of the Seaside paper FREE when you join my team or host a qualifying party in June!

Learn more about becoming a Consultant

Learn more about hosting a party

Posted on

The Best Moments are Free: Free layout kit with select stamp sets!

Celebrate the best moments during June with four My Acrylix® stamp sets and coordinating layout kits designed to preserve some of your favorite memories. This special features three stamp sets from our Seasonal Expressions idea book and one exclusive set—Then & Now—designed just for this special.

For this month only, select stamp sets are paired with materials for creating a 2-page scrapbooking layout at no additional cost! You pay the price of the stamp set and get the layout materials FREE—a savings of up to 40%!

Here & Now Layout

Escape to Paradise Layout

Grillin’ and Chillin’ Layout

Happy Camper Layout

All 4 of these stamp sets and layout kits can be purchased separately or in a bundle. You will save over 50% off retail when you buy the  special The Best Moments Are Free bundle! You can also get one of these workshop kits FREE when you become a Consultant or host a qualifying party in June!

You can also get one of these layout kits free when you join my team or host a qualifying party in May!

 Learn more about becoming a Consultant

Learn more about hosting a party

Posted on

More Magical: FREE Project Guide and Workshop Options

I’m so excited that we brought back the popular Magical paper collection. As an avid Disney lover, this was one of my favorite collections and since it retired, I’ve taken a couple trips to the parks so I’m glad to have it back to scrap those pictures. Since we have updated the colors, this paper collection is called “More Magical” and it is available through September 30 (or while supplies last).

Today, I wanted to tell you a little more about this bundle of products. These papers plus the exclusive coordinating stamp set (CC8183 Dreams) can be used for lots of projects. But you are like me and like to have a little help getting started, you can download a workshop guide to get complete directions for creating four 2-page layouts and eight cards. You can make the pages, the cards or both!

Download Workshop Guide>>

To make these projects, you’ll need the Dreams Stamp Set (CC8183), More Magical Paper Packet (CC8181), 12 additional sheets of cardstock (3 White, 2 Black, 3 Bluebird, 2 Candy Apple and 2 Carolina), White & Gold Ribbon (Z3189), Black & White Dots (Z3314) and 8 cards and envelopes.

You can get all of this and save 20% when you buy the More Magical Workshop Kit

If a few of these color names don’t sound familiar, that’s because Bluebird, Candy Apple and Carolina are new colors that are not available other than in through the More Magical special until September 1!

If you are not familiar with the Close To My Heart workshop guides, you need to check it out to see how through they are. Each guide includes a complete cutting diagram for each sheet of paper.

The guide also has a diagram and step by step assembly directions for each project. 

Regardless of your papercrafting experience, the guide will ensure that your pages will be beautiful and look professionally made! Of course, if you have any questions along the way, I’m here to help you figure it out. 

Here’s a closer look at the 4 layouts in the workshop:

And here’s a look at the cards. You’ll have enough paper and other supplies to make four each of these two designs.

Ready to get your hands on this workshop? I have two options for you to choose between. Don’t wait to order, this workshop is only available through September 30!

Option #1 – Cut your own papers: Order the workshop directly from my Close To My Heart website and have it delivered to your door. Print the guide for directions to cut the papers and assemble the projects. The workshop is available through September 30. Be sure to add Black and Mink ink pads to your order if you don’t already have them. Order now>

Option #2 – Let me do the cutting: Have your kit make a quick stop at my house and I’ll cut your papers! Your kit will also include a full color print of the workshop guide.  Order now>>

Posted on

Ombre Ink Techniques (Puerto Vallarta Part 2)

In today’s post, I thought I’d show you a couple ombre techniques from the Puerto Vallarta layouts. The first is the sun rays on this beach layout. 

To create the sun in the top right corner, used a Cricut cut sun overlay as a stencil and sponged with Canary. The ombre effect was created by stamping the center with Sorbet. This techniques is repeated by stamping another sun in the lower right corner.

You can also see an ombre effect for the word beach. This was created by first inking the stamp with Glacier, then inking the bottom 2/3 of the stamp with Juniper and finally inking the bottom 1/3 of the stamp with Lagoon.

The word sunshine was stamped with an onbre using Canary, Saffron and Goldrush ink. A tip for stamping ombre is to always start by loading your stamp with the lightest color and then add the other colors. Also you’ll want to move fairly quickly so the first ink doesn’t have a chance to dry. You can “huff” on the stamp if you are concerned that it may need some moisture.

Hope you are enjoyed these layout and they have inspired you to try the ombre technique on your own projects.

Posted on

Disney PhotoPass and Memory Maker Review and Tips

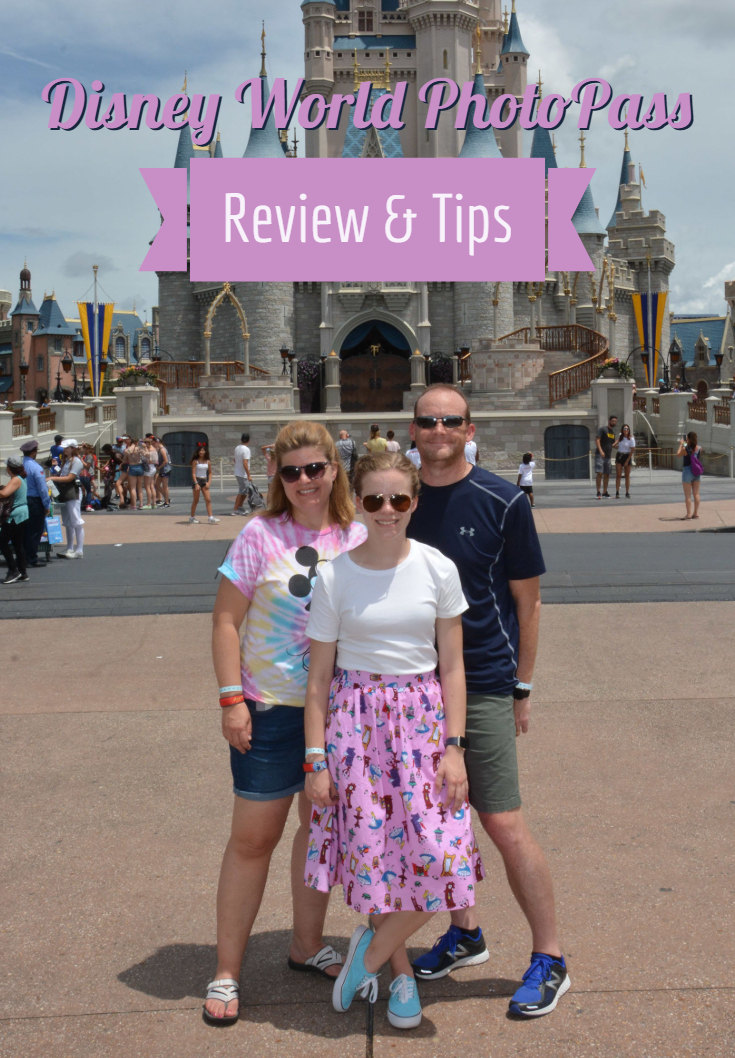
Last week, we spent three jam packed days visiting all four parks at Disney World in Orlando, Florida. Although we have been there several times, this trip was special because our daughter graduated from High School in May and will be heading off to college in August. Because family vacations may look different in the future, I wanted to make sure that we had lots of pictures to remember this trip.

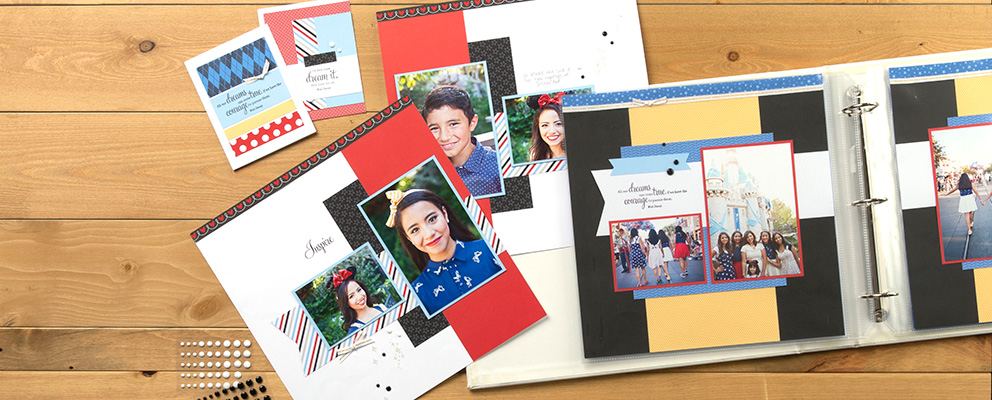
As an avid scrapbooker, I always put my phone to good use taking snap shots and selfies. However, I wanted to make sure we got a few pictures of the whole family and didn’t want to have to ask strangers to take them. The Disney PhotoPass Service and Memory Maker seemed like a good solution. In this post, I’ll summarize how the plan works and give you tips for making the most of the service. While I have done my research and believe this to be accurate as of July 2018, be sure to review the current details on Disney’s website before purchasing the plan.

The first time I used Disney PhotoPass was almost 10 years ago. In October 2009, the whole Brown clan traveled to Orlando together and spent a week “doing Disney”. This included 15 people in 4 families and we purchased the package together.  I was thrilled with the quality and quantity of photos we had to remember this amazing trip. 

Although the PhotoPass system has changed a bit since 2009, the end result is still a great variety of pictures to document the fun days at Disney World.

WHAT IS PHOTOPASS AND MEMORY MAKER?

Here are a few FAQs that help explain the basics of how the system works. (The information presented here is based on my understand of the current program as of July 2018. Please refer to the Disney website for complete details.)

Q: What is PhotoPass?


A: PhotoPass is a free photo taking service throughout the Walt Disney World Resort. You can get photos taken at many iconic locations, on rides, at restaurants and even at a studio at Disney Springs. 

Intense! Can you tell we are competitive?

Q: How can I view or purchase my photos?

A: Each time your photo is taken, you will either receive a photo card from the photographer or have your Magic Band or park ticket scanned. To view or order prints of your pictures, you will need to set up an account on the Disney website and link the photo cards, Magic Band or park ticket. Once your photos are linked, you can purchase downloads, prints and other photo products like calendars and mugs.

Q: What is Memory Maker and is it worth the price?

A: Memory Maker can be purchased to allow you to download all of the PhotoPass photos from your trip. The current cost when purchased in advance is $169.  The current cost of a single download is $16.95, so this is a great option if you are planning to purchase 10 or more images. The price for prints  is also reduced significantly when you purchase the Memory Maker. For example, a single 5″x7″ print is regularly $18.95 but just $0.95 when you have Memory Maker.

Q: Can I get free downloads?

A: Disney VISA card holders can receive free downloads of photos taken at the special character experiences at Epcot and Disney Hollywood Studios. Even though we bought Memory Makers and thus didn’t need the free downloads, we visited both of these locations. Since these are exclusive to card members, the lines were very short — basically walk up — and offer unique photo experiences. At Epcot, our pictures included both Mickey and Pluto and at Hollywood Studios, we had an exclusive meeting with Kylo Ren! We really enjoyed this perk.

Certain annual pass holders also receive free downloads.


December 2019 Update: We took a quick trip to Disney World over Christmas. We did not purchase PhotoPass, but did get photos taken at the Epcot Visa character experience. After a quick scan of my magic band, I was able to see all the photos taken at this location in the App on my phone. Once I was home, I was able to download all of them for free! Great perk of having a Disney Visa.


MEMORY MAKER TIPS

Because Memory Maker is a pretty steep investment, I’d suggest you educate yourself before your trip to make sure you get as much out of it as possible. You will definitely want to review the information on the Disney website carefully. I’d also like to offer up these tips to help you make the most of your Memory Maker package.

1 – Purchase Memory Maker at least three days prior to your first day at Walt Disney World to save $30. However, be aware that the purchase is nonrefundable, so don’t purchase until your plans are definite. 

2 – Be sure everyone in your group is on the Family & Friends List of the Memory Maker owner in My Disney Experience. Only the owner can download images, but all of the photos linked to the tickets and Magic Bands of the Family and Friends will be available to the owner who can then share them with the group. This is especially important if the group will be splitting up for some of the time at Disney World. 

3 – Set the expectations of your kids (and husband?) that you will be stopping often for photos. The photographers know how to get good pictures for the location they are in and can complete a mini-photo shoot relatively quickly. Fortunately for this trip, my daughter was excited to get some fun pictures, but a few years ago I may have had to bribe her with the promise of a Mickey ice cream bar to get smiles for the pictures

4 – Keep your eyes out for roaming Disney photographers. Even on busy days like we had the week of July 4, they are readily available near landmarks like Cinderella’s Castle in Magic Kingdom. But you can find them throughout the parks as well. If there is a line at one photographer, look around there is probably another nearby. 

5 – Do what the photographers ask you to do, even if it doesn’t make sense. Certain photos will become “Magic Shots” with titles or animated characters when they appear in your account. So be prepared to hold out a hand or point or act cold or blow a kiss. Just play along with the fun.

6 – Look for the photo kiosks as you exit rides.  Some of the rides automatically detect the newer Magic Bands, but otherwise you need to scan your Magic Band or ticket to collect these action shots. 

7 – At greetings, relax and interact with the characters instead of posing immediately. Encourage your kids to talk with and hug on their favorite Disney friends. Not only is it fun, but the photographers will often snap candid pictures which will likely become favorites. We love seeing the personality of Mickey and his friends, as well as the princesses’ come through.

8 – Don’t be afraid to make special requests. We found the photographers very willing to take individual pictures or pictures of just the girls (my daughter took a friend) or just my husband and I. Of course, if others are waiting you’ll want to keep it brief, but otherwise if you want a picture of yourself standing in front of the castle with your arms in the air, just ask!

9 – Don’t forget to download your images! It’s easy to let this slide when you get home and step back into non-vacation mode, but the images are only available for 45 days on the Disney website so set a reminder on your calendar so you don’t miss out!

SUMMARY

So, would I recommend Memory Maker to friends headed to Disney World? Generally, yes but it would depend on a few things including the length of their trip, the size of their family or group and of course their budget. 

We had over 300 pictures taken on our three days in the parks (plus breakfast at ‘Ohana’s on day 4 before we started the drive home). In addition to pictures of us, we also received about 40 bonus pictures of Disney characters and park scenes. I’m not sure that I’ll use them but they are included with the package. 

So if you are like me hoping to get a number of great family shots of a special occasion, I’d recommend considering investing in Memory Maker.  If instead, you anticipate downloading just a handful of pictures, I’d say skip the Memory Maker purchase and pay to download individual images.

If this information has been helpful or if you have questions, please let me know if the comments below. If you have used Disney’s PhotoPass or Memory Maker, please tell me your tips.

“Have a Magical Day!”

Rebecca

Posted on

Happy Camper Layout using You Are Here Cricut Collection

The first time I flipped through the handbook for the new You Are Here Cricut cartridge, I was drawn vintage trailer camper. It was so cute that I couldn’t wait to cut it out. Add to that the “Happy Camper” title and we have a winner!

For this layout, I also used several other images from the cartridge. Thanks to the recent updates in Design Space, it is easy to see what images were used. I pulled up this list by clicking on the project in the My Projects list. If you’d like to use one of these images, the best way to add them to your project is to click Insert Image then type the image number (including the hashtag) into the search bar.

When I started this project, I knew I wanted the camper to be teal and white. So I started with our Lagoon and started playing around with other colors. The color scheme I ended up with was Lagoon, Peacock, Sorbet and Pewter.

Our new two toned cardstock gave me more options  while sticking to those colors. For example, I used the actual Lagoon color for the trailer, but used the lighter back side for the awning and trees. In this picture you can also see the difference between the Pewter on the trailer door and tires vs the lighter shade in the title.

Rather than make the layout completely with solid cardstock, I used the Peacock patterned paper from the Enchantment Fundamentalpaper pack. I love how this paper adds some fun detail without introducing new colors to my pages.

I hope you enjoy this layout and are inspired to find time to create too. You need that in your life!

If you are interested in learning more about You Are Here and the other new Cricut Collections, check out my post from earlier this month. Ready to get your cartridge? You can order it from my Close To My Heart website. 

Did you know you can earn your You Are Here Cricut Collection for free? Join my team in August and place $300 in orders by September and it’s yours!

*******

Shopping for a new Cricut Machine? Get 10% off the Air or Air 2 machine plus free shipping in August with code AUGUSTAIR at checkout. Shop now>>

Posted on 23 Comments

Scattered Hearts Cricut Blog Hop: Beach Vacation Scrapbooking Layout using the new You Are Here Cartridge

Today’s post is brought to you by the Scattered Hearts Team! I’m proud to be a member of this leading team at Close To My Heart. This team is full of amazing artists and I have a real treat for you today: a blog hop of projects made by team members using the Close To My Heart Cricut collections.

If you arrived from Pink Cloud Scrappers with Lori, you are on the right path. My project is this beach layout using images from the You Are Here cartridge and stamp sets.

The hardest part of this project was deciding where to start since this cartridge has 700 images. They are all travel related and I love to travel, but the sand castle really won me over so my first You Are Here page has a beach theme.

If you’d like more information about this project, continue reading. If you are ready to see the another Cricut project, hop on over to Scrappin with Heather to see what she’s made.

Project Details

One of the things I love about this layout is the use of our new two-toned cardstock. The front of each sheet is the original color, but the back side is a slightly lighter shade. I love how it works for the sandcastle — using two different colors in our palette would have made the contrast too bold. But cutting the layers out of the two sides of our new Toffee paper made it just enough to highlight the details.

You can also see the difference two-toned makes in the Lagoon water. Our paper still has a white core which helped me create the waves in the ocean.

This layout also introduces our new Color of the Year, Bashful. This beautiful soft pink is so trendy and was the perfect addition to my beach layout. 

We have a full lineup of Bashful items including Cardstock, dye and pigment inks, reinker, glitter paper, albums and even the pearls.Don’t they add so much to the cute beach bag on this layout? You will also see this trendy color pop up in other products through out the year.

The You Are Here cartridge is part of a bundle that includes a paper pack plus three great travel stamp sets that coordinate with the images on the cartridge. This tag was made from a cut on the cartridge and stamped with one of the includes stamps. Toffee paper and ink were used to get the soft tone-on-tone look which was perfect for this layout.

Design Space Link

Click on the link below to open to the Design Space file I used to create this layout. Remember you have to purchase the You Are Here Cricut Collection before you can cut the images.

YOU ARE HERE BEACH LAYOUT DESIGN SPACE LINK

Project Recipe:

Lagoon, Bashful, Toffee and White Daisy Cardstock

Toffee Exclusive Ink Pad

You Are Here Cricut Collection (Z3389 for physical cartridge, Z3387 for digital only)

Bashful Pearls (Z3369)

3D Foam Tape

Posted on

Not just one, but 4 new Cricut Collections from Close To My Heart! (Special Bundle Offers too)

Highest on my wish list for the new Idea Book was a new Cricut Collection. Guess what? They gave us not one, not two,…but FOUR: You Are Here, Hello USA, Hello Canada & Hello AU/NZ! I’m so excited to introduce you to them today. Be sure to scroll to the bottom of this email for exclusive Cricut Collection bundles!

You Are Here 

Whether you’re traveling abroad, taking a road trip or enjoying a relaxing “staycation”, this Cricut collection is sure to have everything you need to document your journey. From outdoor escapades and family reunions to spa retreats and holiday outings, you’ll find shapes and sentiments for every pit stop along the road of life!

The cartridge has 700 images including two complete fonts and travel-related shapes, titles, phrases and fonts.

Sample of images on You Are Here cartridge

View the complete image index>>

You can order the physical cartridge or if you have an Explore type machine, you can order the digital-only version. Note that you will not get a handbook with the digital collection. Regardless of whether you order the physical or digital collection, you will also receive three D-sized stamp set and a pack of 20 sheets of Enchantment two toned cardstock!

Hello USA (Digital Only)

Hello USA is a must for patriots and travelers. There is a total of 60 layered images including one for each of our 50 states with the name, a local flower, slogan and a state specific icon. We also get a layered image for Puerto Rico! In addition, you’ll get a complete image of the United States with optional layers of state outlines, regional boundaries, slogans and icons. Bonus images of the flag, July 4th star and America the Beautiful Heart.

Note this collection is digital only which means it in only for use with machines in the Cricut Explore family.

Hello Canada (Digital Only)

The Hello Canada Collection includes 20 layered images. First you get a geographical view of the entire country with optional layers to show the provincial and territorial boundaries, maple leaf and slogans. You’ll also get an outline image for each of the provinces and territories with layers for the name, flower, slogan and icon. In addition, you’ll get the flag, hockey, parliament building and polar bear!

Note this collection is digital only which means it in only for use with machines in the Cricut Explore family. 

Hello AU/NZ (Digital Only)

Hello AU/NZ is a collection of 20 layered images is a must if you have traveled to Australia or New Zealand. Full Australia and New Zealand geographical images includes an optional layers marking the state and territory boundaries, slogans, flowers and icons. In addition, there is an image for each individual state and territory as well as a local flower, slogan and coordinating icon. In addition, you’ll get both countries’ flags, plus a dolphin and sea turtle!

Note this collection is digital only which means it in only for use with machines in the Cricut Explore family.

Rewards Your Way (The Best Deal)

I know you probably want one or more of these cartridges and I’d like to help you get them in your hands so you can start creating right away! The best way to get one of them plus a bunch of other great Close To My Heart products is by joining my team. Only in August, when you join my team, you will have the opportunity to earn your choice of these Cricut collections for free in your first 30 days!

Learn more about the choices>>

Get Started>>

Bundled Savings!

For each of the new Cricut Collections, I’ve put together a bundle that includes a free related stamp set! You can order the Cricut collections on my website and I’ll send the bonus stamp sets separately.

Bundle #1: You Are Here PLUS A New Adventure (B1565) FREE

Order You Are Here with a physical cartridge>>

Order You Are Here digital collection>>

Bundle #2: Hello USA PLUS Fourth of July (A1204) FREE

Bundle #3: Hello Canada PLUS Canada 150 (A1214) FREE

Bundle #4: Hello AU/NZ PLUS Aussie Greeting (A1211) FREE

Order Hello AU/NZ digital collection>>

These bundles are only available during August 2017 by ordering on my personal Close To My Heart website.

Posted on

Get all 50 State Stamps for around $100 — must order by July 31!

One of my favorite (and least expensive) Close To My Heart current products are the State Stamps. Don’t you love this one of the “Show Me State”?

These M-sized stamps are a perfect detail for travel scrapbook pages like this one from the Close To My Heart blog.

They are also great for scrapbooking your home, a move or a long distance relationship!

Sadly, these stamps will be retiring at the end of the month. However, the good news is that you can get them at a deep discount thanks to our Stampaganza special. This month all stamps are buy 2 get 1 free. At regular price, all 50 state stamps would cost nearly $150, but right now you can get ALL of them for around $100!

Don’t want to enter 50 item numbers? Just let me know and I’ll do it for you 🙂

There are also M-sized stamps for each Canadian province, plus Australia and New Zealand.

These stamps also count toward the buy 2 get 1 free special. In fact, all of the current stamps (except stamp of the month) are included in this deal.

This includes some special stamps that were pulled out of our archive just for this special!

Start shopping now>>