Posted on

Springtime in Dallas: Flower Market layout

This coming weekend, I’m excited to be heading to Dallas. Although it is going to be a quick trip, I’m hoping to get a chance to see some of the famous Texas Bluebonnets. According to the Lady Bird Johnson Wildflower Center, we are right in the middle of the season.

I can’t wait to get a few pictures to put on this layout I made using the Flower MarketCricut cartridge. I love that this cartridge has such a variety of detailed flowers. In an earlier post, I included a link to a document listing of all 50 flowers on the cartridge.

The layers of the flowers are cut from Glacier, Pacifica and Sapphire solid cardstock. The leaves and stems are made of Willow. Scattered over the page are stars cut from Lemon cardstock. The white tag and the “in TEXAS” from the Art Philosophy Cricut cartridge which is retired. (I have one left in inventory — message me if you’d like it!) All remaining cuts are from the new Flower Market Cricut cartridge.

On the outer edges, I used coordinating papers from the Enchantment and Adventure Fundamentals line. These patterned papers add more interest than solid cardstock without overwhelming the the floral theme of the page. Starting on the outer edges, you can see strips of the Sapphire thin stripes, Pacifica dots and Lemon broad stripes papers. White Twine and Blue Enamel Gems finish off the page.

While in Texas, I will be at the Stamp & Scrapbook Expo at the Gaylord Texas Resort in Grapevine. If you will be in the area, please stop by the Close To My Heart booth to say “Hi!”. If you can come on Friday morning, you’ll have a chance to make this layout as a create & take!

Posted on 2 Comments

Christmas Time is Here Layout: FREE link to Design Space file!

I’ve been playing with the City Sidewalks Cricut cartridge again!

I love the holiday village on the City Sidewalks Cricut collection and the overlay is perfect to create a snowy night sky. It is a great layout to display the pictures of your home’s light display or other decorations or whatever it is that makes you feel like “Christmas Time Is Here”.

If you like this layout, I’ve saved the file for you! Simply click on the link below to open it in your Design Space account. Then you are ready to start cutting!

<<LINK to open Design Space file>>


IMPORTANT: Note that you will not be able to cut this file unless you have linked the City Sidewalks cartridge. If you do not have it yet, you can order it HERE. This cartridge retires on December 31, so don’t put off getting your copy!


In addition, the “TIME IS HERE” is from the Flower Market cartridge. You order it (physical or digital) can change the text to your favorite font.

By the way, I also have a free Design Space file for the three City Sidewalks cards below. As I announced yesterday, you can get this file by signing up for my newsletter. (Available to new subscribers in December 2016 only.)

<<Sign up for the Show Me Scrapping Newsletter and receive Christmas card Design Space file>>

The rich colors of this layout are from our Enchantment color palette: Sapphire, Fern, New England Ivy, Pomegranate and Saffron. You just need one sheet of each. You will also need a sheet of Cocoa and three sheets of White Daisy.

To create village scene, cut pieces of the Saffron paper and adhere to the back of White
layer to cover the holes for the windows and lamp light. Then attach the White (with Saffron pieces down) on top of the Cocoa piece. Finish off the shops and trees with the remaining pieces of Fern, New England Ivy and Pomegranate.

NOTE: There ate two tiny Pomegranate chimneys! I missed them and had to cut them by hand from scraps!

For the trees, layer the New England Ivy over the White bases to create snowy branches. Then finish them off with with the Cocoa trunks.

Once you have cut out all of the Cricut pieces, you can cut the three 4 x 6 photo mats from the remainder of the Fern cardstock. To assemble the layout, I used 3D foam tape liberally. I used the thin 3D tape under the village and regular 3D tape under the trees to add variety and depth.

I hope you’ve enjoyed this project and it inspires you to spend some time crafting this holiday season. To see more artwork I’ve created or pictures of all of the images, click here. 

Happy Christmas Creating,

Rebecca

Posted on

Happiness = Ice Cream Layout

I’ve been playing with the June Stamp of the Month again. The result is this bright cheerful layout.

The yellow chevrons and pink hears of the fundamental whimsy papers give this project instant pop. If you look closely, you will also see the glitter of white shimmer trim. It shows up much more in person. 

The “black board” message was created with white pigment ink on black cardstock. To balance the blackboard, I stamped the images in black also with pigment ink. Then I colored them with the watercolor pencils and spread the color around with the blending pen.

I hope you enjoy this project — it was a fun one to make. If you’d like to recreate it, be sure to order your stamp set before the end of June.

Have a wonderfully happy day,

Rebecca

Posted on 1 Comment

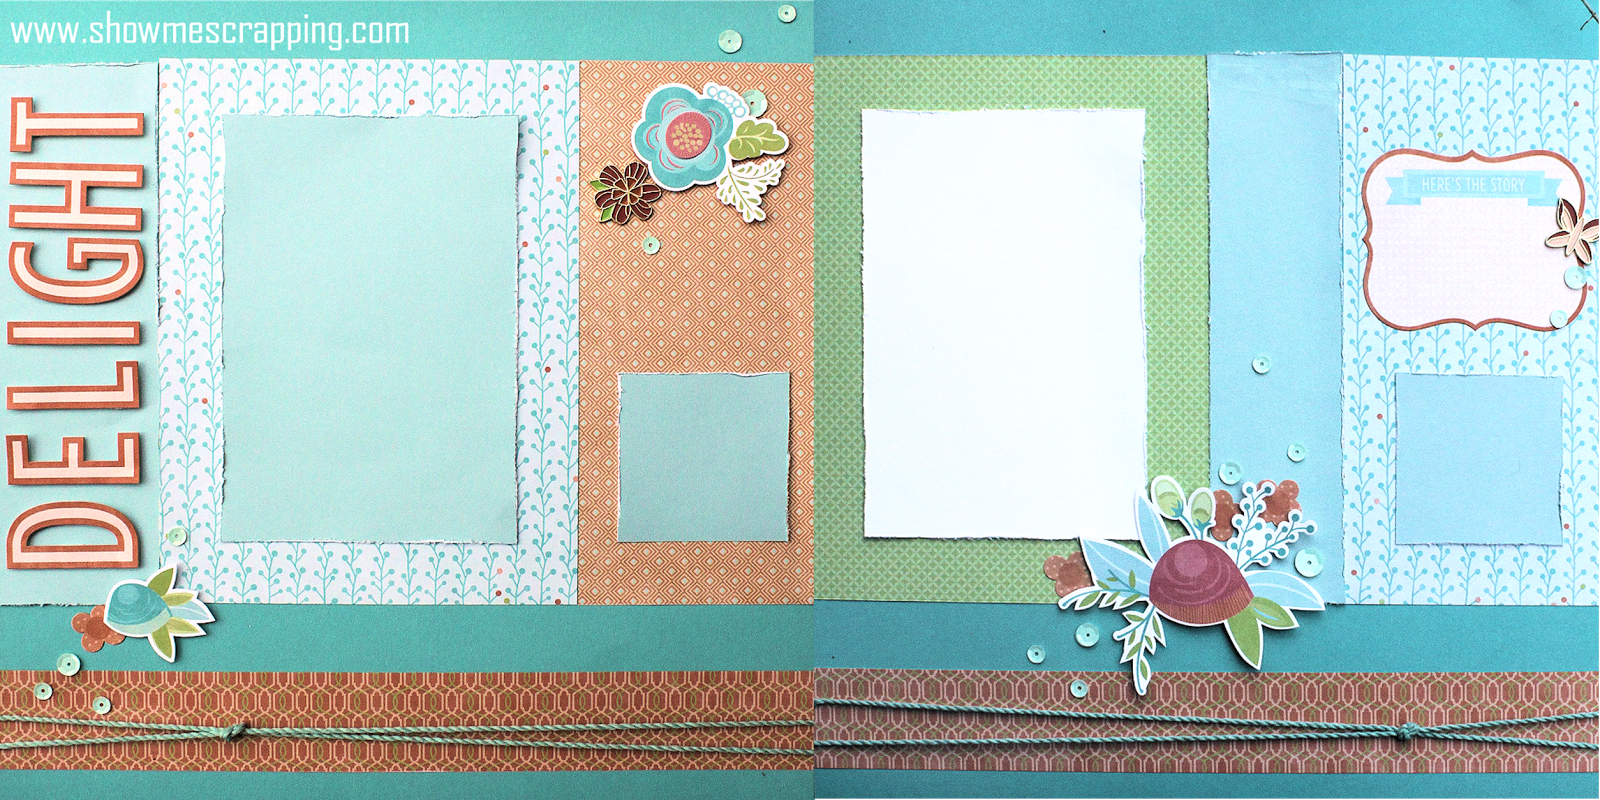
Take DELIGHT with the Blossom Collection

I love the new paper Blossom Collection from Close To My Heart. The colors are cheery and the accents are lovely. Whether you are a scrapbooker, card-maker or other crafter, you will find much to love about Blossom.

This layout came together quickly using stickers from the Blossom Complements. These pages will be perfect for spring or summer memories.

If you are like me, stickers tend to feel flat. To add dimension, I usually pop some up on foam tape. For larger stickers, it helps to put a little powder on the back to remove the stick. The papers needed a little more interest, so I roughed the photo mats up a bit with the edge distresser.

Blossom Layout Detail 3

As you can see from these close ups, I also added a few of the Blossom metal accessories and Ocean Sequins. I love how all these pieces coordinate perfectly.

Blossom Layout Detail 1

I love how “wrapping” my pages with twine looks, but sometimes it is hard to get it to stay in place. My solution is Washi tape — it is light weight and easy to work with. It is strong enough to hold the twine in place, but also offers some forgiveness if you have to move it to get the ends exactly where you want them.

I hope you have enjoyed this project and are inspired to try something new. Remember when you place an order of $25 or more you qualify for my hostess club and are invited to come to my house to put it together the following month. For more information, visit the Events and Hostess Club pages.

Have a wonderful Spring Day,

Rebecca

Posted on

Wild Thing Layout with Ivy Lane

Last week, I created the new Ivy Lane scrapbooking workshop on the go layouts and was looking for something to do with the leftovers. I also wanted to use the February stamp of the month, Wild about Love.

Here’s what I came up with.

My inspiration for this layout was a sketch on the Split Coast Stampers scrapbooking challenge (see it here). This was a great layout for using leftovers since I just needed 1/2″ strips of paper. You may notice that I used a mix of zipstrips and the actual paper.

Most of the embellishments were from the Ivy Lane Accessories Pack. The Gold Shimmer Trim was left over from making the Ivy Lane Card-making workshop on the go.

If you like the stamping on this layout, you need to check out this month’s Stamp of the Month, Wild about Love. When you place an order of $50 or more, you can get it for just $5. Order now, so you will have it in time to make some Wild Valentine’s Day cards.

Have a Wild Day,

Rebecca

Posted on

Soccer Artbooking Layout

Do you have some old sports pictures that you’d like to add to your scrapbooks? My daughter has only played competitive sports one season a few years ago so I wanted this layout to be special. I used the Artbooking cartridge to make custom titles, overlay and other elements for these pages.

The overlay is on page 83 of the handbook.  It is really easy for the overlays to overpower everything else on the page, including the pictures. So I cut it out of the grey print from the Proplayer Paper pack to create a tone-on-tone design with the Slate cardstock. This helps keep the pictures as the focal point while adding great detail.

I cut the full page overlay because I was planning to just make a single page layout. However, I found that the pictures hid most of the overlay, so I cut it in half and split it between the two pages. In doing this, I was able to display the most relevant words like “fun” and “go team” and hid the ones that didn’t really fit a kindergarten soccer team (“defense”). 

I cut the word “Soccer” and the ball from this same page. I stole the word “Girl” from the very girly page 80 and “Read. Set. Go” from the school layout on page 69. I love how you can mix and match titles, photo mats, borders and overlays from different layouts on the cartridge.

I cut everything at 11.5″ so it was all scaled appropriately for a 12″ x 12″ scrapbook page. I love the relative cut sizing on the Artbooking cartridge! When you work with this cartridge, you set the cut size based on the completed project size rather than the individual image size. It really simplifies pulling together a layout – no more recutting because the size isn’t what you expected. (By the way, if you want an image cut a specific size, you can press the “Real Dial Size” button.)

Other embellishments are from the Proplayer Assortment and a couple Slate Twist Ties. I also used a few of the stars that were cut from the overlay. The opposite side was a darker design that showed up well on the slate base pages.

I have several projects lined up this holiday week. I hope that you also find time to relax and create as well.

Keep Creating,

Rebecca

Posted on 2 Comments

Family Reunion

Last weekend, I had a fabulous time at the First Class Scraps crop in Chesterfield, MO. This was their 10th crop and the theme was “Family Reunion”. Throughout the weekend, they touched on each of the 10 prior themes. 

Trust me, Mary Jo and Maureen know how to throw a party! Lots of fun games, snacks and, of course, cropping! 

Each person who attended got to create the mini-layout below at my Close To My Heart table. It uses Laughing Lola papers and the new exclusive hostess stamps “Family Photo”. 

In addition, one lucky winner won this layout using the same paper and stamp set.

First Class Scraps has announced their full 2014 schedule and you can register on their website (www.firstclassscraps.com). Hope to see you there!

Photobucket

Posted on

Kids!

This layout is a reminder of a fun day the human “kids” had with the goat “kids”. 

It is based on the layout in the Buzz and Bumble workshop on the go shown below. While many of the elements I used are directly from the sample layout, I modified it to work with the photos I had.

You will notice that I created clusters of embellishments very similar to what is in the sample project.

I love that these embellishments are detailed and beautiful, yet the photos remain the focal point of the layout. Without the Workshop On The Go pattern, my pages would not have been nearly as put together.

Photobucket

Posted on

My Favorites Layout

Today, I want to share with you this “favorites” layout I made at the Regional Celebration. Designed by the creative folks at Close To My Heart, this layout uses the background papers from the Scholastic pack. Because the colors and designs are somewhat muted, your pictures will shine.

IMG_6384

This would be a great way to showcase your favorite memories from 2012. There is room for at least five pictures. The 3″x3″ openings on the right side would be great for Instagram style prints from your phone snapshots.

Making pages that depend heavily on stamping are easy on your pocket book too! I love creating my own embellishments from a little cardstock and ink!

Do you recognize the stamp set I used? If you said Perfect Fit – Frames, you are correct.

This set is typically used to frame 1×1 circles that can be stamped with images or words. In this layout, the round “frame” was used as a background stamp on the right page. The oval frame was used as an embellishment on both pages. After wrapping it with Baker’s Twine, I attached it using foam tape to add dimension.

Here’s a close up of the cluster on the left page.

IMG_6384 - detail

Please let me know if you have any questions about creating this layout or the materials used.

Keep Creating!

Rebecca