Posted on

Skylark Card Kit Details

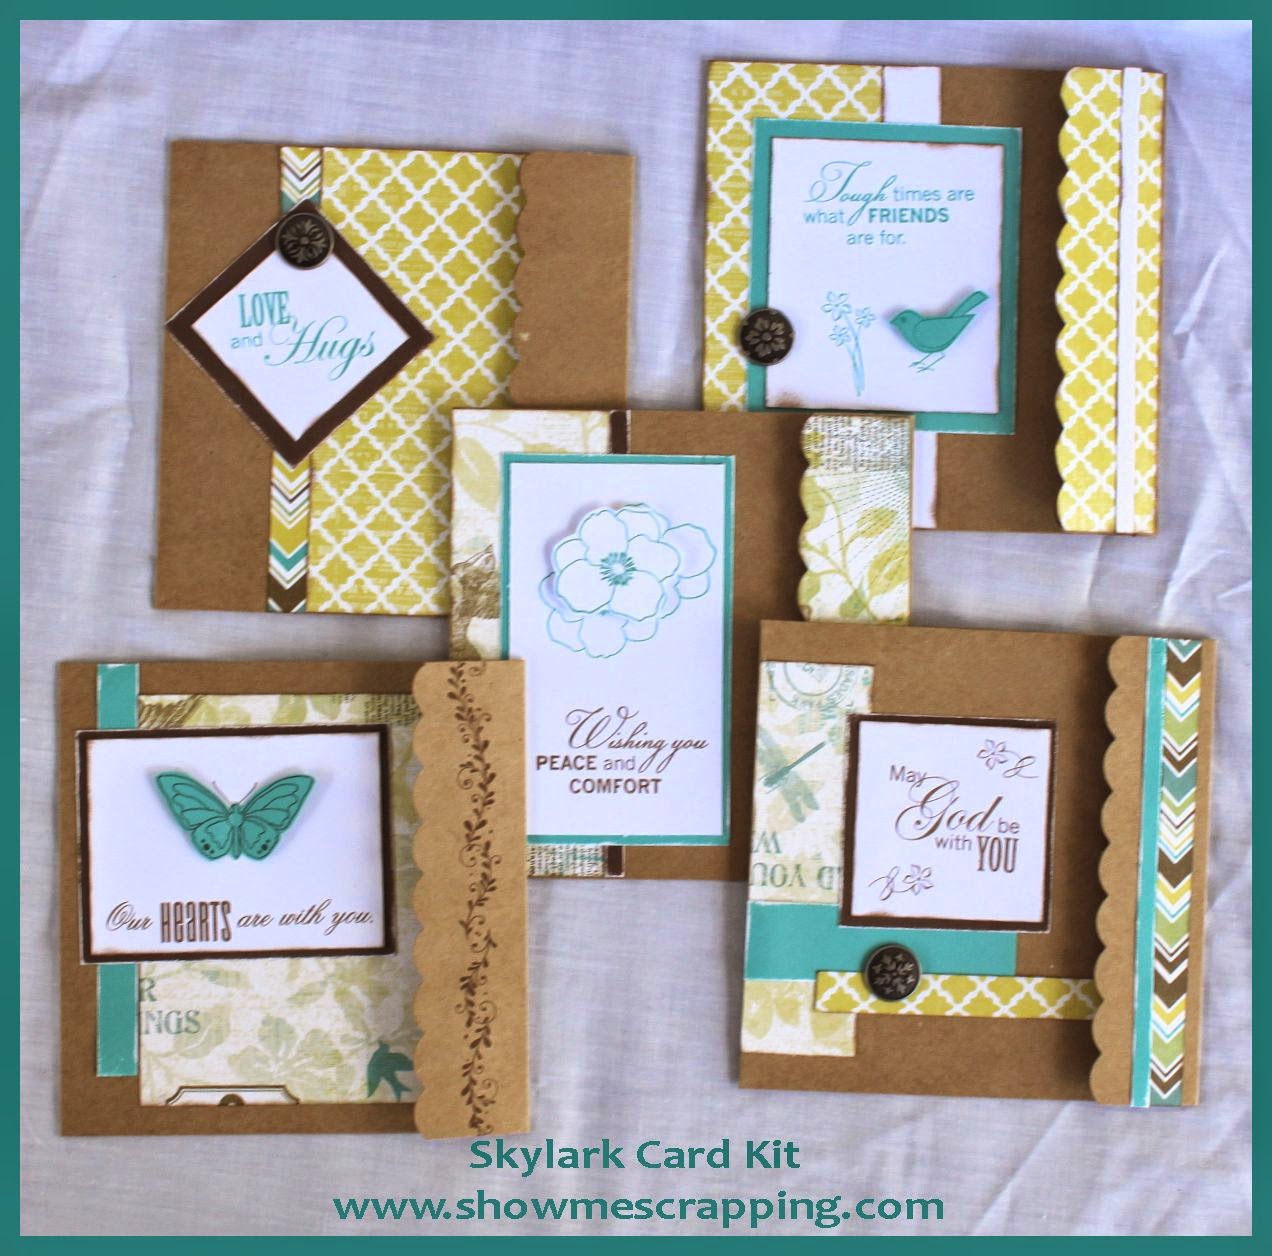
On Friday, I posted about the new Skylark card kit. Today, I wanted to show you a few details about the cards in the kit.

Edge treatments always make a project come together. For these cards, a little sanding on the solid cardstock brings out the white core. In addition, sponging with Chocolate ink softens the white and B&T paper edges.

A little foam tape on card 3 & 4 under trimmed bird and blooms adds dimension. 

This butterfly on this card was stamped twice. Once on the underlying White cardstock piece and once on a scrap of lagoon paper. The lagoon butterfly was trimmed and the wings folded up. It is attached to the card with a little Liquid Glass at the body only so that the wings are above the paper. The stamping on the white cardstock creates a shadowed look. 

Here are close up pictures of each of the cards:

Skylark Card 1
Skylark Card 2
Skylark Card 3
Skylark Card 4
Skylark Card 5

I only have 5 of these kits left. Ready to order? Click this link!

Be sure to review the list of additional items needed to complete the cards. These products can be purchased on my CTMH sales website (www.rebeccabrown.ctmh.com). The stamps, inks and tools will also be available for your use at my August workshops.

Don’t forget to post pictures of your Skylark projects to win a size M stamp set of your choice. Details of this contest are in this post –>LINK

Keep Creating!

Rebecca

Posted on 1 Comment

Florentine with Avonlea WOTG Stamp

This week, I have been focusing on using up my old paper packs. I am down to just a few crumbs of Florentine, but I am determined to finish them before allowing myself to open any new paper. I did allow myself to get out the new Avonlea Cardmaking Workshop On the Go stamp set. It is a perfect match to the Florentine patterns.

IMG_5534

IMG_5537

Posted on

My Acrylix Stamps: Just the Facts!

Since the June special allows you to buy two stamp sets and get one free, I thought this would be a great time for a refresher on some facts about Close To My Heart’s My Acrylix stamps. I believe they are “clearly” the best!

7 Facts that set My Acrylix Stamps apart:

  1. My Acrylix stamps are ready to use right out of the package—no cutting out, mounting, or applying stickers required. Just place the stamp on your block, apply ink, and you’re set!
  2. My Acrylix stamps are stored separately from the blocks making them very easy to transport.
  3. My Acrylix stamps and blocks are clear, making it easy to stamp in exactly the right spot.
  4. Multiple stamps can be places on the same block allowing you to stamp complete words or combinations of shapes in one stamping.
  5. My Acrylix stamps are flexible so you can make straight lines curvy or shift the shape of your stamps to make unique stamped images.
  6. My Acrylix stamps are super easy to maintain and will last for years!
  7. Many My Acrylix stamps coordinate with Cricut® Art Philosophy cartridge shapes, giving you lots of creative possibilities. Cut the shape on your Cricut® machine, stamp the image on the shape, and attach to your project! In the Idea Book, the images outlined in red coordinate with Cricut® shapes.
Both layers of flower were cut on the Cricut

before stamping with coordinating image

 My Acrylix stamps can be used to create a variety of popular looks, including:

  • base and shade stamping

Stamp image using a lighter color or second generation
Stamp outline in darker color or first generation
  • creating your own patterned paper

  • sponging on multiple inks for single-impression, multi-color images

Just a reminder, you can buy stamps from the current Idea Book (Spring/Summer 2012) and the one preceding (Fall/Winter 2011), giving you even more selection to choose from!

Posted on

Thinking of You Cards

Today, I’d like to present to you the cards we’ll be making at the next Cards by the Dozen workshop on January 22.

The theme for the day is “Thinking of You”. In planning this workshop, I was thinking of tough circumstances that people go through in life. Have you ever had a friend or family member in the midst of a trying situation and not known what to say? Often the situation is out of our control and the best we can do is let our loved one know we are thinking of them.

This first card is made with the Hope stamp set that CTMH offered in response to the Japan earthquake with proceeds going to the American Red Cross. I made this simple card that I made when I first received the set and thought it would be a nice card to let someone know you are thinking of them.

The second card is uses the on of my favorite discontinued papers – Olivia. I love the barn red, oranges and greens of this paper pack. We will be using sand paper and ink to get the distressed look of this card.

For the final card, I used the Art Philosophy Cricut cartridge to create a shaped circle card. The stamping is from the Pair-a-Phrase stamp set and the B&T paper is Sonoma.

Here’s the inside of the card:

Need a girls day out? You are welcome to come join us! This is the place to be!

Each person who attends will be making four of each of the three cards above, for a total of 12 cards. Envelopes and all supplies needed to make the cards is included. Just bring yourself!

Date: Sunday, January 22

Time: 2:30 – 5:00 pm

Cost: $12

Place: My house (email for address)