Last week, I went through my photos from 2002. We had just purchased our first digital camera, our daughter was two, I loved photos but was not really a scrapbooker yet. It was so fun to look back at these pictures and choose the ones to print. My first three layouts for 2002 are done!

The Stitched Together Scrapbooking workshop was perfect for the candid photos we took in our yard that spring. Before I show you the rest of my pages, let’s take a look at the kit.

The contents include:
- Stitched Together Paper Packet + Sticker Sheet (X7257S)
- Additional cardstock sheets (1 Green Apple, 1 Sapphire, 3 White Daisy)
- Exclusive die-cut sheets
- Exclusive patterned paper sheets
- Wood Buttons (Z3668)
- 4 Top-load 12″ × 12″ Memory Protectors™
- Photo placeholders
- Printed instructions
Here’s a look at the sample pages that are shown in the directions for the kit.

I love these kits because they give me ready-to-assemble pages, but with the freedom to make them my own. For al of these layouts, I kept the backgroud (quilting) patterns. But since all of the photo mats are cut from the full sheets of cardstock, I was able to modify the size and number of photos easily.


I love the combination of the quilt patterns and clusters of flowers on these layouts. Here’s a close up of one of the clusters. I raised some of the flowers with 3-D foam tape to create dimentions. The wooden buttons also add nice texture and height.

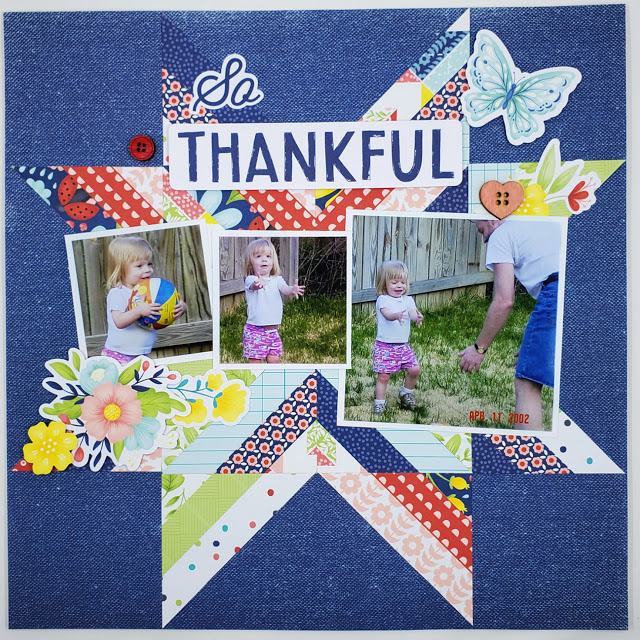
Since the theme of the pictures for this second layout are not sewing, I choose “So Thankful” instead of “Sew Thankful” that was used in the sample. I love that the kit includes both words to give you options. Once I decided what photos to use and cropped them down, I cut mats and started arranging the flowers and other elements until I found a pattern I liked.
The sample layout used the “Better Together sticker, but since these photos are mostly of just my little girl, it didn’t really fit. (However, that sticker was perfect for the family reunion photos in the last layout). Speaking of this photogenic little girl, I can hardly believe she is now 20! Where did time go? This is why I scrapbook!


Although the quilted pattern on this layout looks like it was intricately made with lots of strips of paper, it was made with exclusive patterned paper that had a chevron paper. The directions show you how to cut it and piece it togther to form the underlying pattern on these pages.

Even though I liked the style and colors of this layout for these photos from a family reunion, the “Friendship” title on the sample didn’t really fit. Luckily the stiker sheet had an unused title and “Good times” was perfect.


This kit includes the materials to make 6 scrapbook pages. In the kit you get a full color printed workshop guide with step-by-step directions. If you’d like more instruction on this kit, Close To My Heart is hosting a virtual workshop on July 14. Details coming soon on the Close To My Heart Facebook page. (Be sure to mark yourself as “going” on the event page to be intered to win prizes!)
I hope this post has given you some ideas about modifying kits and patterns to fit your photos and memories.
Keep creating!
Rebecca